Doing this hot rod building and restoration stuff, either as a hobby or as a business, is so rewarding because it’s a creative endeavor. You’re bringing a vision that exists in your mind, through a planning stage and, finally, to a real physical product. As a Taoist might say, moving something from its Yin aspect to its Yang aspect.
But, damn… there’s always something. Especially when the creative process starts with a car or truck that is half a century old. There will be blood. And frustration. Rarely is anything simple and straightforward. Not complaining, mind you, problem solving is part of the fun. So with that in mind, we’ll share some solutions that might apply to your project as well as ours.
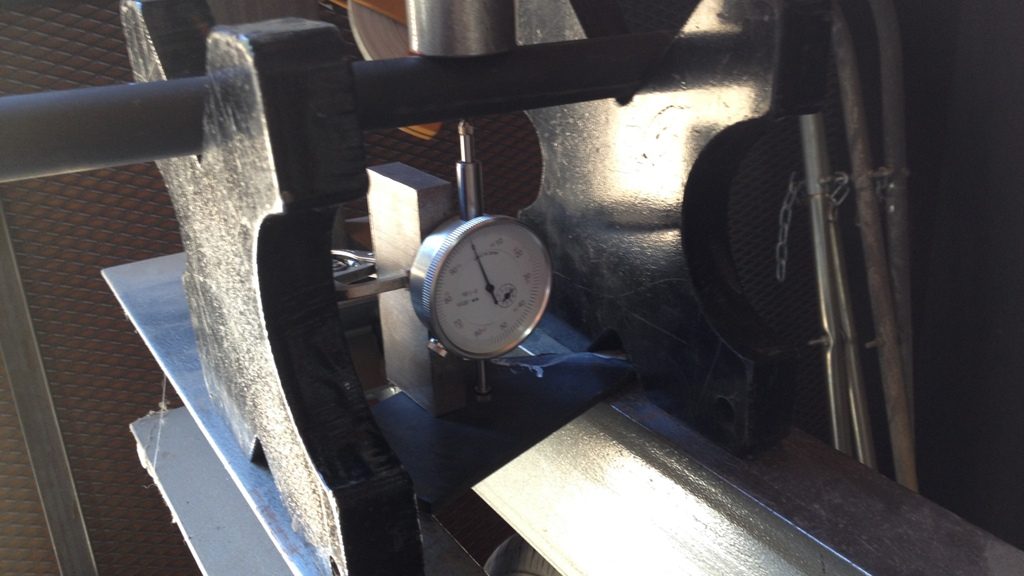
Even tools can cause headaches. Trying to straighten the HF bead roller shaft, which had a wobble in it.
During the process of working on our old cars and trucks, we have developed lots of favorite things: tools, equipment, websites, stores, and ideas. Even dumb ideas… why should you go down the same dead end that cost us time and money.
We don’t waste money, because it’s hard earned. We really prefer getting a good value for our money… if it’s a tool or equipment we think we’ll be using on most projects, we buy it. If it’s a one time problem we’re trying to solve then borrow it. No doubt it helps to live in Southern California because we are never far from resources.
One of the best resources anyone can find – no matter the endeavor – is a smart, experienced guy. Whether that’s your local owner/operator transmission shop or exhaust shop or machine shop, or just a friendly hot rodder who’s been doing it longer than you, these relationships will save you headaches and time and money.
Why a post about bump steer? Well, because we’ve built two trucks and both suffered from horrendous bump steer problems. One was brought on by the installation of a drop axle, and the other by upgrading to later GM power steering setup.
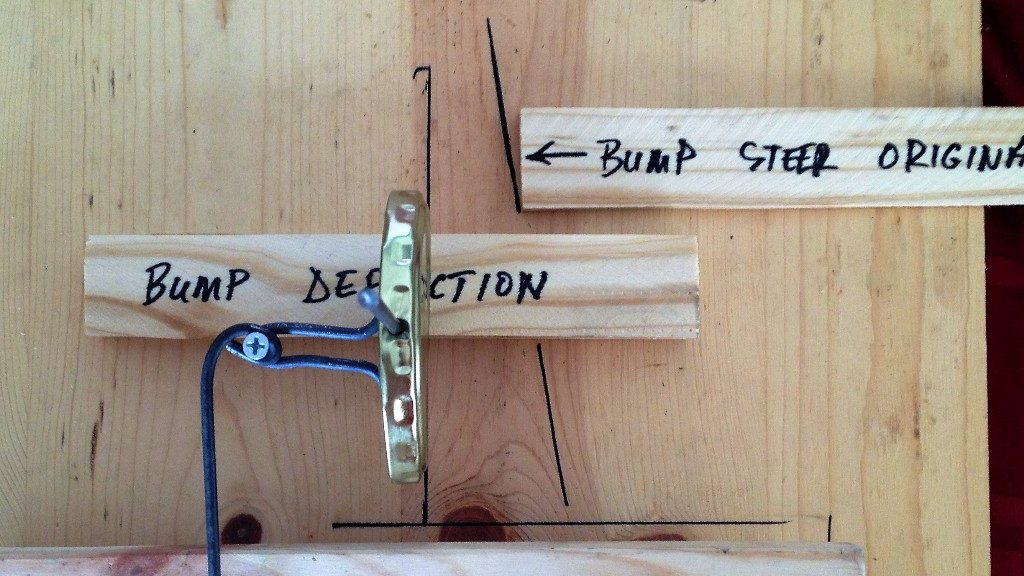
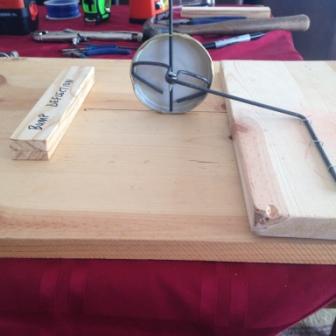
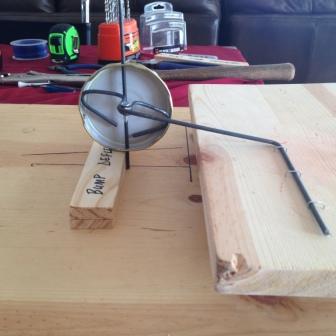
How to make it livable? You need to get the drag link parallel with the ground. A short drag link that is steeply inclined could see you bouncing into a ditch or into the oncoming lane. Not knowing how significant the effect might be, I built a simple model.
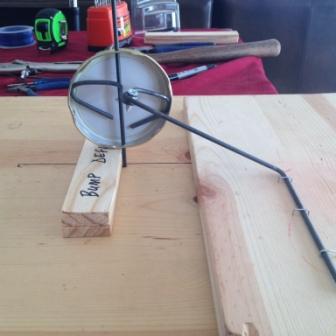
If you start with a steeply inclined drag link,
and hit a bump,
you get a lot of steering effect.
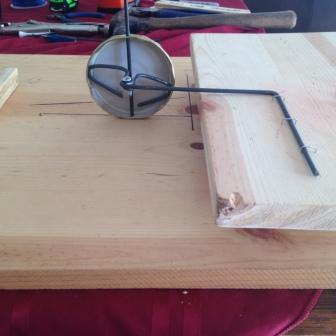
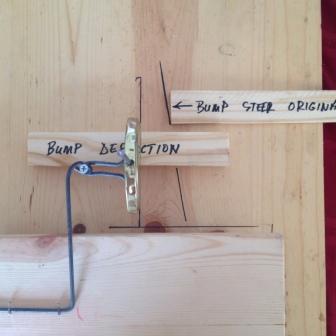
If you start with a more level drag link,
and you hit the same bump,
you get negligible bump steer. Compare to the original bump steer line.
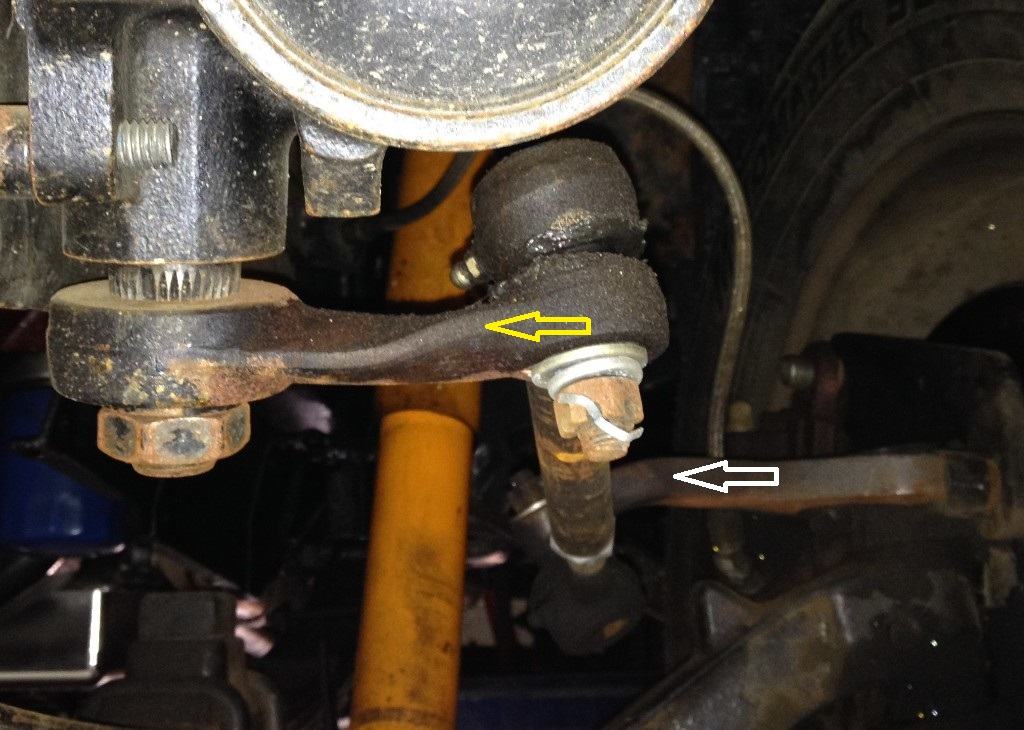
The ’48 Chevy had a CPP kit which facilitates an upgrade to a 1967-89 Chevy truck power steering setup . This entails mounting the steering box to the outside of the frame rail. CPP sells a Pitman arm for lowered trucks that allows the drag link to be dropped in from above the Pitman arm. In addition, we fired up the oxy-acetylene torch and bent the both the Pitman arm (yellow arrow) and the steering arm (white arrow) to achieve a horizontal drag link when the car was sitting on the ground. This picture was taken with the ’48 on the lift so the drag link is at a slight angle in this photo. It took a couple tries, but we finally made the steering manageable.
The twist in the Pitman arm is to prevent binding at extreme bump or extension angles.
Since this truck has significant body roll, especially at the front end, at some point we will source an anti-roll bar. (We hope) that will further decrease the bump steer effect and make the truck a little more sporty in the corners.
We rebuilt the 350 for the ’59 Apache, including: main and rod bearings; rings; camshaft; lifters; pushrods; oil pump; fuel pump; water pump; harmonic balancer; Edelbrock Performer manifold; Edelbrock 1406 carburetor; small chamber heads; timing chain set; valve covers; oil pan; and new freeze plugs and gaskets.
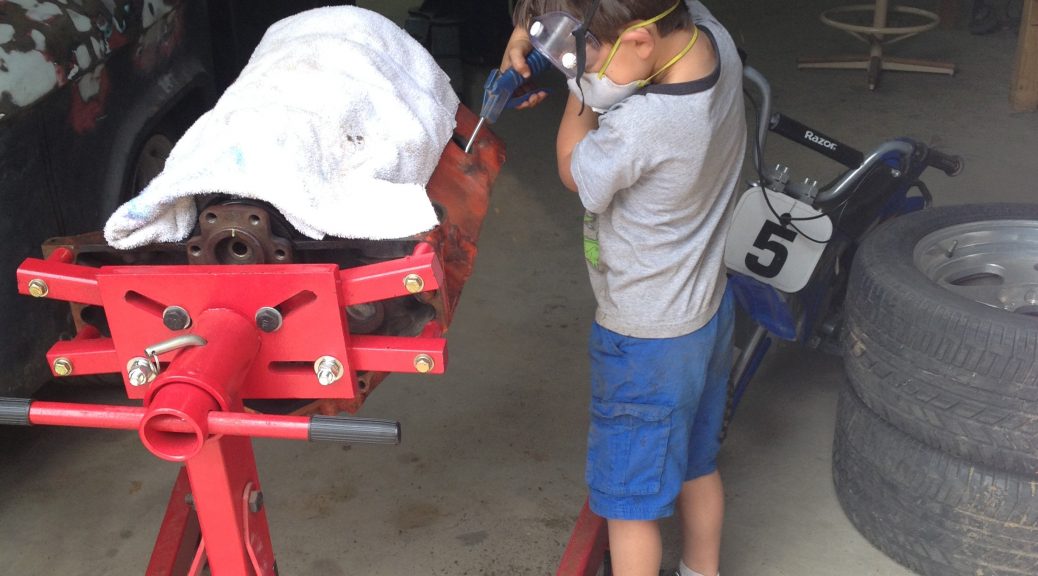
An important part of the rebuild was knocking out all the water jacket plugs (aka freeze plugs) and using our high pressure washer and compressed air to remove the chunks of rusty metal that are detrimental to cooling efficiency.
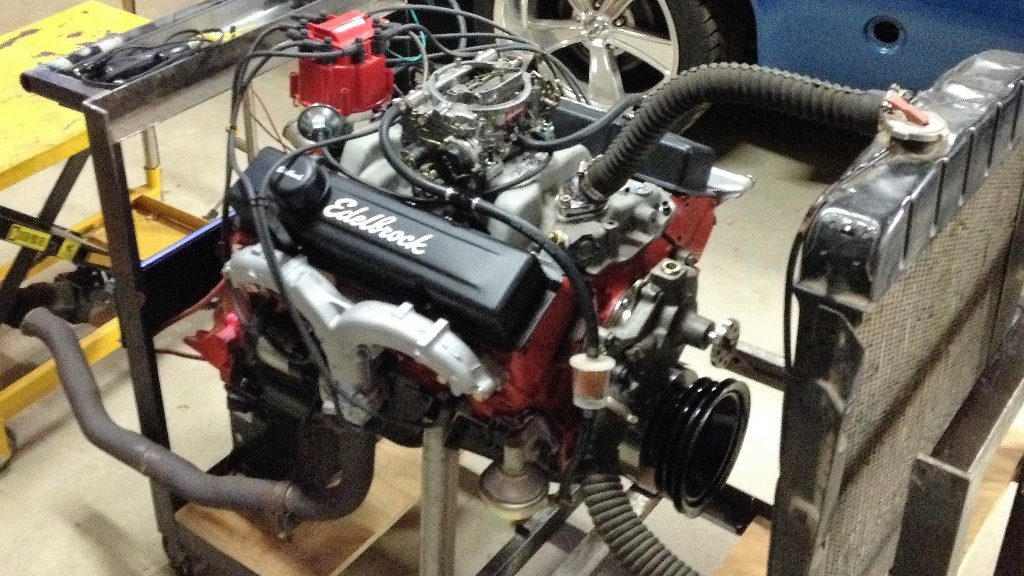
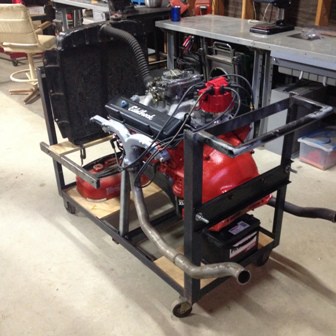
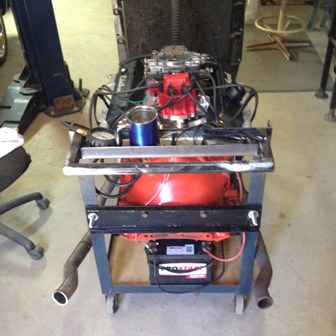
After putting it all together, there was no way I was going to stick it back in the truck without testing it first. We happened to have two heavy duty metal tables, one with a metal top that serves as our welding table. The other had a wood top and it became the temporary engine test bed. A little surgery removed the angle iron on which the wood top rested, allowing us to drop an engine into the middle. Here’s what it looked like…
Keeping it simple.
Adding the necessities.
The most important (only) gauge… oil pressure.
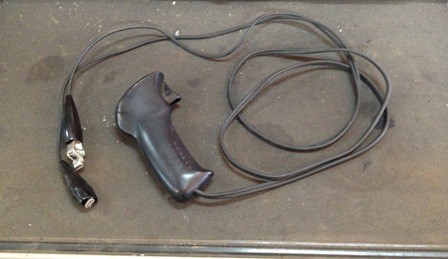
Have starter button, will travel.
Ready to go. On/off toggle in the tray, which holds gauge, pistol-grip starter button, and coffee. Might have been whiskey.
And it’s a table again, waiting for next rebuild. Bolt-in rails along the side replaced the welded originals, so the wood top is still supported lengthwise.
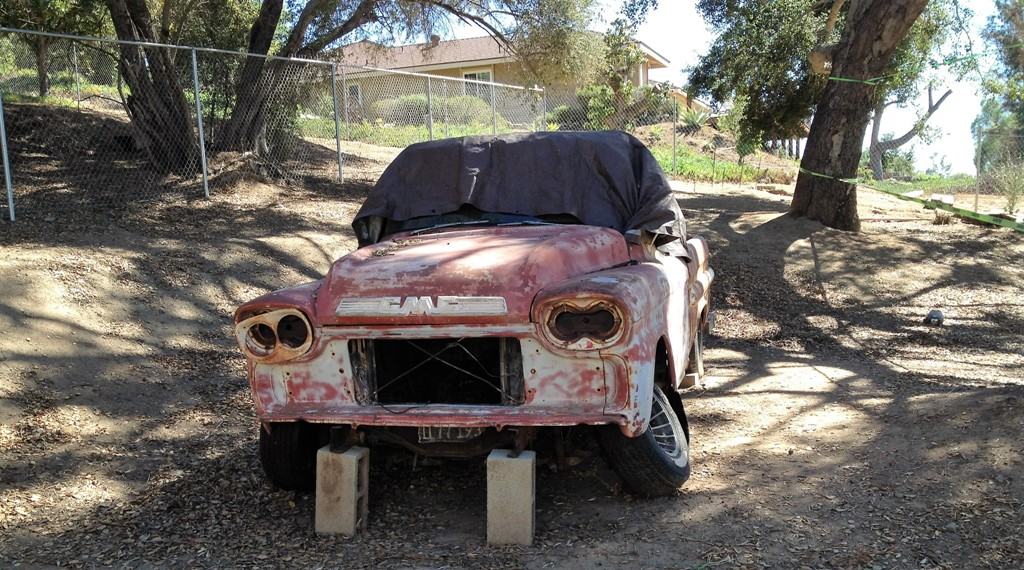
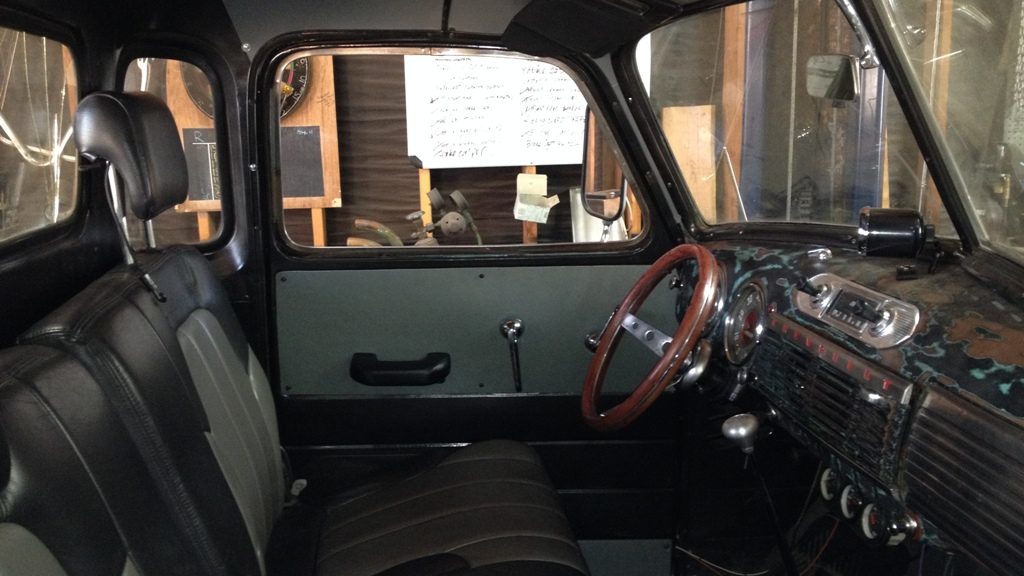
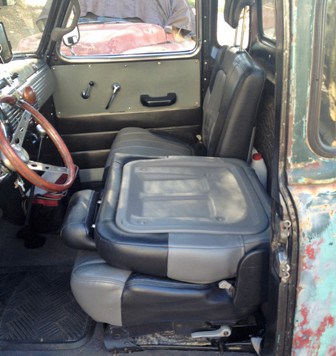
Sometimes you just get lucky. As you can see below, the interior of the ’48 was destined for the trash bin. So, after taking some measurements we headed for local wrecking yards to see what we could find. We knew we were looking for gray leather, so armed with measuring tape and a few tools, we started our hunt.
Our first stop was a yard in Oceanside where you pay a couple bucks to enter, and pull the parts yourself. As we neared the end of our walk-through, a relatively pristine 2002 Pontiac Aztek was dropped off. Eureka! Everything about the second row seat shouted “take me home.” Dimensions – check; color – check. And the seat was removed by simply pulling up on a release bar at the front. Best of all… the price: we took it home for less than fifty bucks!
The original seats would have cost a small fortune to repair.
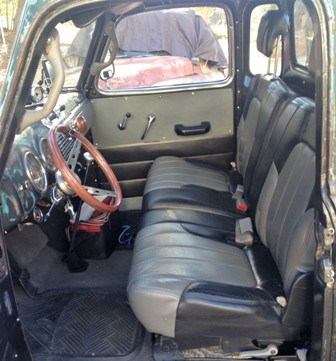
Aztek split bench seat installed in the ’48.
The back folds down.
Another lever lets you tilt the seat forward.
By just pulling up on a bar at the front of the seat, the entire assembly lifts out of the truck. A good find for a grand total of $47.50 plus our time to install in the truck. The Pontiac Azteks weren’t pretty, but they are interesting cars, especially with camping accessories.
So, we bought the ’59 Apache. Generally, we knew what we were getting, but what exactly did we buy? Time for a little detective work.
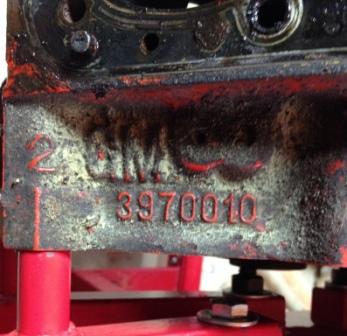
It has a 350 small block Chevy engine. The number at the rear of the block on the driver side tells us that this is a 3970010 block casting, which had a ten year run, from 1969 to 1979, and was used for 302 and 350 cubic inch engines.
Rear of block, driver’s side.
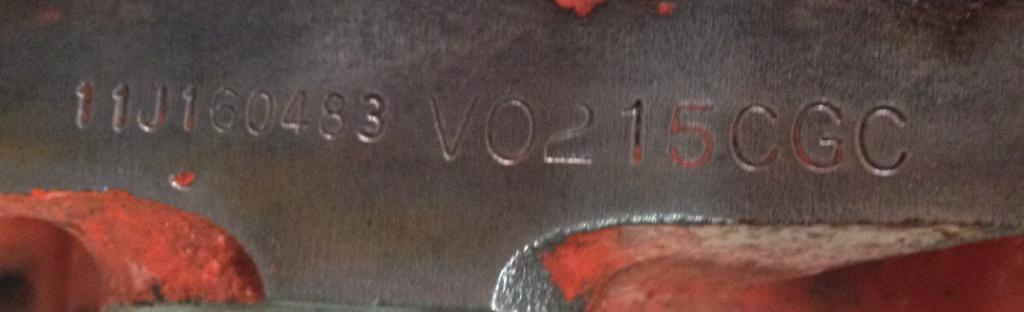
To get a little more specific information, we looked for the engine’s three letter suffix, in our case “CGC,” found on the passenger side of the engine just below the cylinder head at the front. Turns out our engine was 350 from 1971 with 245 hp. It would have been installed in an El Camino with the turbo-hydramatic, or a full-size manual transmission car, police car, or taxi.
Front of block, passenger side.
The “11J” at the beginning indicates the car was a Chevrolet, model year 1971, built at GM’s oldest assembly plant in Janesville, Wisconsin (set up in 1919, and shuttered in 2009). The beginning of the engine code “V0215” indicates the engine build was at the Flint plant on February 15th.
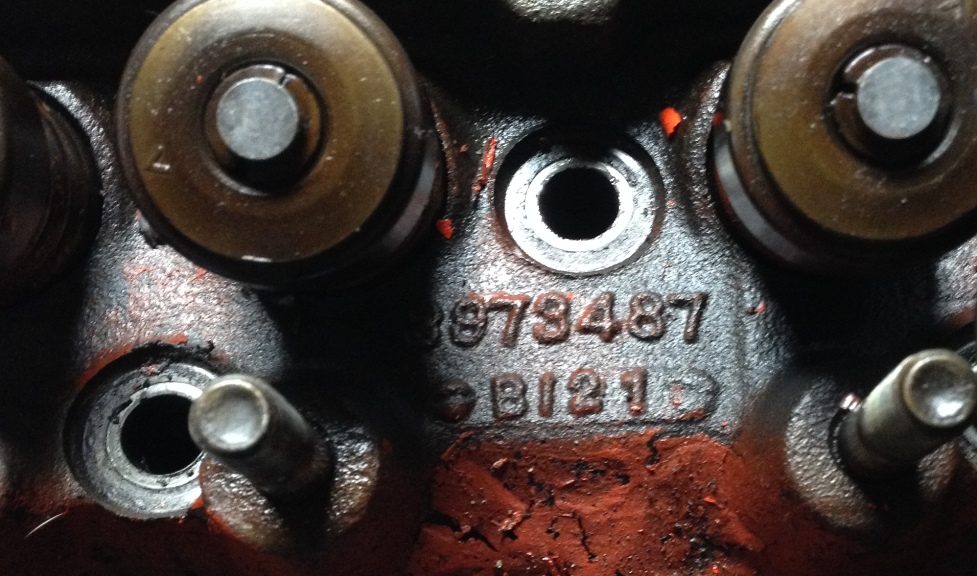
Under the valve cover.
Removing the valve covers revealed the cylinder head identifying numbers “3973487” which indicates that this is a “smog” head with 1.94 intake / 1.50 exhaust valve diameters. Not a good base for making power because of the size (76 cc) and shape of the combustion chambers. We ended up swapping these heads for ones with a 58 cc combustion chamber, just to put a little more pop in the explosion… more on that in a future post about the engine rebuild.
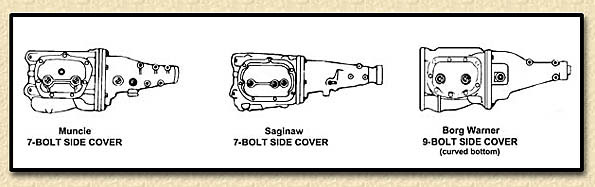
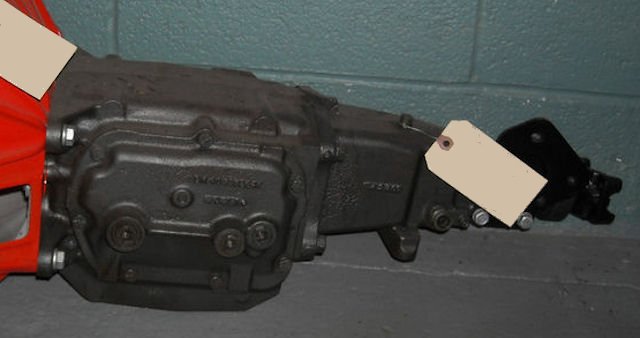
It was easy to identify the transmission as a Saginaw. These manual gearboxes have seven bolts fastening the side cover and all three shift levers are on the side cover. The Muncie also has seven bolts securing the side cover but the reverse shift lever is on the tail housing.
photo from http://chevellestuff.net/qd/muncie.htm
The final piece of the drivetrain – the differential – yielded its specifications, as well, once we were able to guess correctly at the last digit of the casting number.
A Google search on GM differential 3707340 pointed us to a number of gear vendors. They revealed the same information…
GM ’55 – ’64 1/2 ton truck
drop out carrier
10 bolt rear cover
c/clip axles
12 ring gear bolts (3/8 x 24)
ring gear diameter: 9.375″
pinion nut size 1 – 1/8th”
Yukon Gear, Randy’s Worldwide, and Sierra Gear all list a GM55T-338 replacement ring and pinion with a 3.38 to 1 ratio along with all the other parts necessary for a rebuild. I would choose that ratio over the Apache’s, which seems to be a 3.90 ratio. In fact, I’d like to go even further via an overdrive transmission. If I could find a three-speed Saginaw with overdrive – for a reasonable price – I would swap it for the four speed in a heartbeat.
But first things first. Unfortunately, the Apache’s rear end is making the worn-ring-and-pinion howl and that means I need to put it on the bench for inspection and adjustment or replacement.
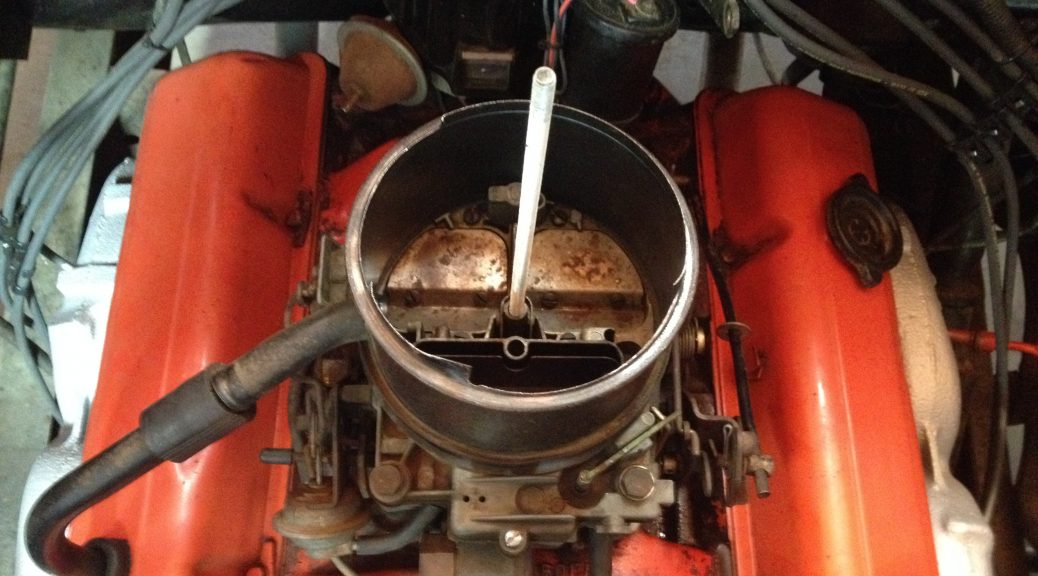
From the day we bought the Apache, it needed an engine rebuild. Perhaps the biggest factor in its poor-running was the Rochester Quadrajet carburetor. I know they are a fine when in good condition, but this one was well past its “use by” date. It was in need of a complete rebuild or replacement.
We tolerated the crappy running motor while busying ourselves with body and interior jobs, and brakes, and steering. Until one day, this happened. The truck had been sitting for three days on a slope with the nose down. I tried to start it but the battery wasn’t strong enough to turn it over. After charging it up for half an hour, I checked the voltage and gave it another try. Still it wouldn’t turn over!
Inspecting the engine, I noticed a couple little puddles of gasoline on the intake manifold. Then the light bulb went on… I reckoned that the Q-Jet’s floats had caused the needle valve to stay open, filling the motor with gasoline. Remember, the Apache’s fuel tank sits high, inside the cab. I pulled a spark plug and found that, sure enough, the engine was locked up because the cylinders were full of premium unleaded.
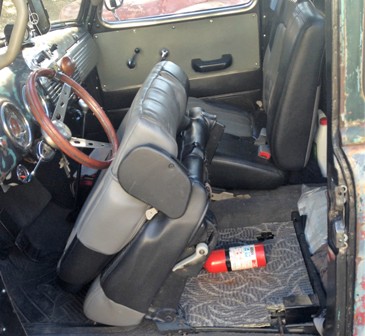
So, I removed the rest of the spark plugs and cranked over the engine, pumping the gas out of the cylinders. I’m not sure if the idea of getting started with the engine rebuild came before or after the fireball. I do know the fireball looked impressive from the driver’s seat. And Russel’s response time with the fire extinguisher was also impressive. These events provided the final impetus to get going on the rebuild, and the final nail in the coffin for the Q-jet.
p.s.: DO remember to disconnect coil wire next time.
Good idea to have two or three of these around.
I visited a couple of local machine shops specializing in engine rebuilding and estimated that I could expect to pay at least $1200 for a complete rebuild. I trusted both of these shops and knew they would deliver a solid value, and it was tempting to just load the engine into the pickup and get it back a week later ready to install.
Instead, we decided to save some bucks and have a go at the rebuild ourselves… something Russel and I had always looked forward to doing. Tallying the bills after we finished showed we spent a little less than $500 on the rebuild plus another $290 (which would have been added to the professional build, as well) for a used Edelbrock carburetor and manifold. Check out the engine rebuild article for details.
First order of business: pulling the engine. With a chain hoist strapped to the cross beam of our lift, and after first removing the Saginaw transmission, it wasn’t difficult to remove the engine without assistance.
Pause for flywheel removal.
After the engine block was stripped, the expansion plugs were removed, along with the oil gallery plugs. The only problematic ones were the three threaded oil gallery plugs at the back of the block. With these we applied penetrating oil, heat, a long breaker bar, and brute strength. In one case we needed to drill through the plug and use a bolt extractor, taking care not to damage the threads in the block.
The tear down.
Brushes, scrapers, a pressure washer, and compressed air were used to thoroughly clean every nook and cranny of the block. This engine ran hot, and after seeing how much rusty, flaky, corroded metal we blew out of the water jackets, it was no surprise. We cleaned up every hole that was going to have a bolt threaded in, used scrapers and scouring pads on all sealing surfaces, used brushes and air in all the oil passages, and followed with more pressure washing. WD-40 was used to prevent the cylinders and bearing journals from rusting.
Clean everything… three times!
After the tedious job of measuring the cylinder bores at the bottom, middle, and top in two perpendicular directions (with a telescoping gauge and caliper), we were satisfied that we could just hone the cylinders and install new rings on the old pistons. Most of the clean up was done with a 240 grit rigid hone, but to produce a better cross-hatch we switched to a flex-hone to finish the cylinders. A final wash with water and a cylinder brush, followed by another coat of WD-40, and the cylinder work was checked off.
Our junior mechanic, Tommy, blowing out the water jackets.
The crankshaft journals were cleaned up with 2000 grit sandpaper, cut into strips. We used our telescoping gauge, caliper, and micrometer to determine which bearing shells to order. Then we picked up some plastigage at the parts store, and installed the caps to the recommended torque to confirm that our new (standard size) main bearings and rod bearings were within spec.
We had purchased a $32 camshaft bearing tool and used it to remove the old and install the new cam bearings. Then we slid the new 1103 camshaft from Summit Racing (slightly more aggressive than the stock camshaft), new lifters, pushrods, rocker arms, gaskets, and valve covers. We decided to put the 487 heads on the shelf for future fun (porting practice), and instead used the 624 heads that we had in the barn. These particular heads have smaller combustion chambers (58 cc versus 76 cc) and valves, but the main motivation was that they were ready to install.
Bottom end coming together.
We felt the reduced valve sizes didn’t matter with this truck, since we weren’t going racing with it and didn’t care about power up high in the rpm range. We do like torque. The combination of the 1103 camshaft, the increase in compression ratio, the Edelbrock 1406 carburetor on a Performer manifold, plus new rings sealing the pistons in our freshly honed cylinders resulted in a very nice motor for the Apache.
The rebuild included a new oil pump, fuel pump, water pump, oil pan, spark plugs and wires, harmonic balancer, timing chain set, timing chain cover, and gaskets. We purchased an HEI distributor, but then decided we didn’t want to tear up the carpet and tunnel to accommodate the bigger cap. We stuck with our Pertronix setup and an external coil.
Nearly there.
Excluding the Edelbrock carb and manifold, which cost us $290, the rebuild came to just under $500. Based on the estimate of $1200 for a professional rebuild – by a trusted machine shop – it amounted to quite a saving. Plus, we really wanted to rebuild an engine ourselves… the Apache was the perfect opportunity.
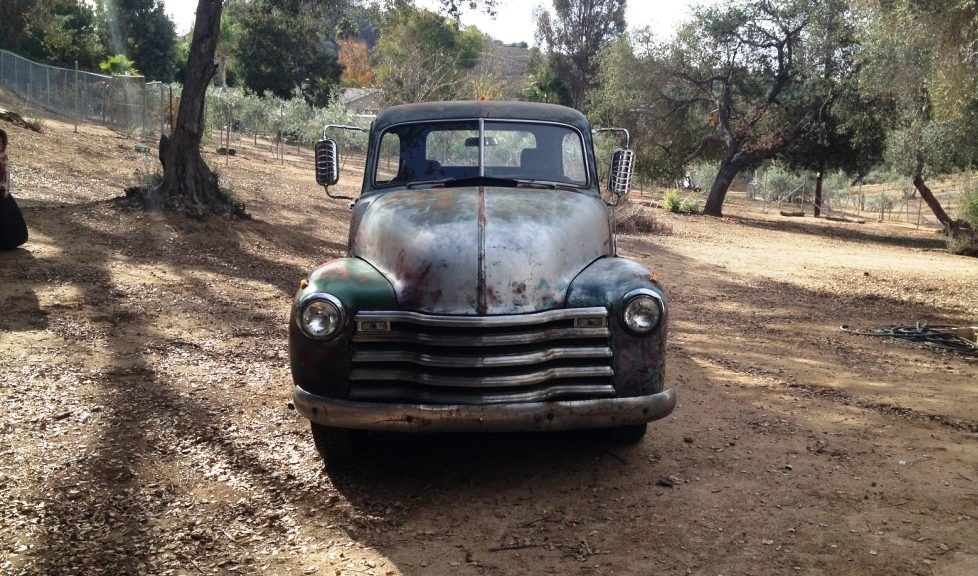
After finally getting the ’59 Apache painted and back on the road, we were ready to begin on the “farm truck.” It didn’t take long to figure out that the 3/4 ton truck was going to be more problematic regarding parts. They tended to vary between unobtainium and ridiculously expensive. But, since the truck has been in the Lewie’s family for fifty years, we all felt that restoring 3600 flatbed to it’s former glory was preferable to converting various systems to half-ton spec.
Time to learn a new firing order… the venerable 235 six.
We performed a couple of reasonably quick and easy checks of the engine which confirmed that the easy starting, smooth running 235 straight six was in good condition.
Not bad for a sixty year old engine!
We checked the compression dry and then wet, and were satisfied with those results. We intended to follow with a leak down check, but the rib cages were screaming for mercy after reaching for those rear cylinders, so we moved on to the vacuum test… it couldn’t have looked much better. We can put an engine refresh on the back burner for now. There are a couple leaks that need to be dealt with, but nothing major.
Looking good and instilling confidence.
Flatbed Disassembly
Next we decided to disassemble the flatbed to make it presentable again. We determined that we could use the existing planks if they were flipped over, but the metal strips were too rusty to re-use.
LIft off!
Mar-K Manufacturing in Oklahoma City makes replacement metal strips. We filled out the online form with the required dimensions: overall length, location of the bolt holes, size of the bolt holes, and quantity. Within a few hours, we had a price quote for our nine strips ($14 each, plus a setup fee and shipping).
Ready for disassembly.
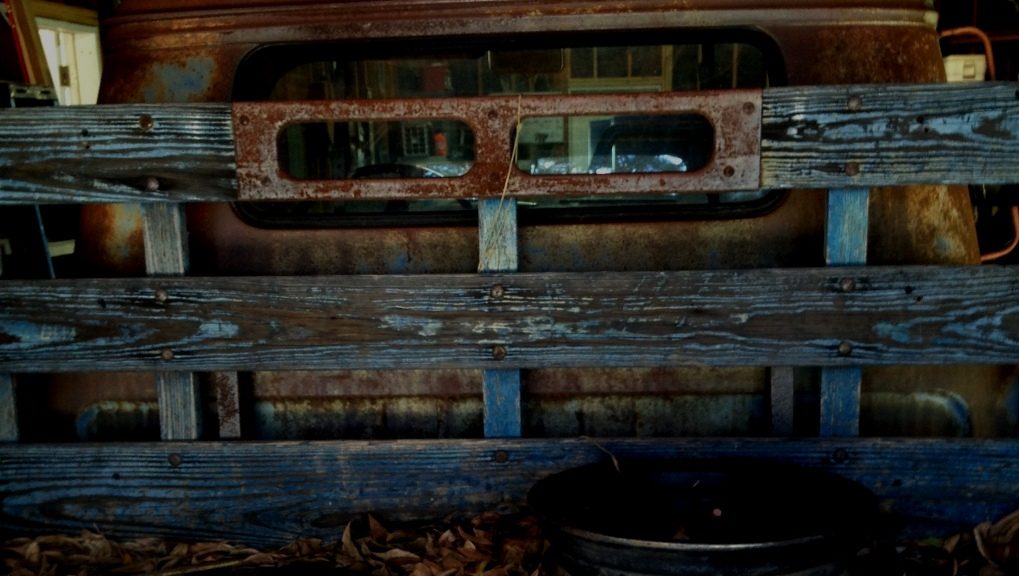
Removing the rear of the flatbed frame allowed us to slide the 1.25″ thick planks out the back. The planks are 92″ long and of varying widths, and the top side has been routed and grooved so that the strips sit more level with the wood surface and lock the adjacent planks together.
Wood at the front of this beam is soft and collapsed where the bolts pass through.
We found that one of the two main fore-aft beams supporting the flatbed was rotted out and soft at the front, so we will need to graft on a new piece or have a complete new beam built to spec. More on that later.
Keeping the barn tidy… all the flatbed pieces on one cart.
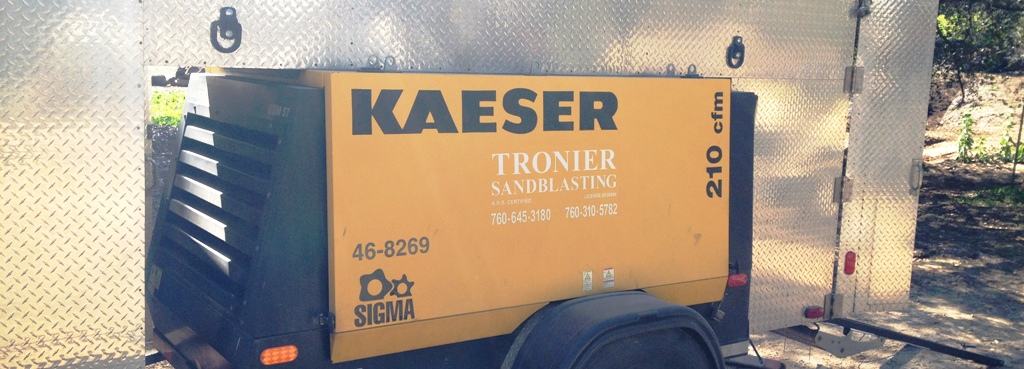
After assessing the efficacy of our own blasting equipment, we decided professional help was needed. Fortunately, just down the street in Fallbrook we had driven hundreds of times past a sign advertising sandblasting by a company called Tronier Sandblasting. We phoned the number – 760.645.3180 – and asked Tronier, father and son, to come out and take a look at our project. The rate to blast the entire truck seemed reasonable, so we set a date.
The ’56, stripped of glass, hood, engine, and the flatbed, ready for blasting.
They agreed to do the job at our site, but first we had to figure out if we could get the truck back into the barn if we rolled it out. We had a 2000 lb. rated, 24 volt winch in the shop so we rigged it up in between our two post lift using a stout piece of rectangular tubing. Rather than just a straight pull, we felt using a pulley on the load would be safer, reducing the tension on the rope by half.
Winch setup.
Testing it out, with blankets and towels draped on the line to dampen the snap if the line should break.
Satisfied we could get it done, we proceeded. In between rain storms, we found two clear days to do the job.
Tronier’s custom made trailer holding their power, compressor, ladders, and 400 feet of high volume hose.
Jim Tronier at work on the frame.
Sometimes laying down on the job.
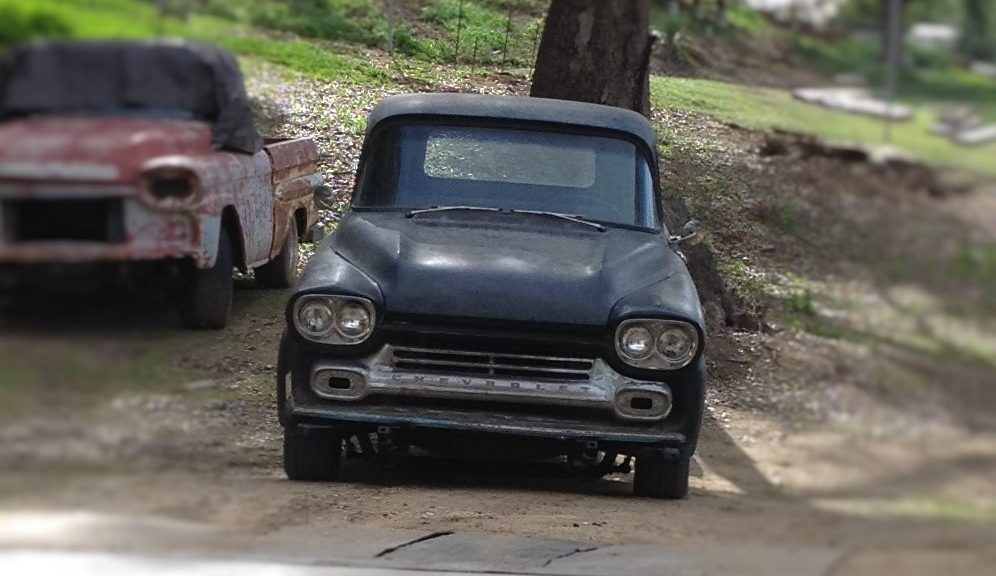
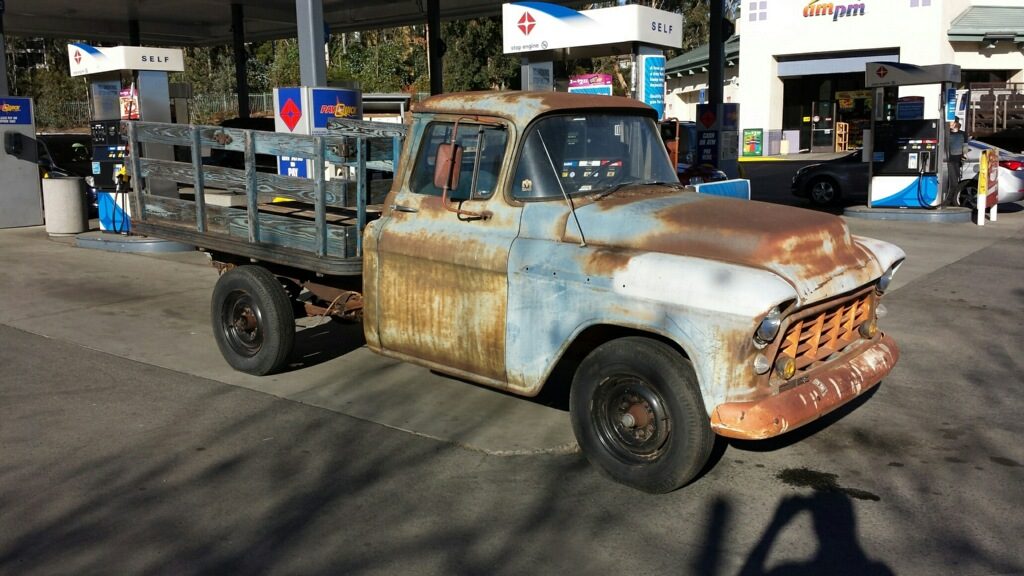
What Jim estimated could be a one day job, turned into two days plus, but the price remained the same even though we offered to sweeten the deal. I can’t say enough good things about Tronier; for sure we will have them back to blast the ’58 GMC, seen sitting in the backround.
Interior blasted.
Engine bay done.
All done but for the bits removed: hood, flatbed frame, etc
Back in the barn before the next rain. Bare metal will rust if you just drop a bead of sweat on it.
The Farm Truck was really in excellent shape, with only the steps on both sides and one corner of the hood needing any rust repair. But blasting away any body filler will reveal all – including some damage to the left front fender, and a couple ripples in the right front fender. All in all, though, it is in fine shape for a sixty year old truck.
Damage revealed.
The flat face on the driver side fender has been pushed under, creating a knife edge look. This is what it should look like.
The correct look.
Lance and I thought we’d be able to get the sand wedges out and hone our bunker shots, but the kids were quick to claim the beach as their own.
Tommy, Lucia, and Tugger stake their claim to the new play area.