


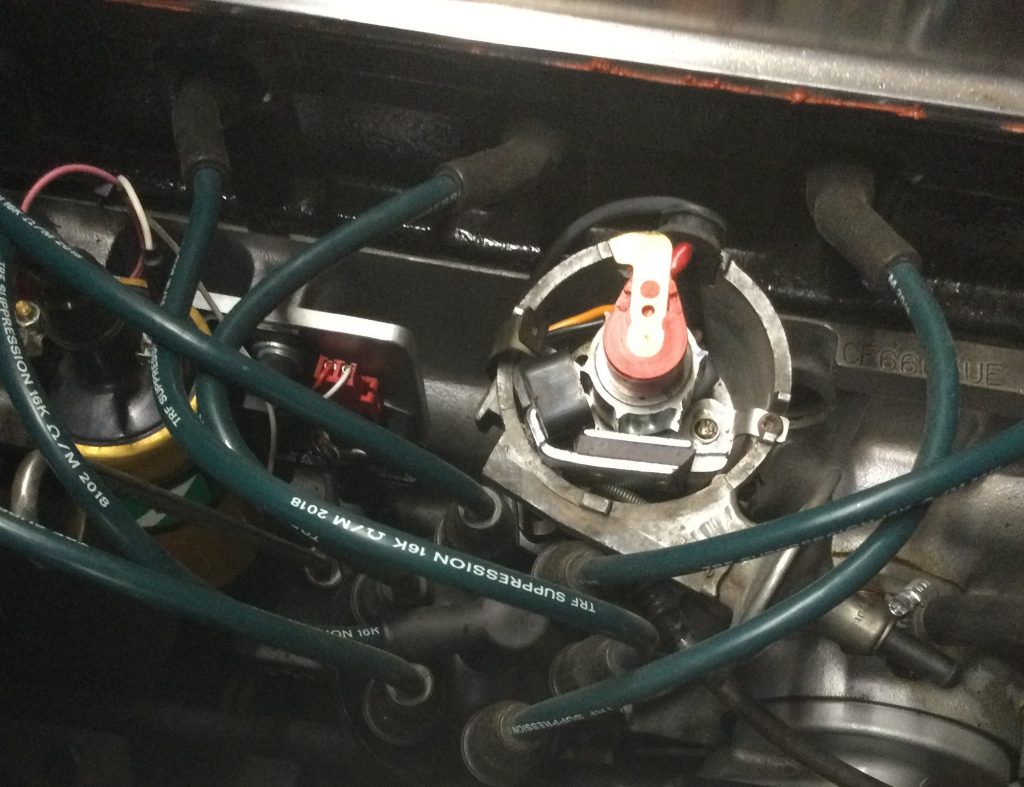
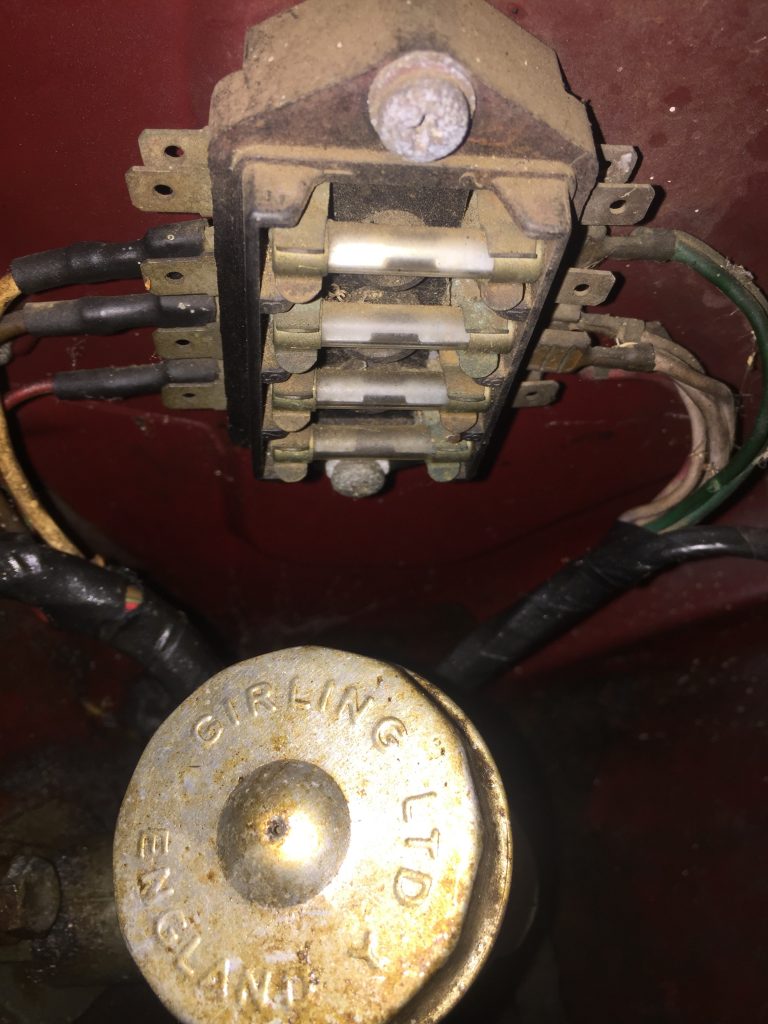
The final major project at this stage was installation of the interior components. Perhaps installing a new wiring harness did merit its own article, but for some reason I took zero pictures of the wiring job. Too busy looking at wiring diagrams and reading Dan Masters’ Electrical Maintenance Manual, purchased from British Wiring, I guess. It was a tedious job but, given the state of the original main harness, had to be done. The only part of the original wiring that I felt comfortable repairing was the rear section.
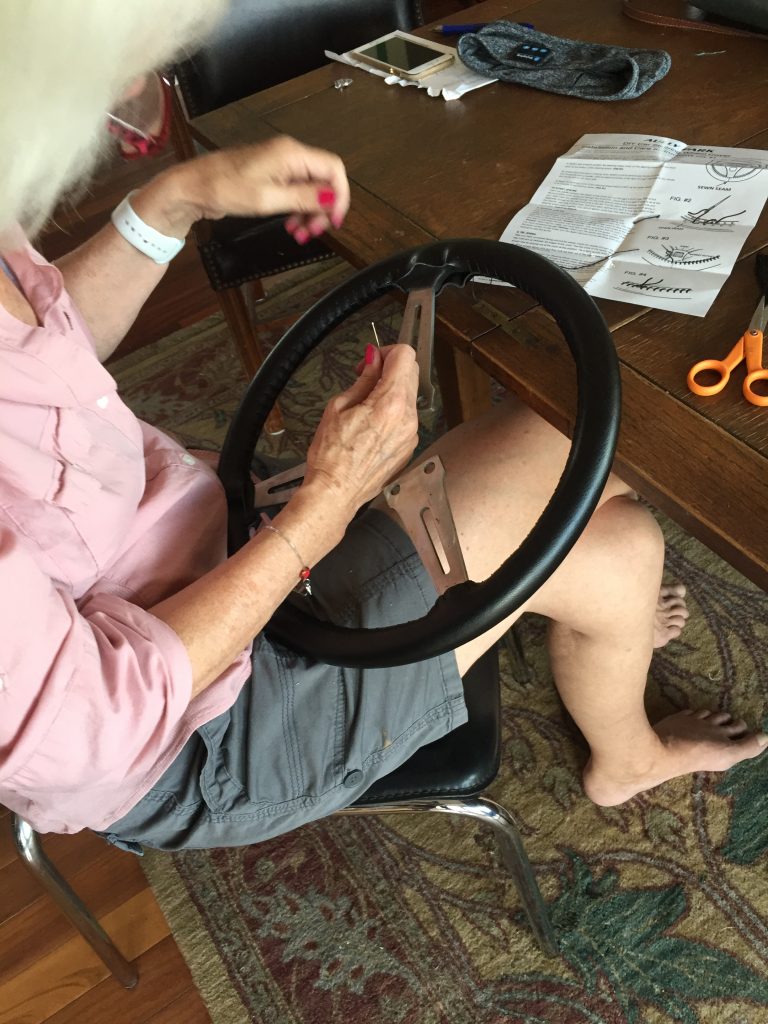
The very first thing restored was the steering wheel, which my wife Linda took care of, sewing a new leather cover on it. That steering wheel was on display in my office for nearly two years, badly missing my initial time table of “a few months” for the whole project.
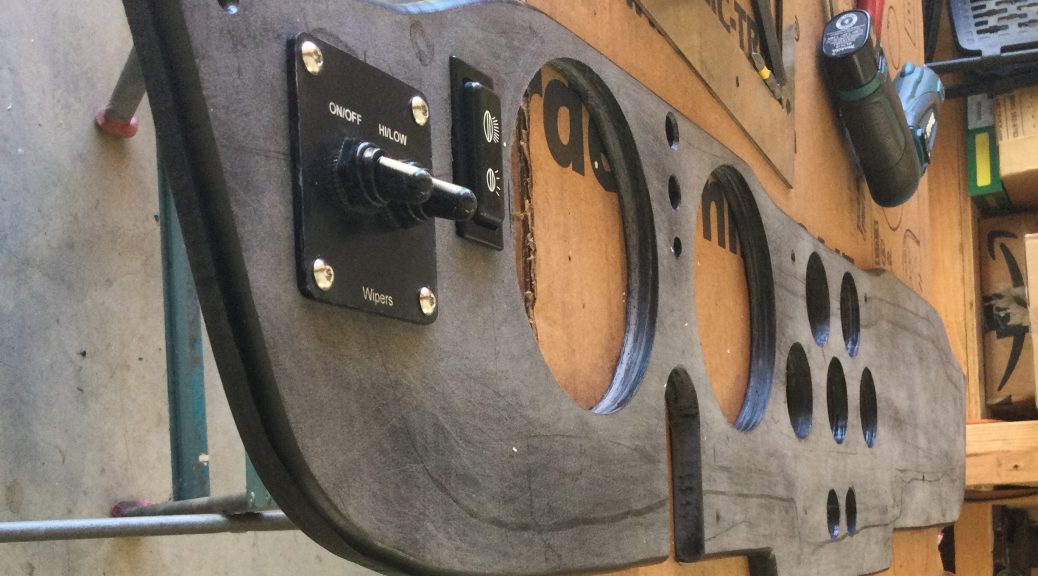
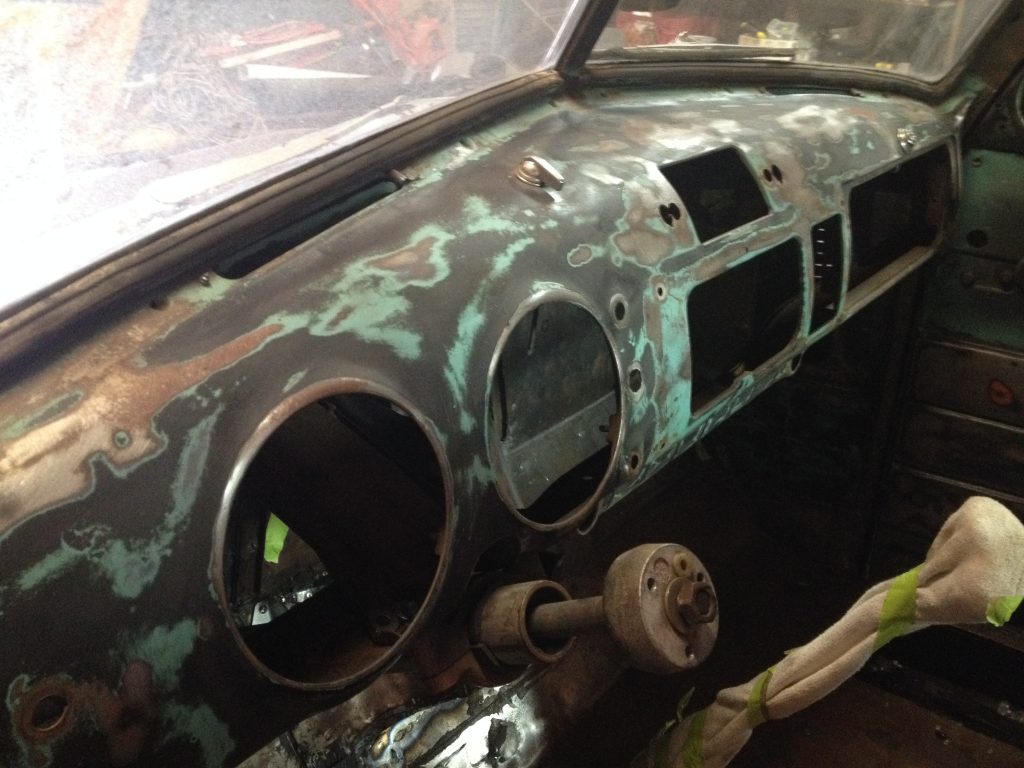
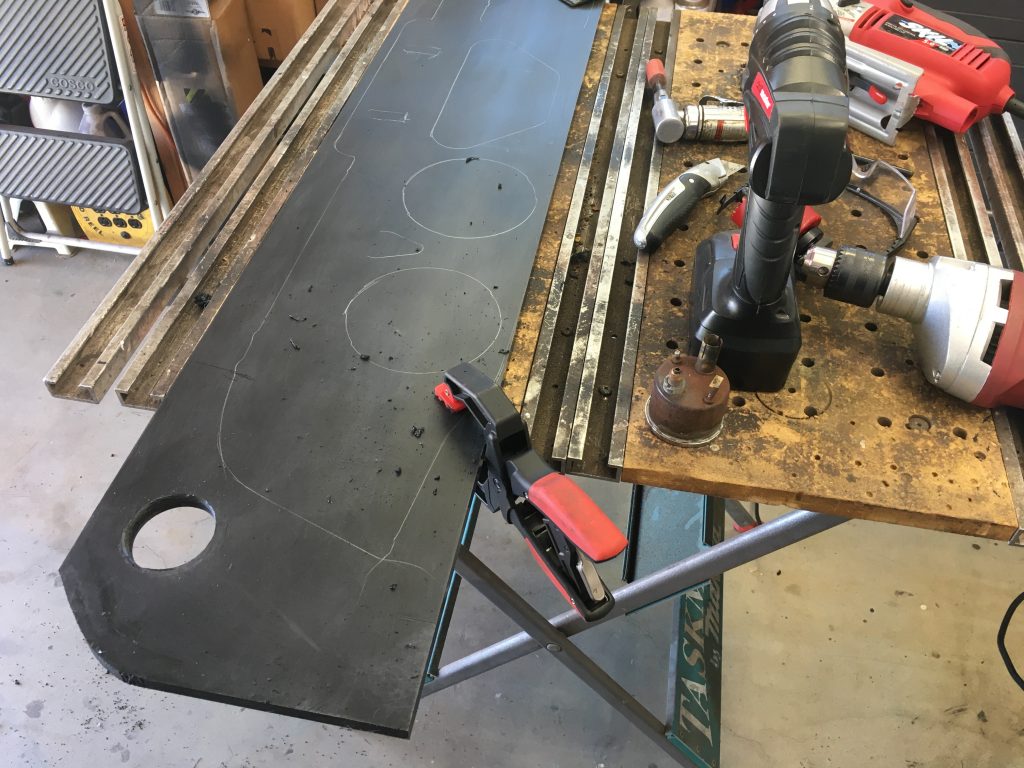
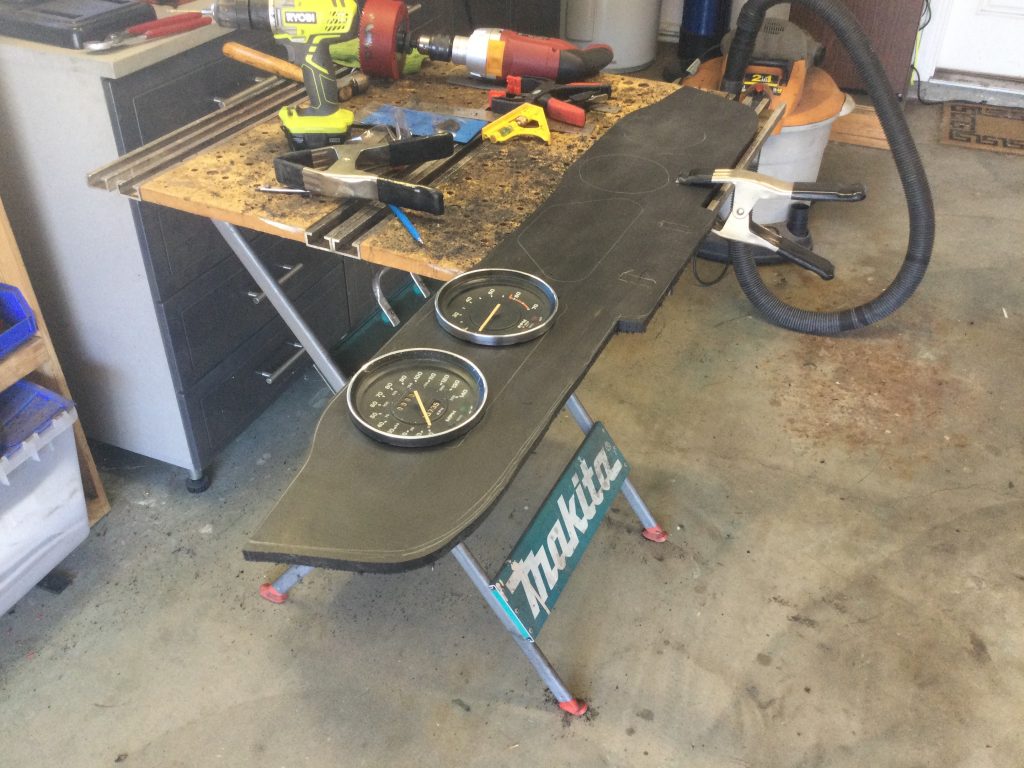
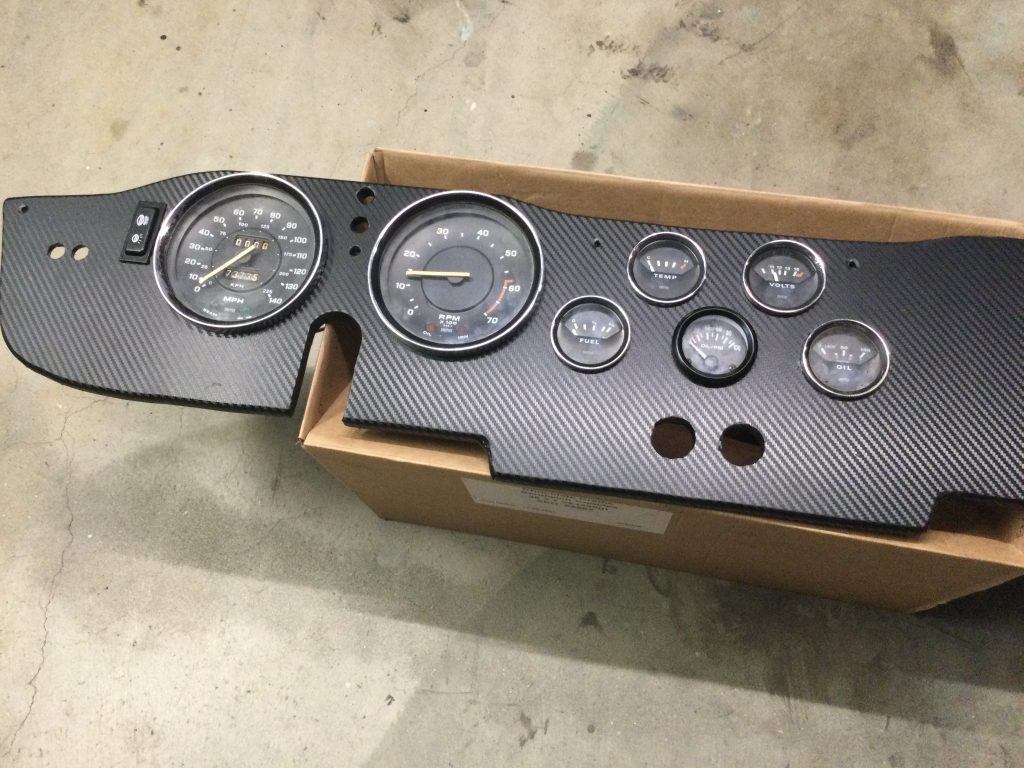
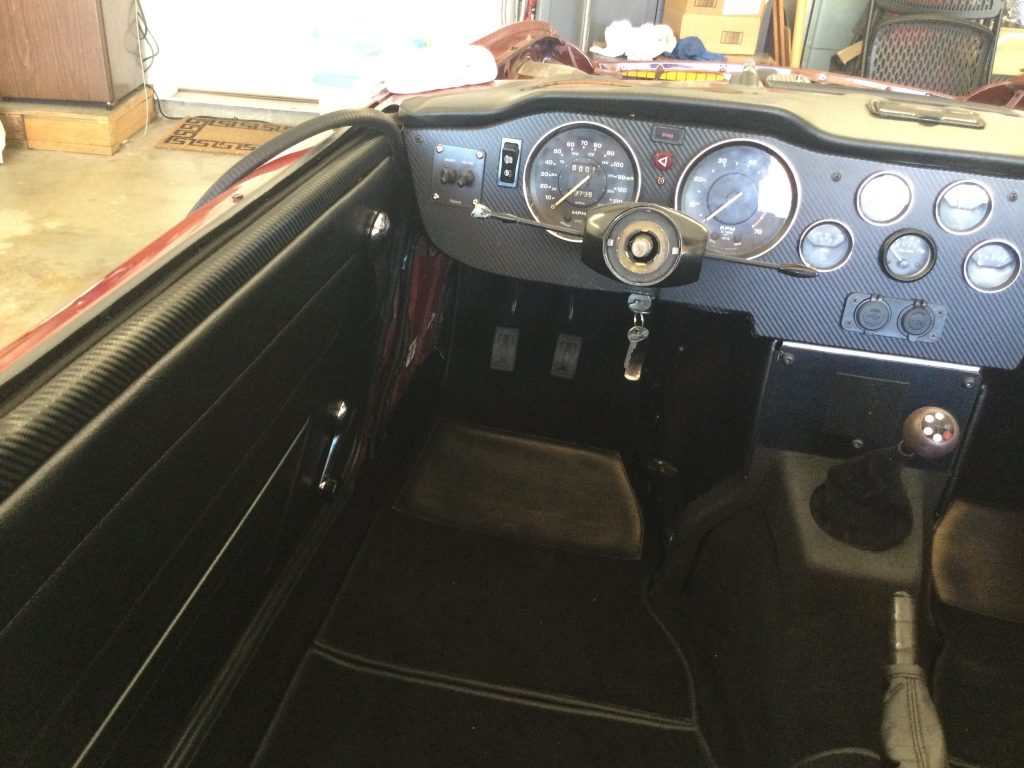
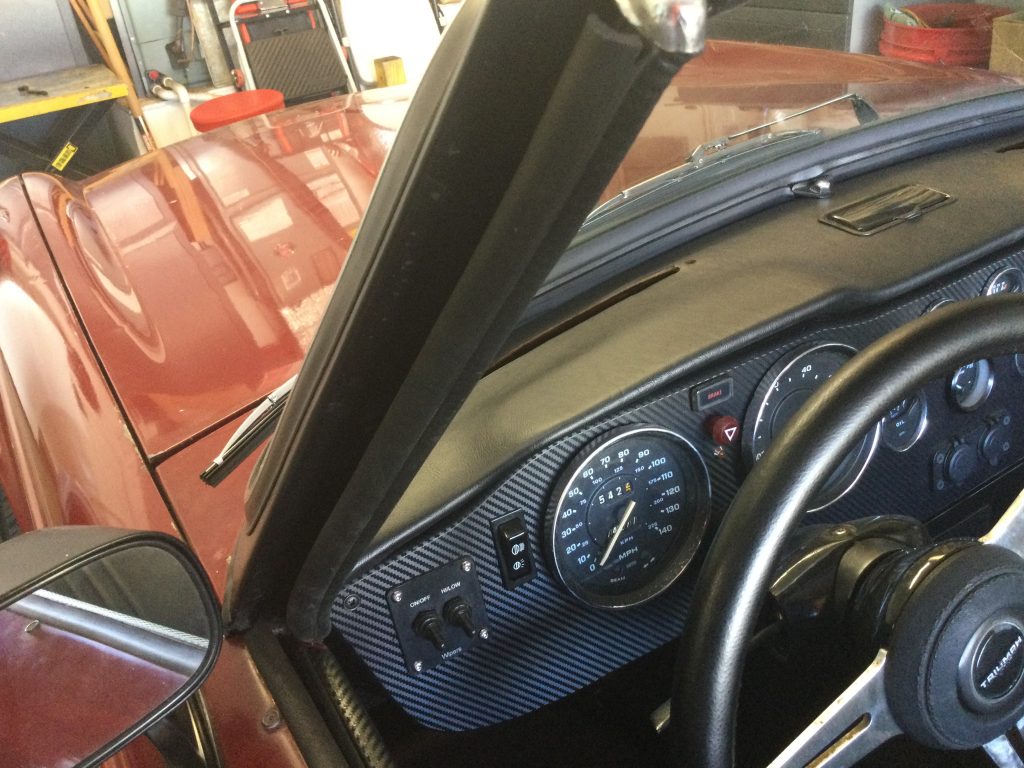
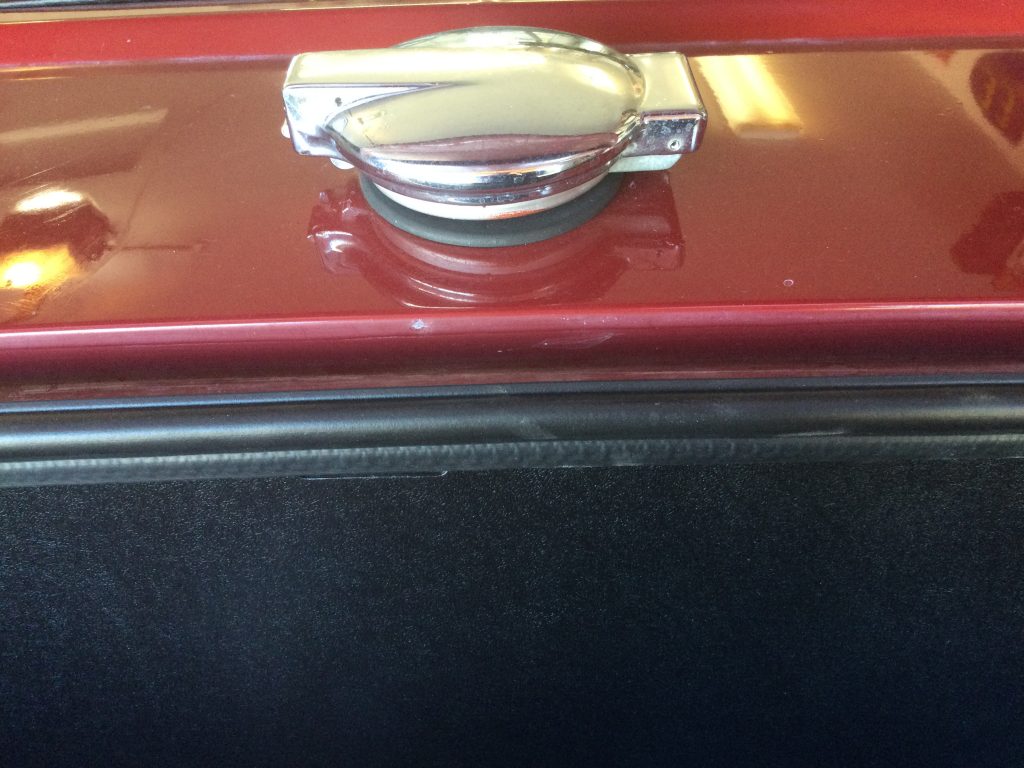
I chose to go in a different direction with the dash panel, opting for 1/2 inch thick HDPE. I bought the 9 inch by 48 inch sheet from my “go to” supplier for hard to find stuff, McMaster-Carr, at a cost of around fifty bucks. Adding the $12 for the vinyl “carbon fiber” wrap that covered it made it a pretty cost effective solution. Purists may cringe, but I’m a little sick of the wood dash look anyway. The HDPE does require a little preparation to get paint or vinyl to stick to it… burning off the surface oil with a torch and spraying with an adhesion promotor.
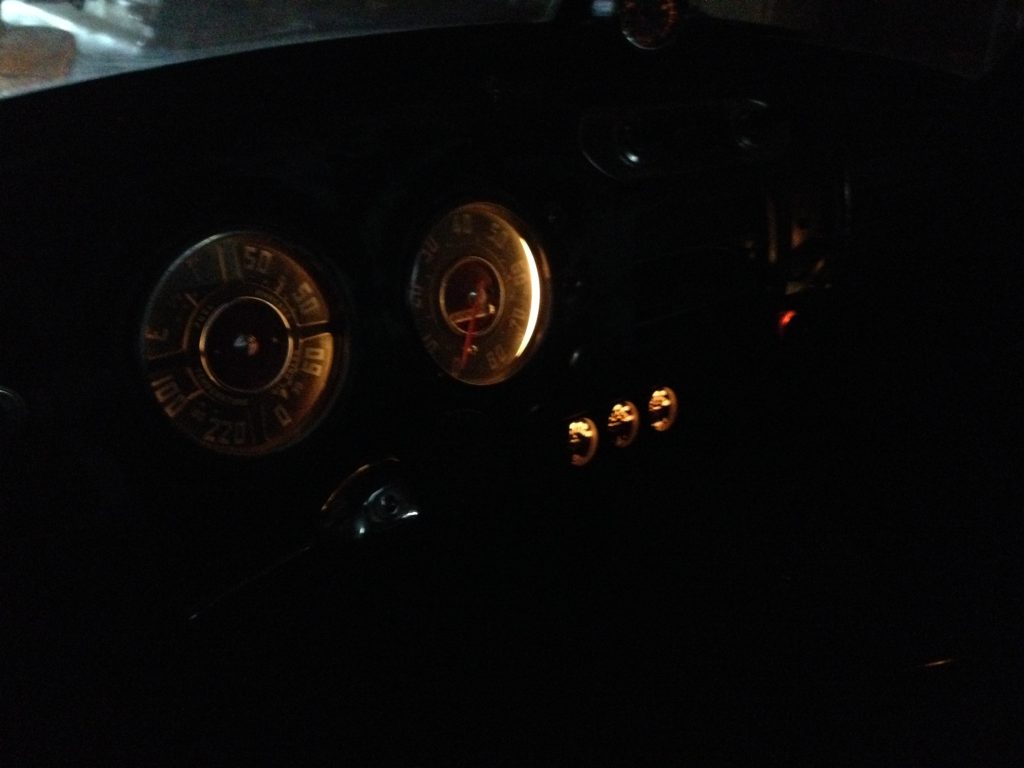
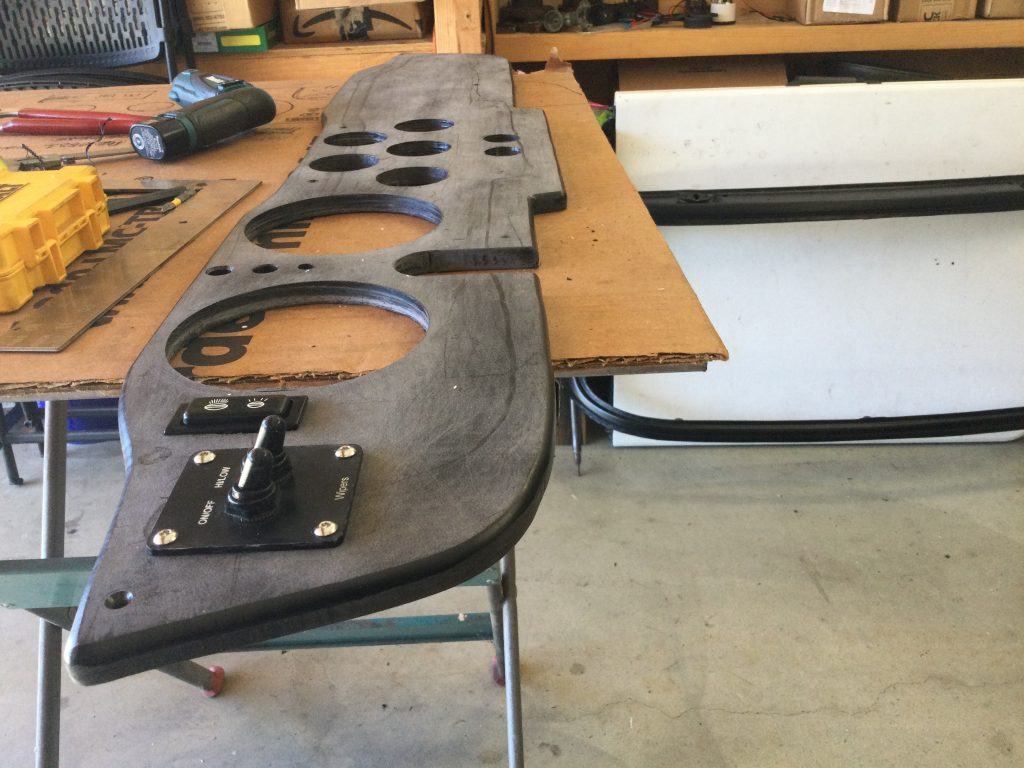
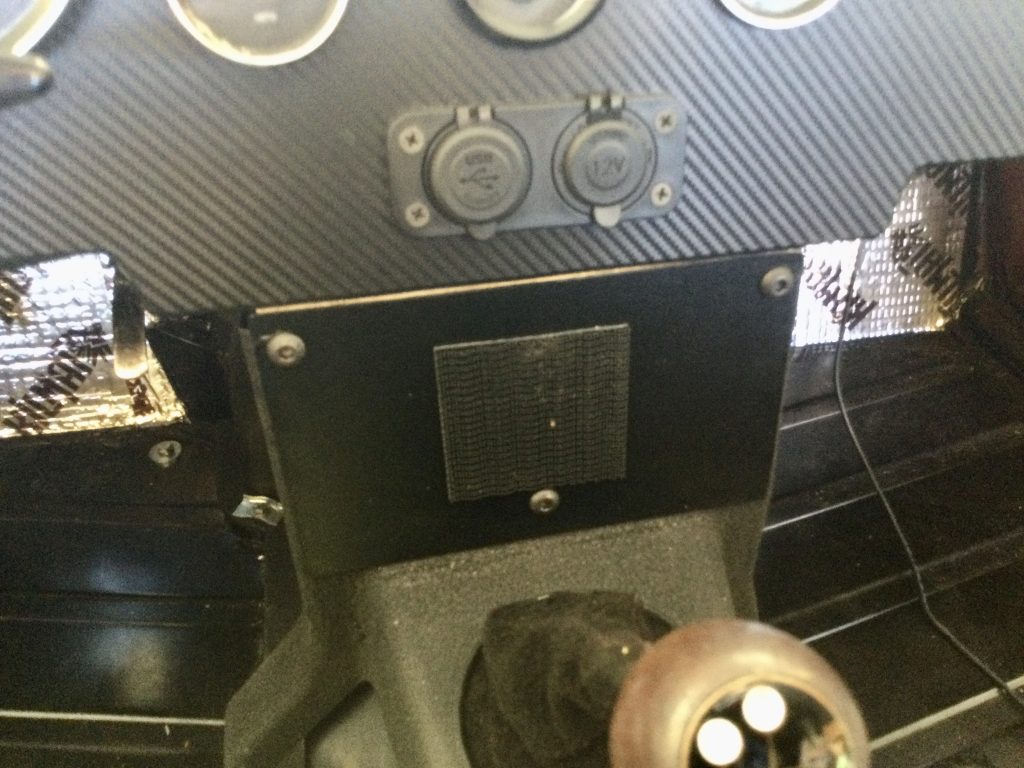
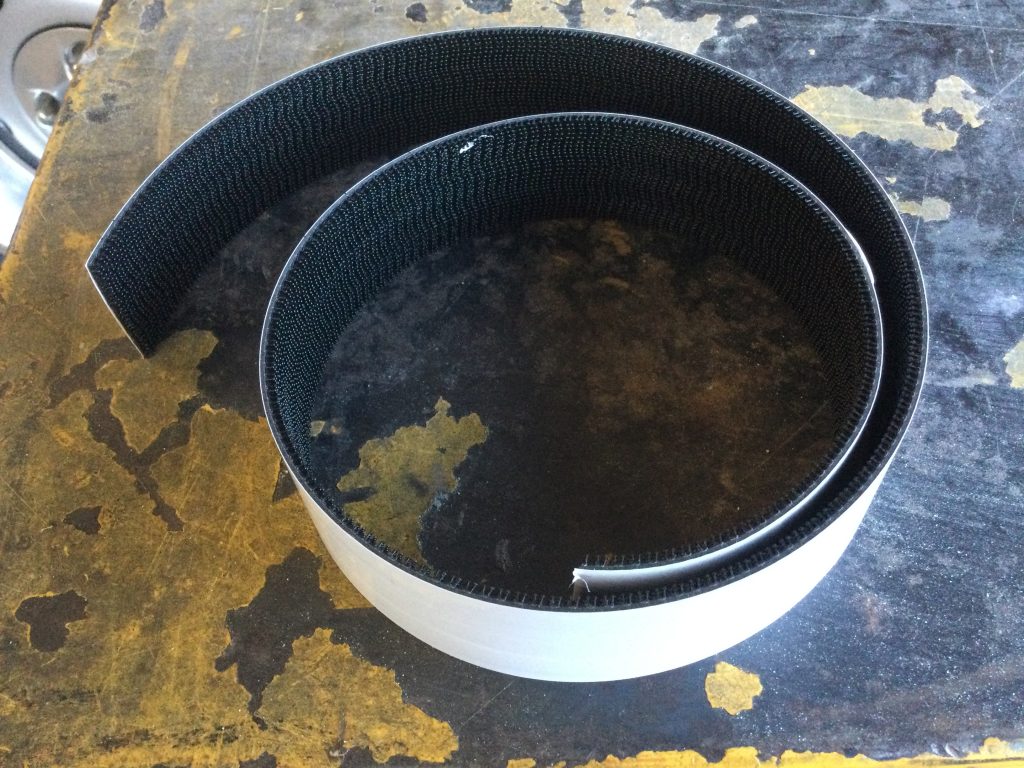
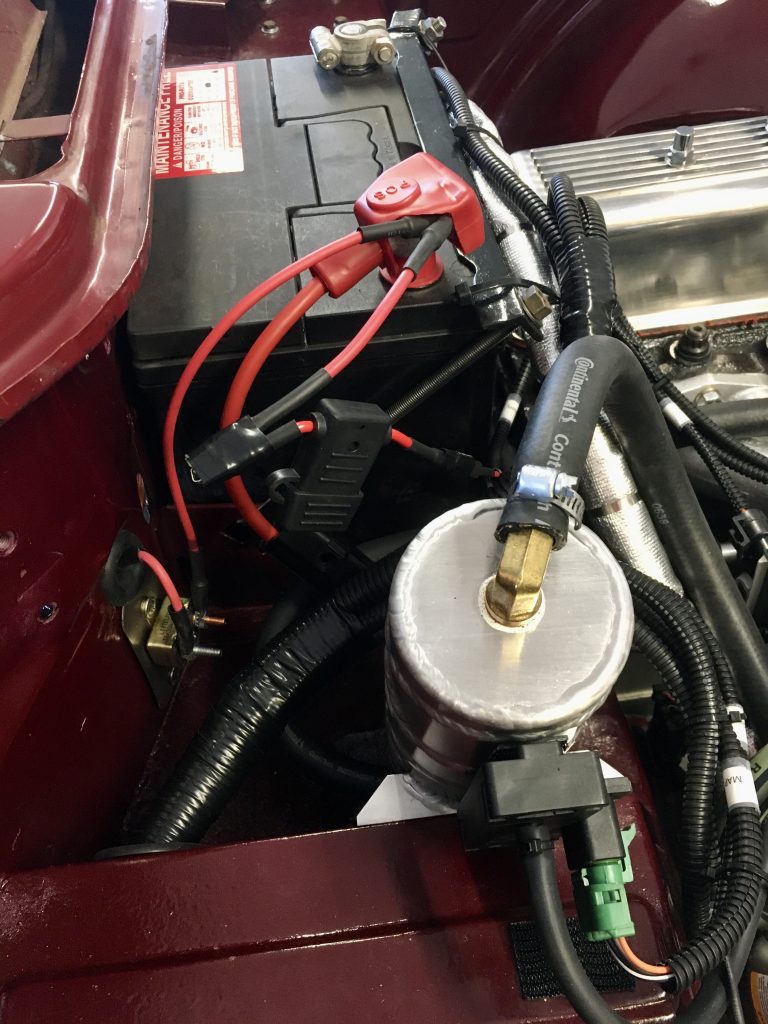
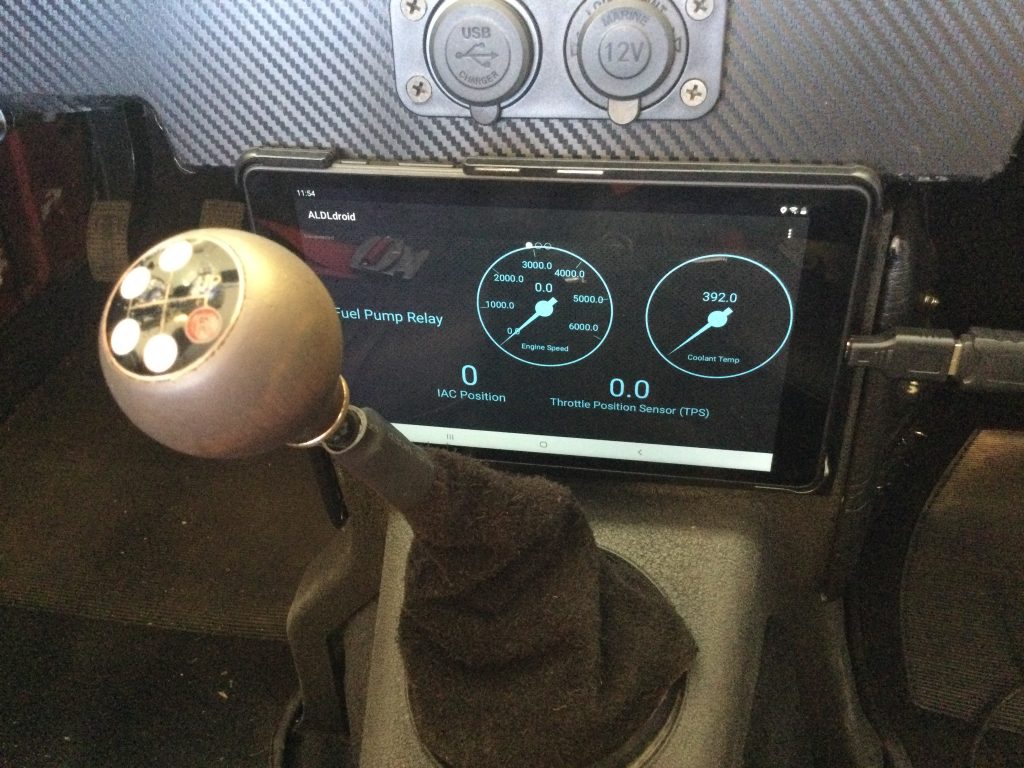
The gauges are all a press fit, as several of the threaded studs holding the original gauges were rusted and broken. This also made the wiring job much easier since I could wire the gauges and not bother with reaching around behind the dash. I simply wrapped some of the vinyl wrap around the gauges until the fit was snug. As I have done in other restorations, I opted for an electric oil pressure gauge, which is the odd duck in the middle of the cluster. The original oil pressure gauge was installed with the illumination light just to satisfy my sense of symmetry. The “velcro” that I used for the Samsung tablet and to mount the ECM computer is the plastic mushroom shaped interlocking style, which I also purchased from McMaster-Carr. Very strong and the adhesive grips so well that if you decide to relocate this stuff, it will rip the paint right off the car. Don’t ask me how I know this.
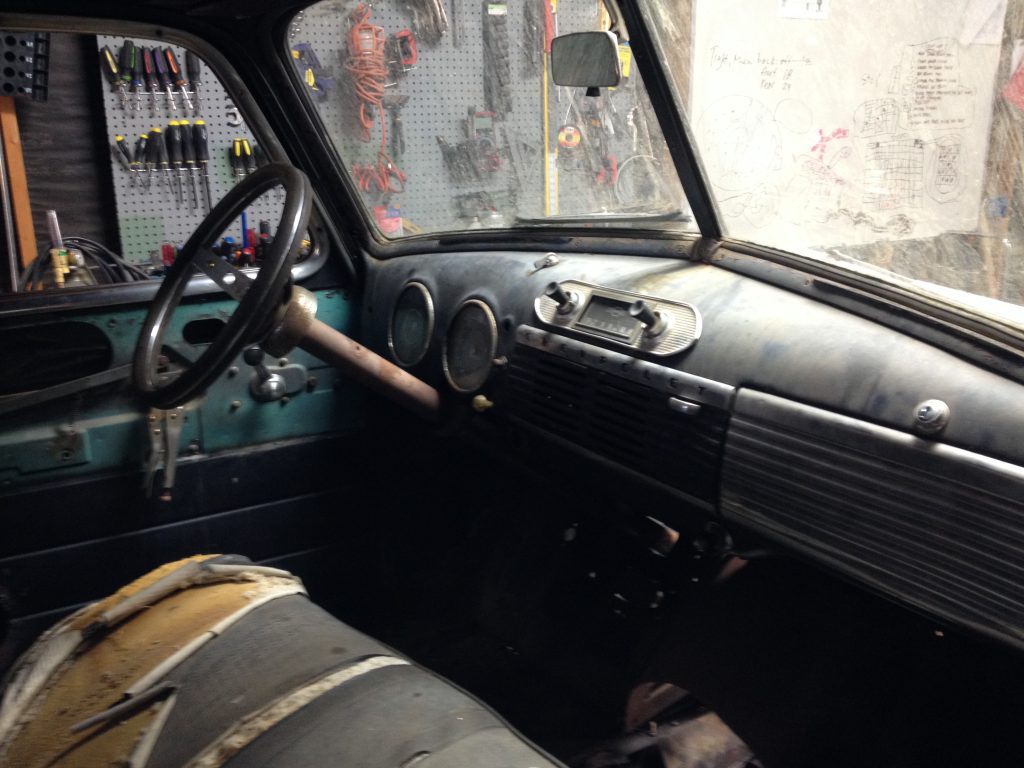
After fiddling with the original rotary wiper switch and a replacement version, I chucked it all and went with a double toggle switch arrangement. That idea is from Masters’ manual. I also added a double USB outlet and lighter outlet for convenience. Since there is no heater in the car, and no top, I am hoping I can plug a heated blanket into the lighter socket on the remote chance that Linda will want to ride with me on a cold morning or evening. In truth, it’s probably the way I drive that keeps her out of the passenger seat.
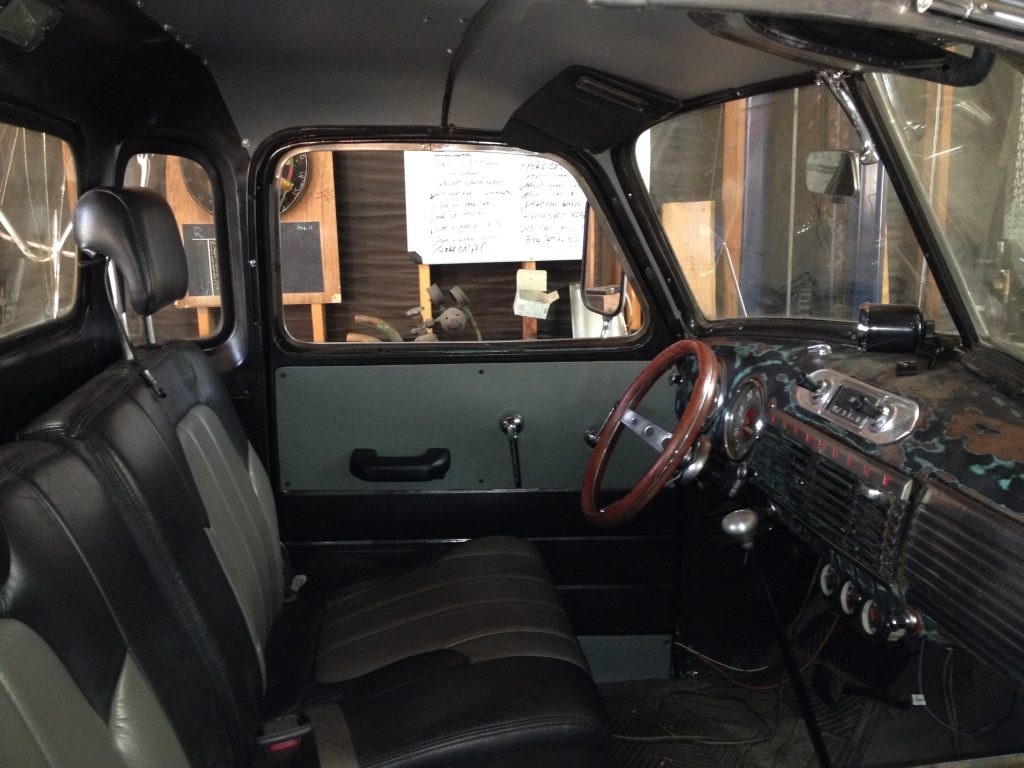
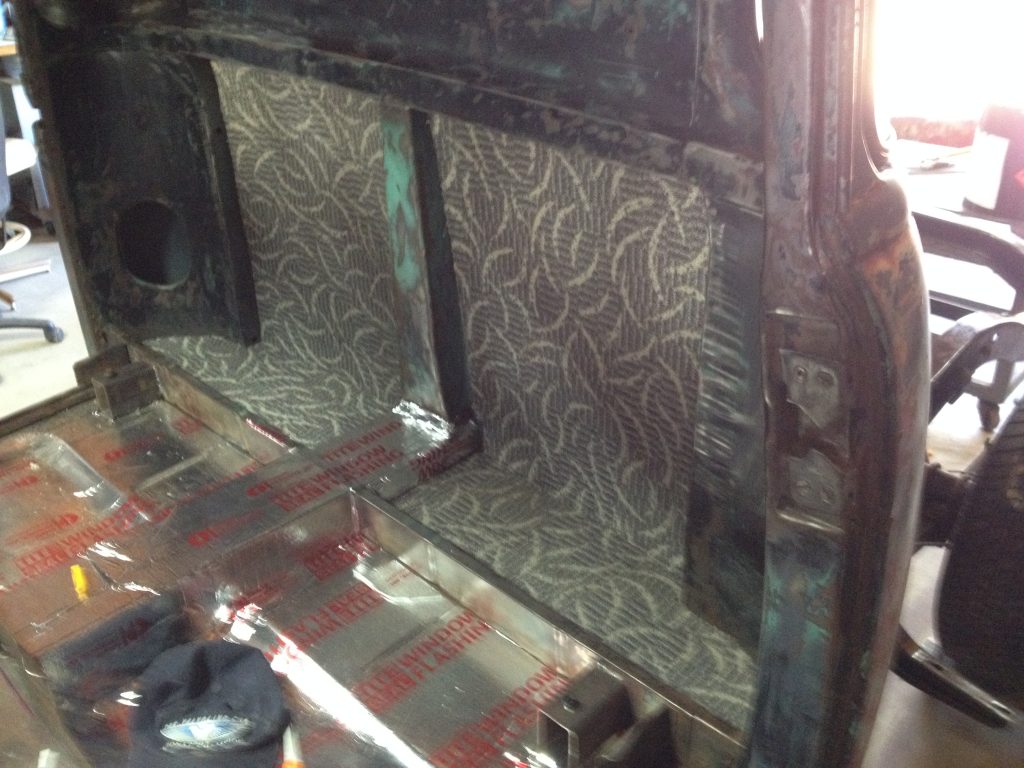
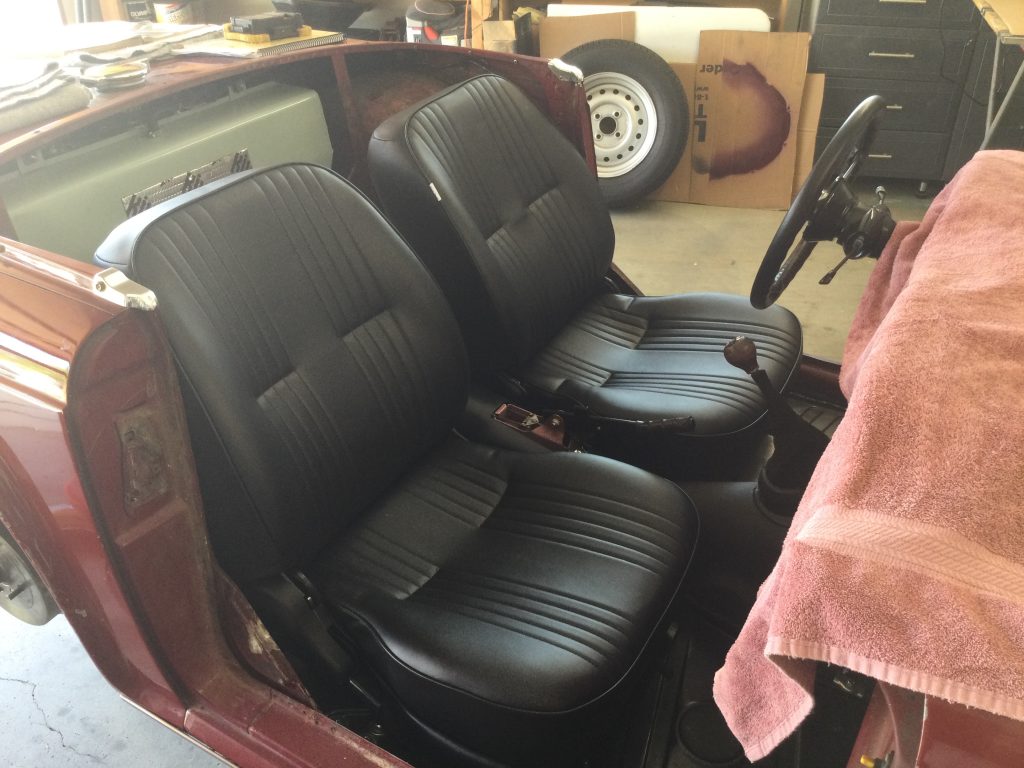
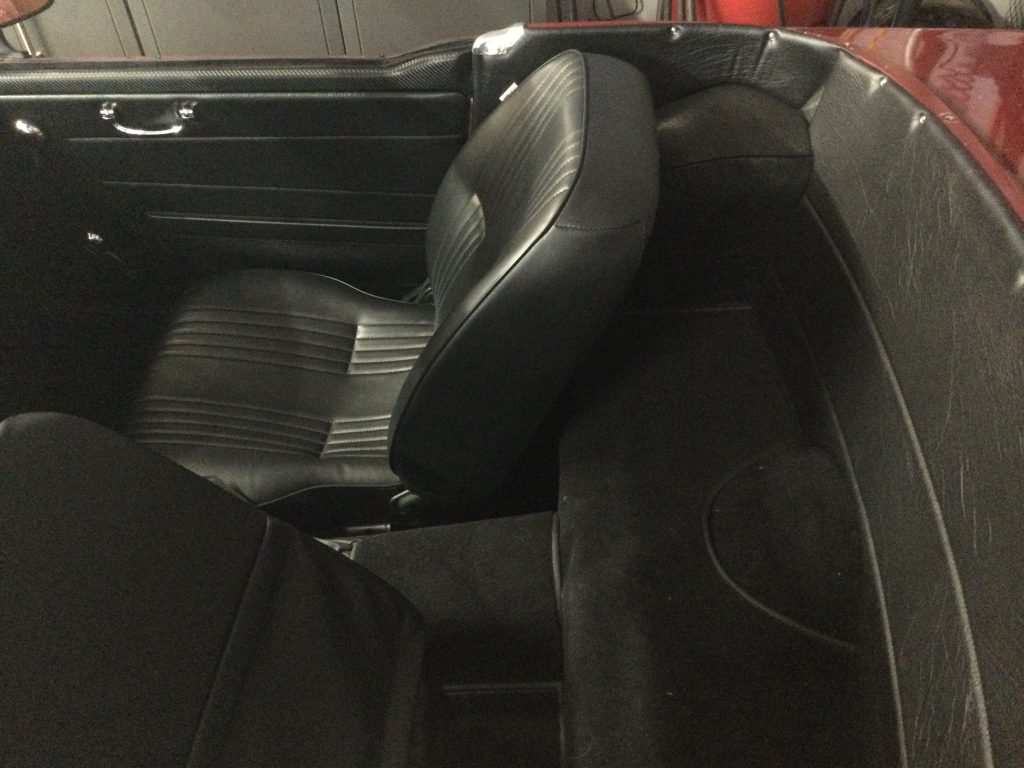
I installed Pro Car seats sourced from CARid, and for the interior panels went with Bob Danielson’s excellent product. The only thing I’ll note about the seats is that the seatbacks are considerably thicker than the original seats, so I’ve had that cover off a few times to carve away foam. It is a simple job but of course requires removal of the seat. I’ve got it down to about an hour job to remove, carve, and re-install. Nearly there now.
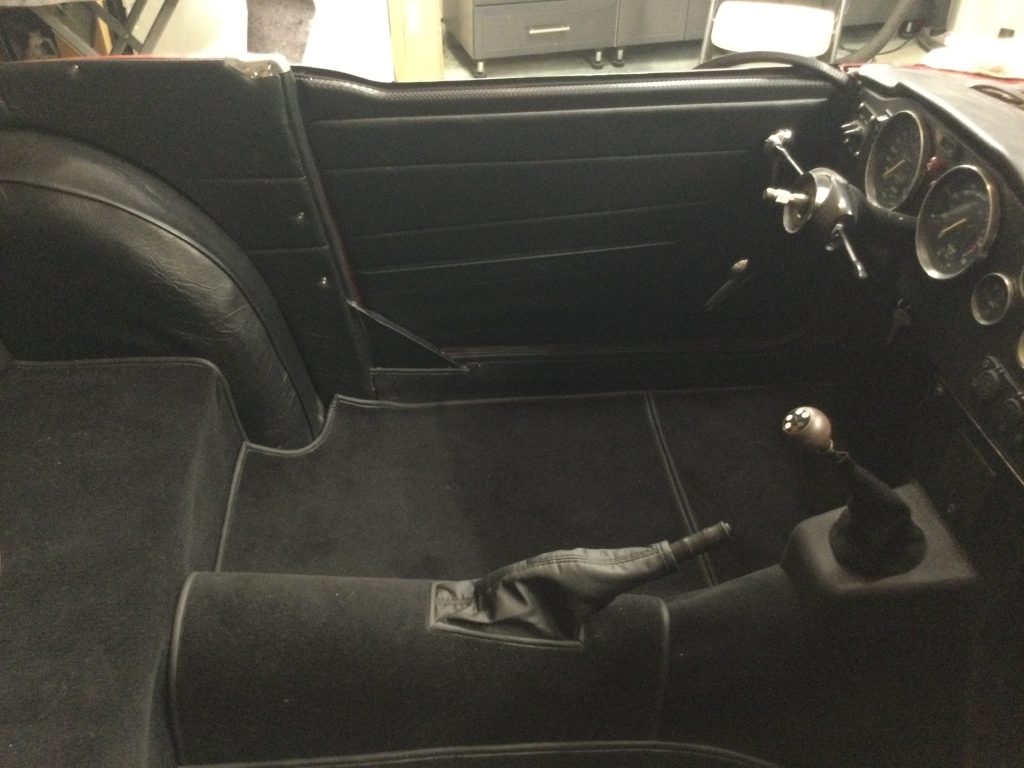
For door seals, as well as boot and bonnet seals, I decided to go with Martin MacGregor’s products from macgregorukcarparts.com… they are perfect and so easy to install compared to the nightmare I remember from my truck restorations. Plus he’s another of those great sellers who is a pleasure to deal with from a customer service perspective. Fun talking with him.
And on that note, I’m all talked out. The sun is shining and the forecast says 70 degrees here in San Diego, a week before Thanksgiving. Time for a cruise.
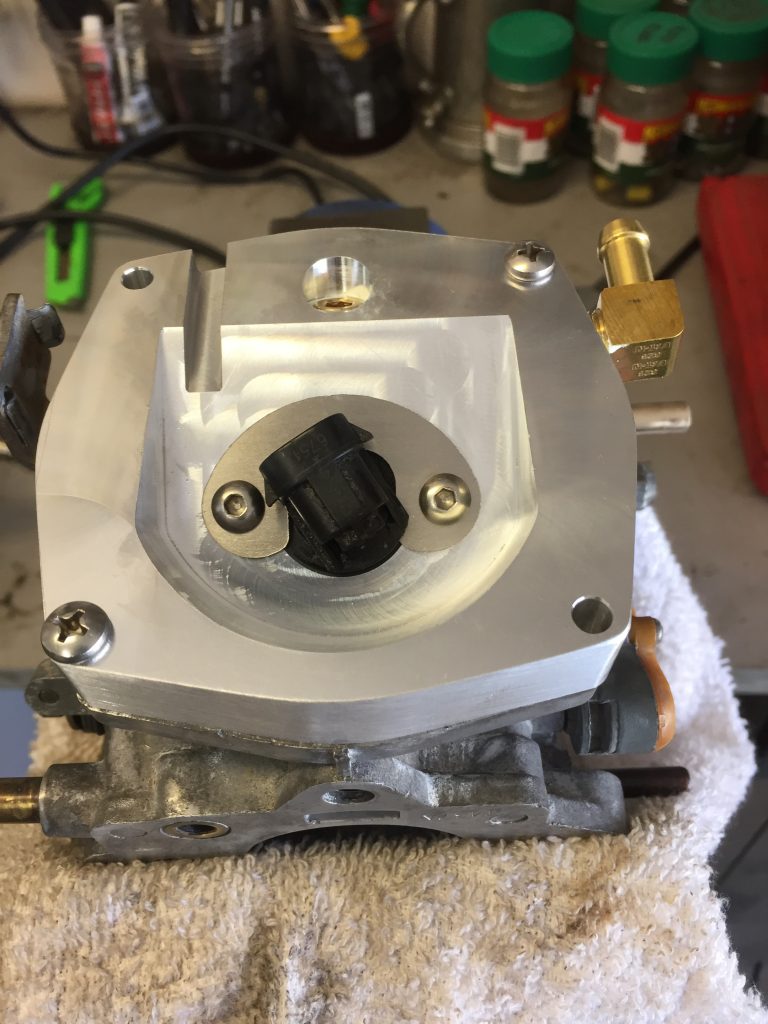
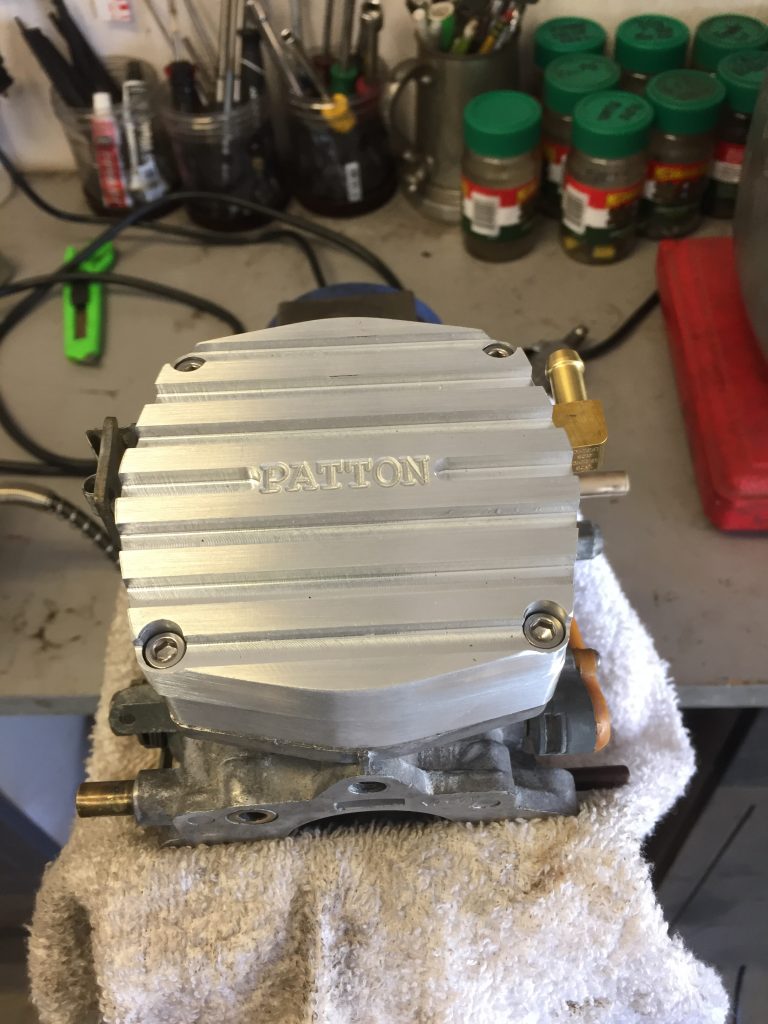


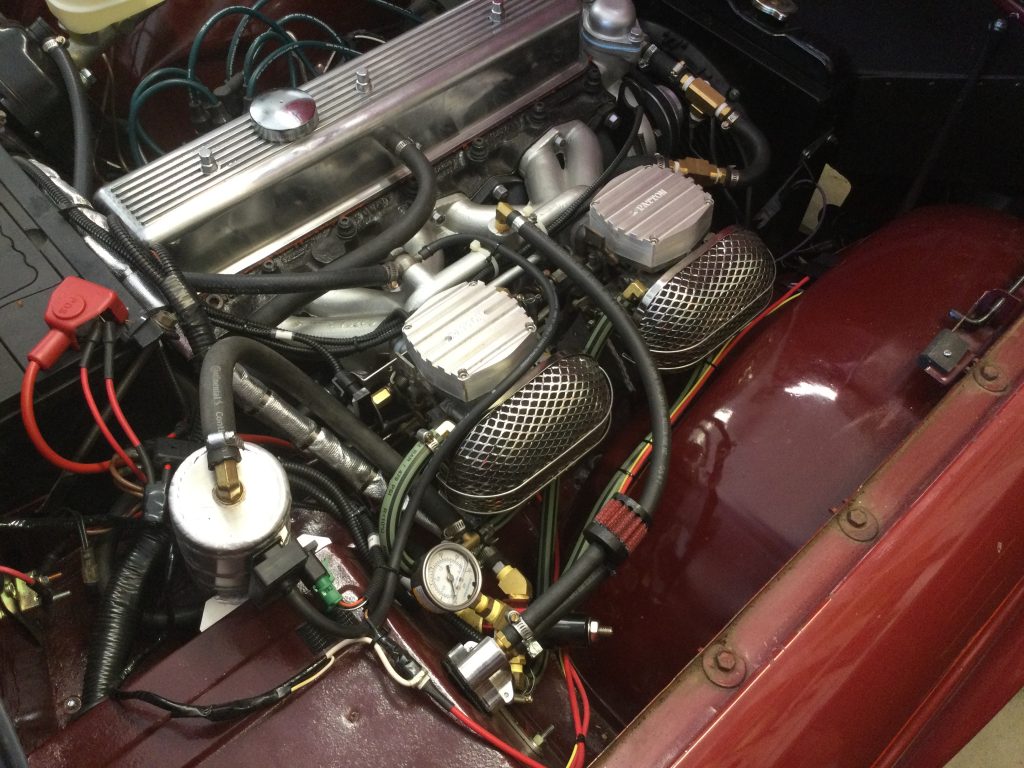

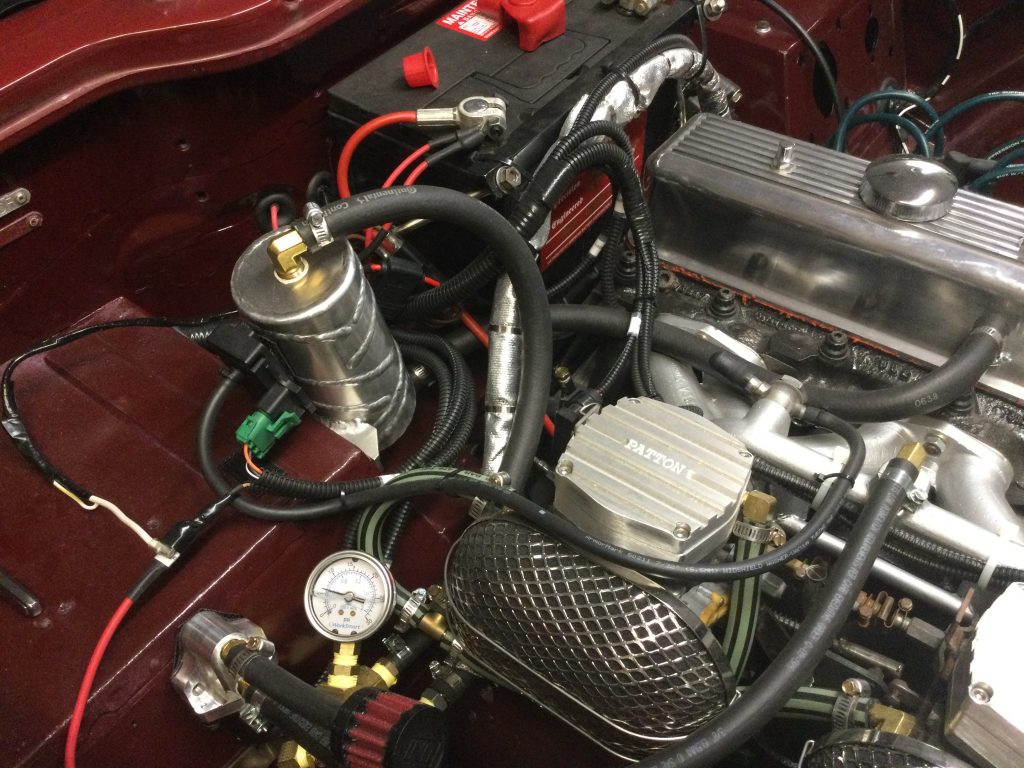
Installation of Rick Patton’s TBI fuel injection kit was a breeze because of two factors: it is almost entirely “plug and play” with the exception of a couple easily made connections to power the computer and the fuel pump; and more importantly because of Rick Patton himself. He provided excellent customer service and enthusiasm about my project, and he’s a TR6 owner, as well. Since this was my first experience with a fuel injection conversion, I’ll admit to needing a little hand holding and guidance.
The kit comes with all the documentation you need to get the system installed and working. In addition, Bob Danielson’s lengthy and thorough step-by-step narrative of his TR6 installation was extremely valuable.
When I got the system installed and ready to fire, it was a complete hoot to just reach in and turn the key and hear the engine come to life… no choke, no fussing about with the throttle. Once it is up and running, forget about carburetor servicing and tuning, that is what sold me on this conversion, as well as the promise of starting regardless of the temperature and, hopefully, better fuel efficiency.
There was a hitch once the car was ready to drive and I embarked on my 3 mile loop around the neighborhood. It would just suddenly die as if the key was switched off. This happened consistently: drive for a mile or two and it would just stop; coast to a stop; turn the key off, then it would start right back up and go a couple more miles. It was a frustrating period of examining my wiring job (I had also installed a new main wiring harness), and scratching my head, and getting ideas from Rick.
Finally, I decided to Google my problem and found that I was not alone. There were several posts out there about the GM TBI system failing in exactly the same way as mine. And the problem most often was an ignition control module (ICM) failure. I drove down to the local Chevrolet dealership and picked up the real GM article rather than replacement brand. Presto, my problem was solved and it has been smooth driving since then.
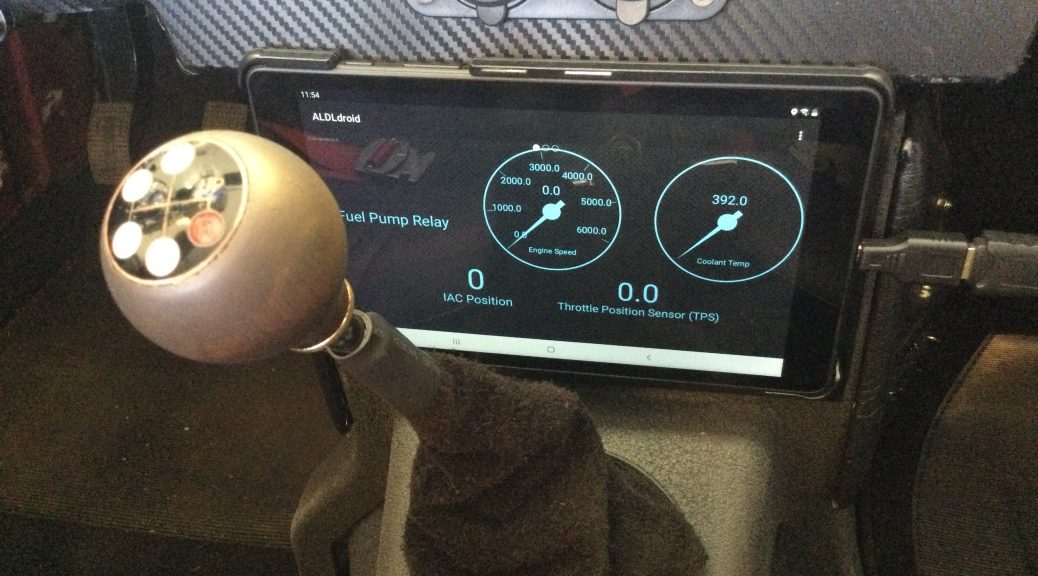
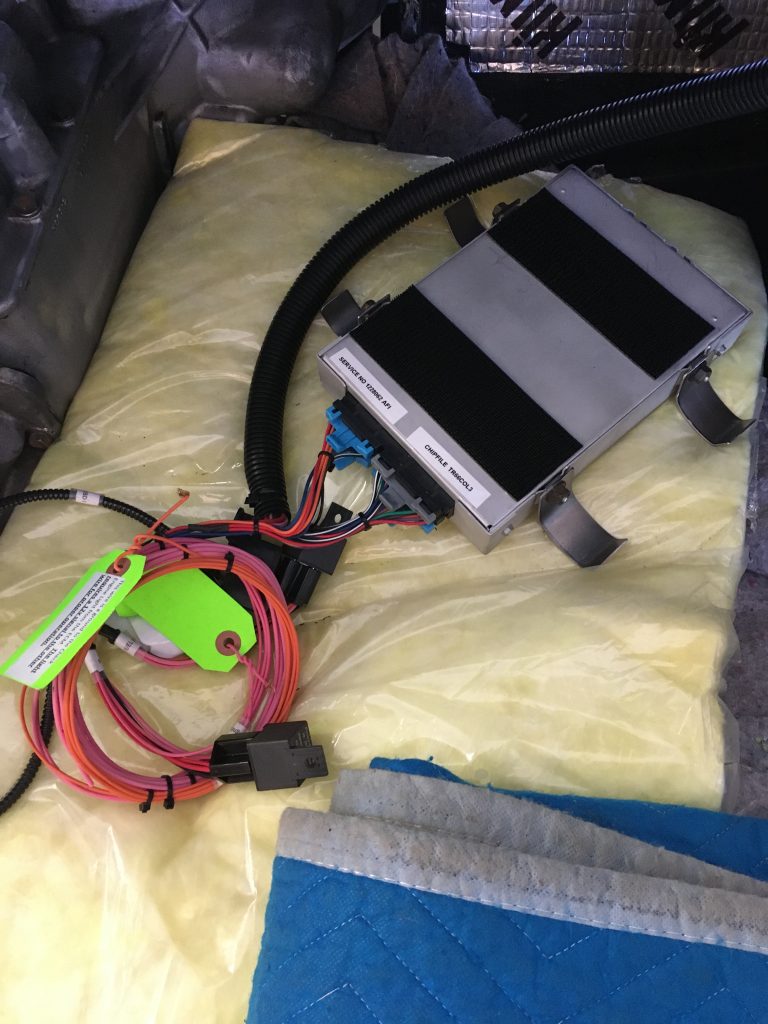
For data logging the kit includes Windows software that I installed on my laptop. The log files can be sent to Rick Patton for his review. I also picked up an Android app called ALDLdroid for my Samsung tablet, which I mounted where the radio would normally be installed. Not only can I plug into the ECM to display or log data, but it can also serve up Google maps, Pandora, and all the wonderful things you can do in modern vehicles.
Needless to say, I’m really happy that I chose Patton’s TBI kit to take care of induction. It is a source of pride when I pop the hood, er, bonnet and explain what is going on in there. Installation was straightforward and Rick was with me in spirit and by email, every step of the way.
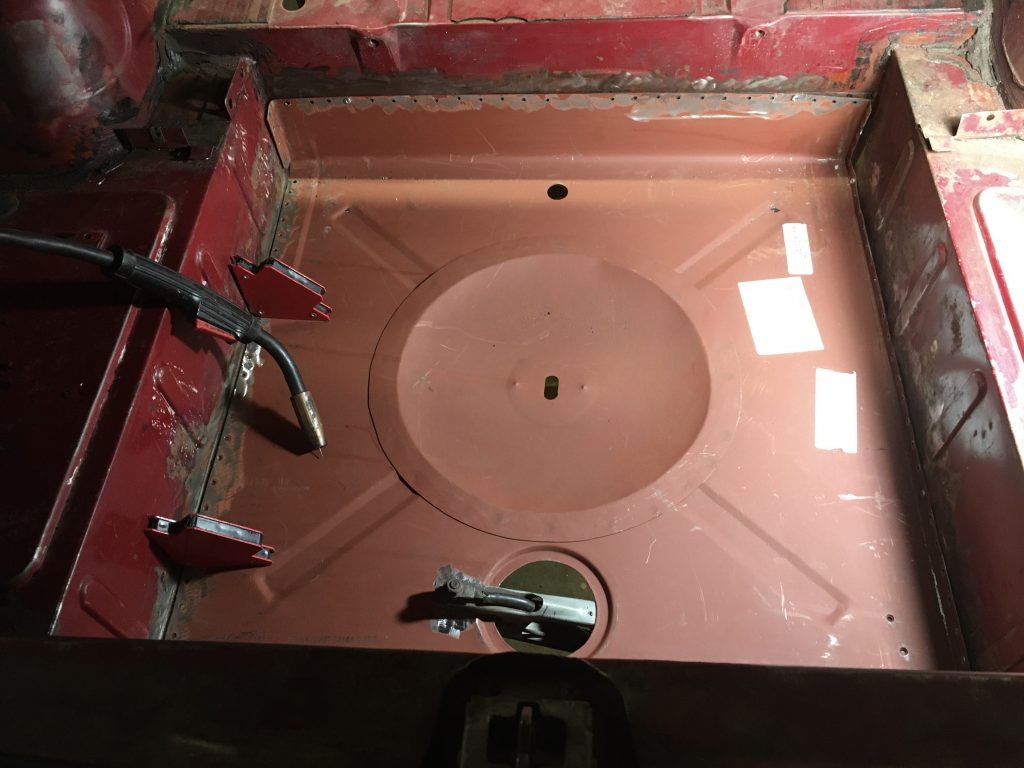

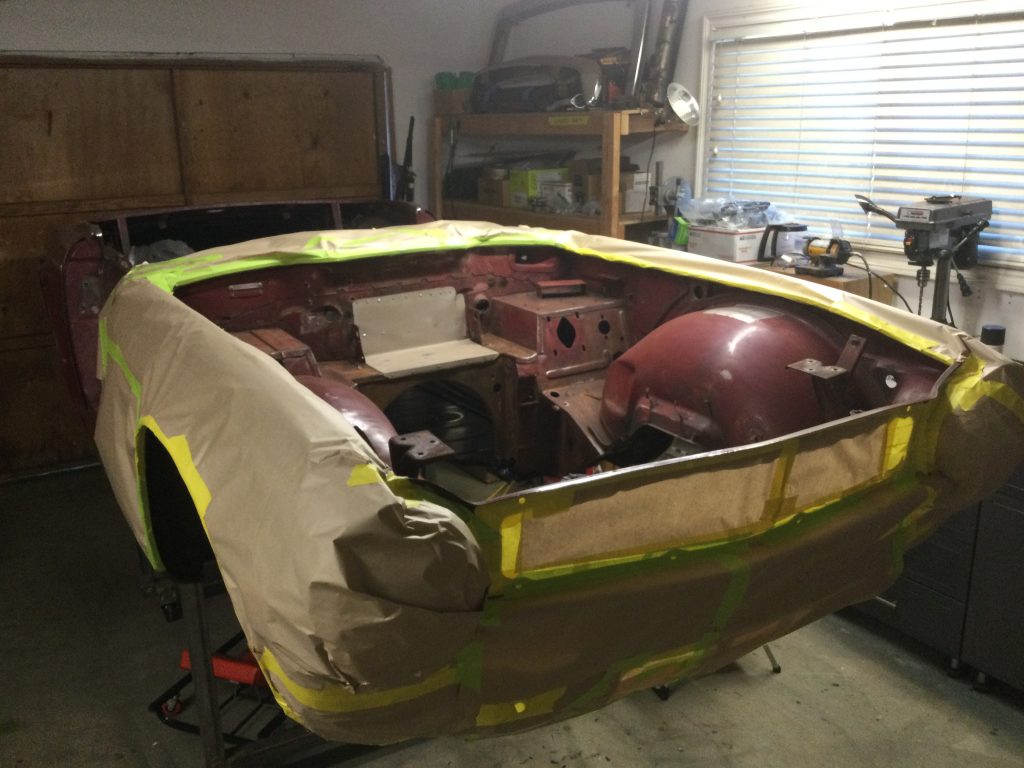
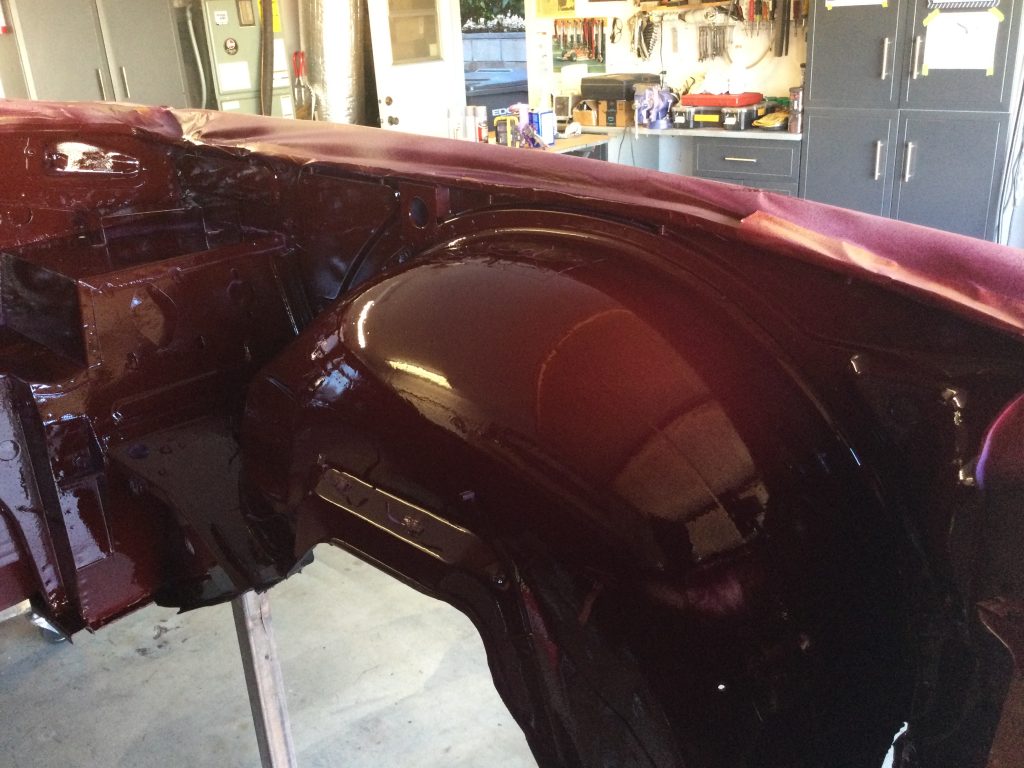
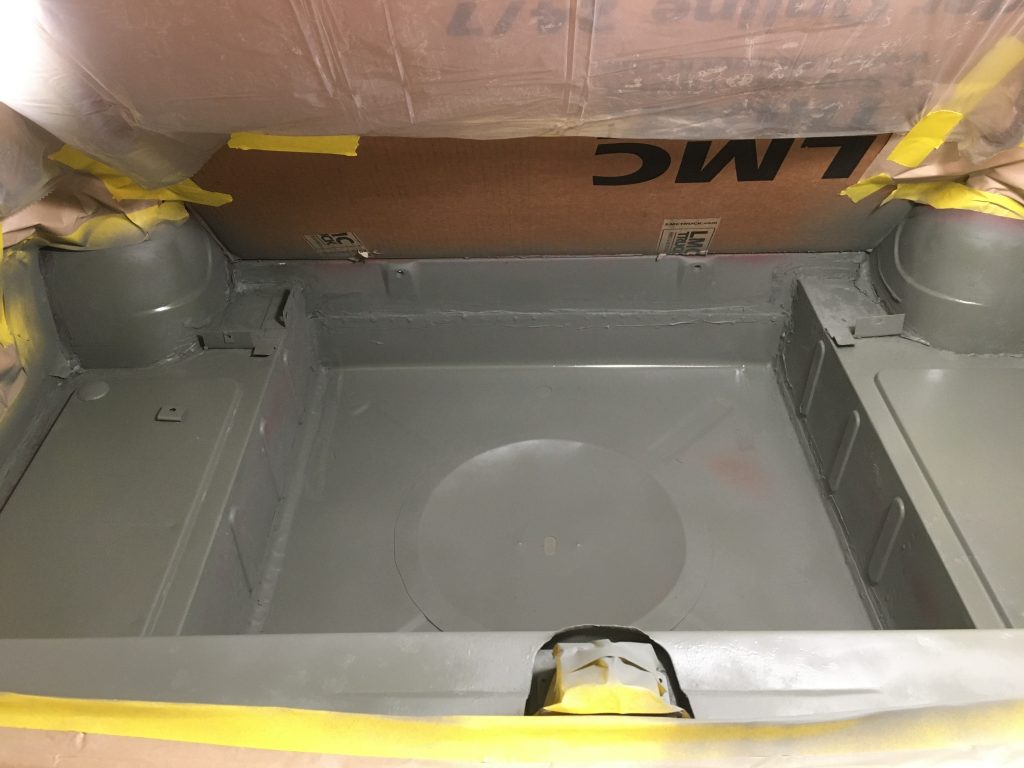
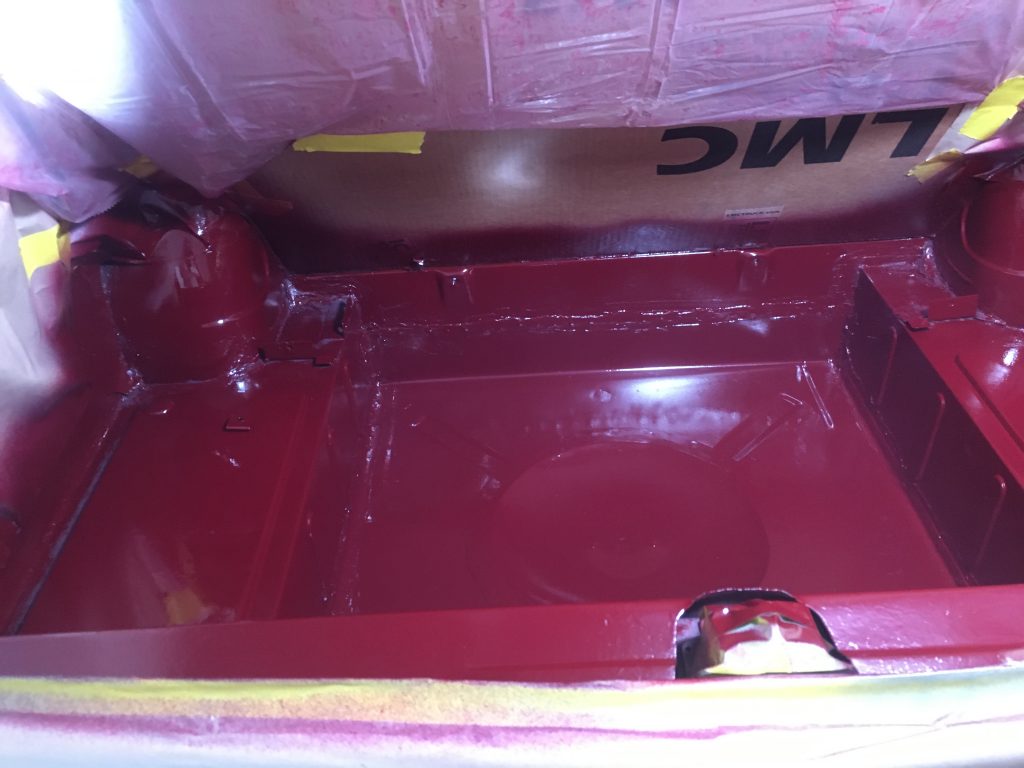
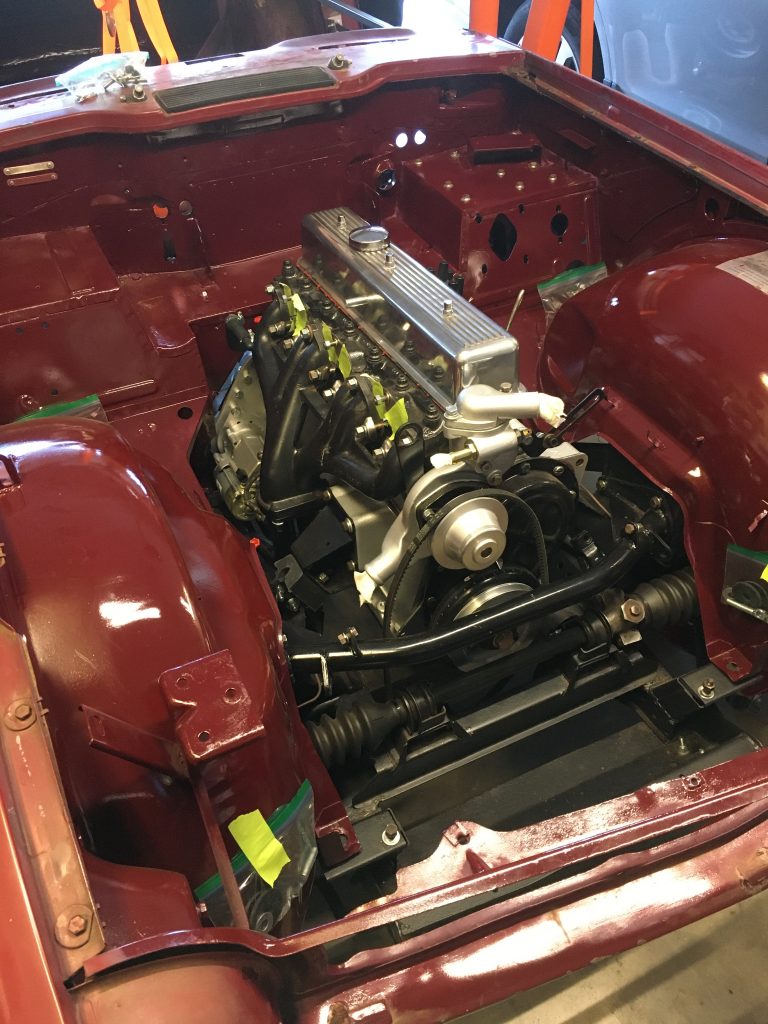
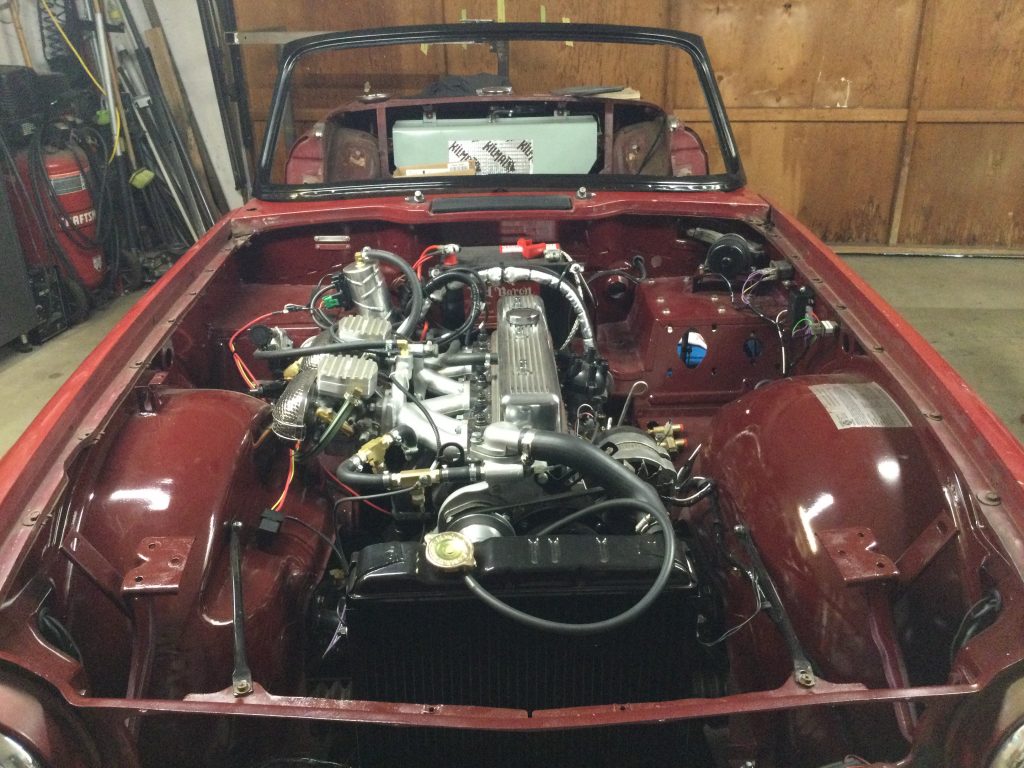
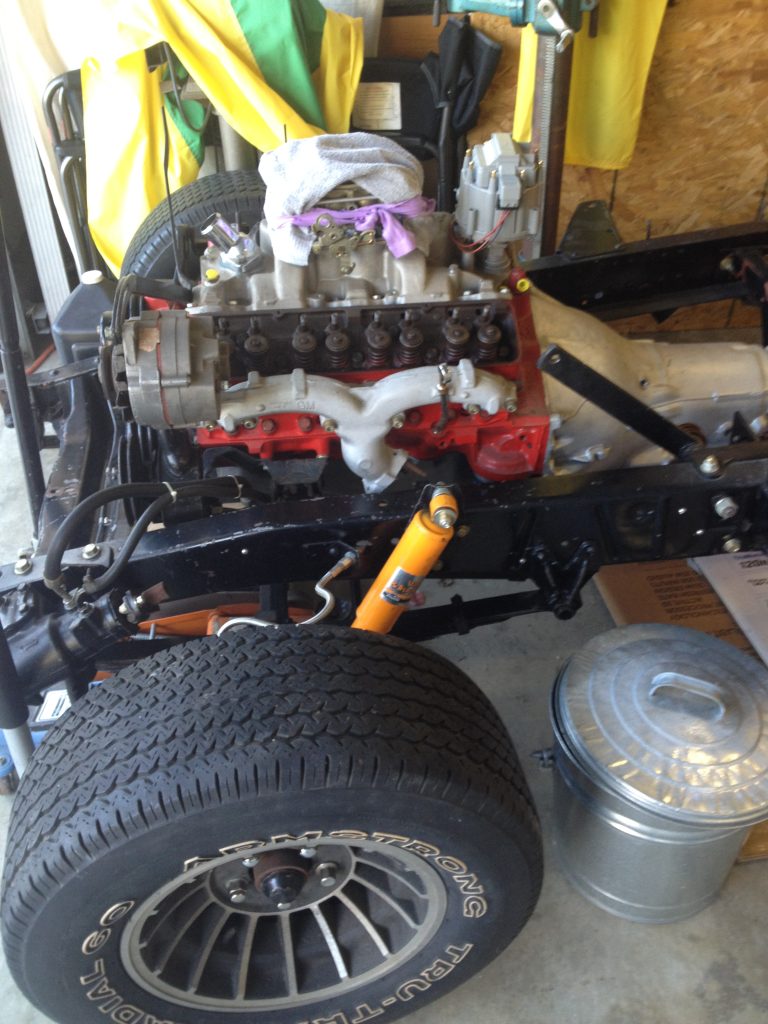
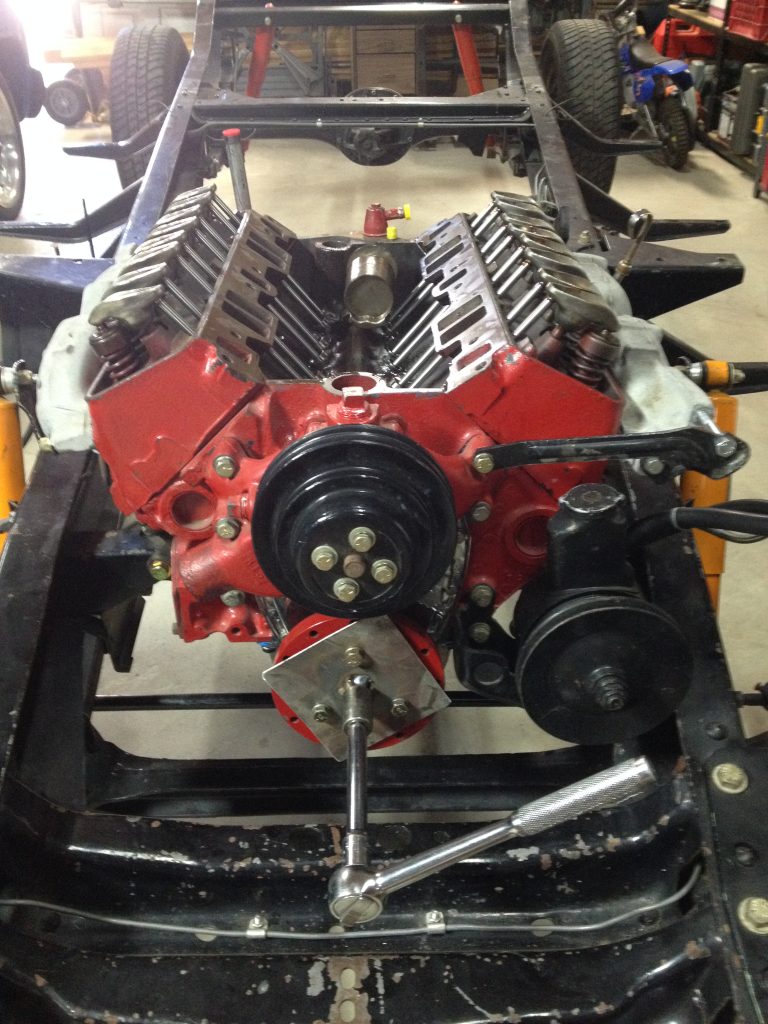
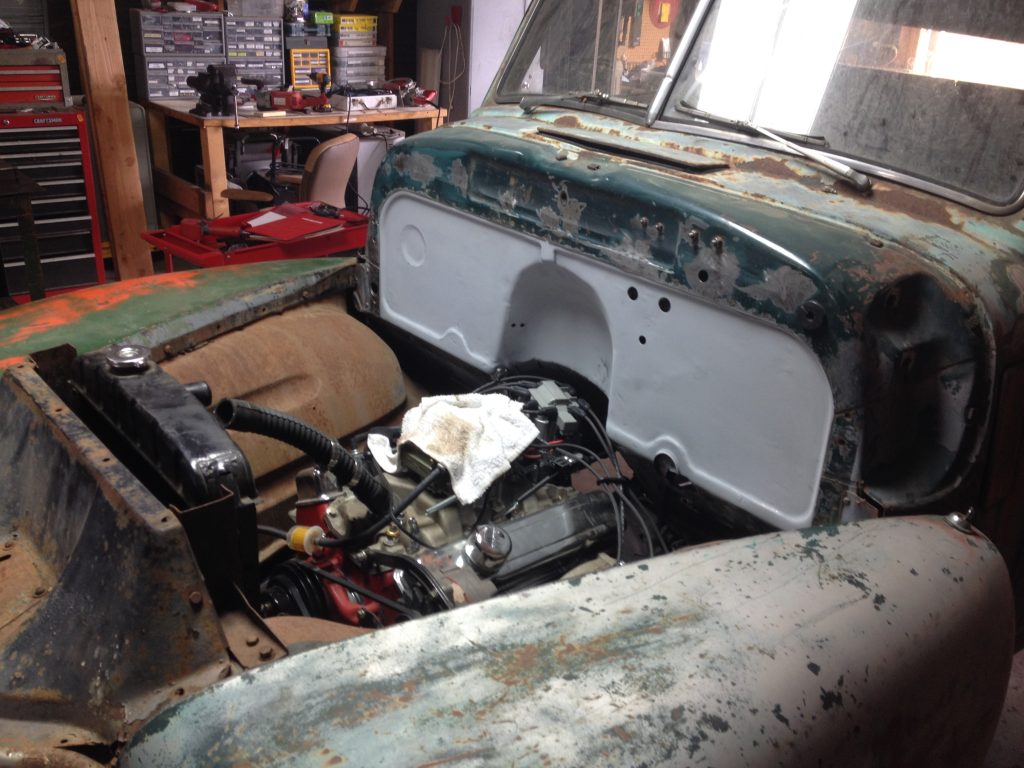
Although I had no intention of painting the Triumph, I couldn’t let the nice looking engine reside in squalor. So, the I painted the engine bay and also the trunk, which got a new floor. The color – which I bought from TCP Global, was meant to be the original color, Carmine Red.
As you can see, it is much darker than the exterior of the car. I’m not sure if that is due to the age and condition of the original paint or because the formulation is just off. If I decide to paint any part of the exterior (and I am thinking of painting the hood) I will head down to Meza Paint in Escondido and see if they can match my weathered exterior color.
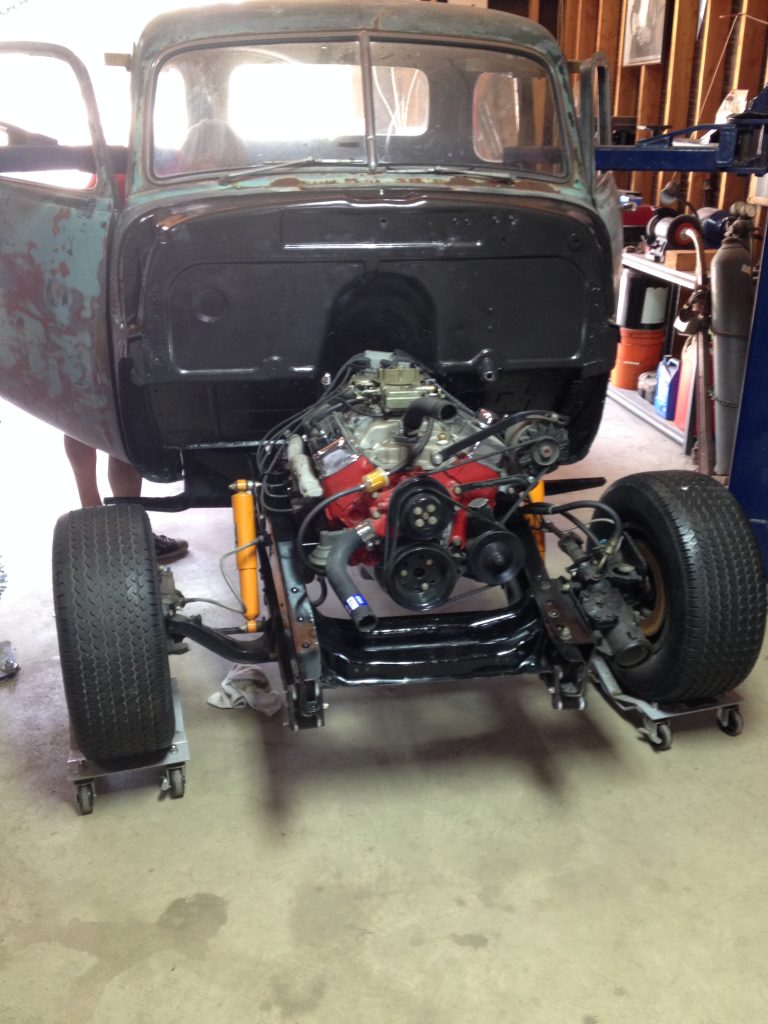
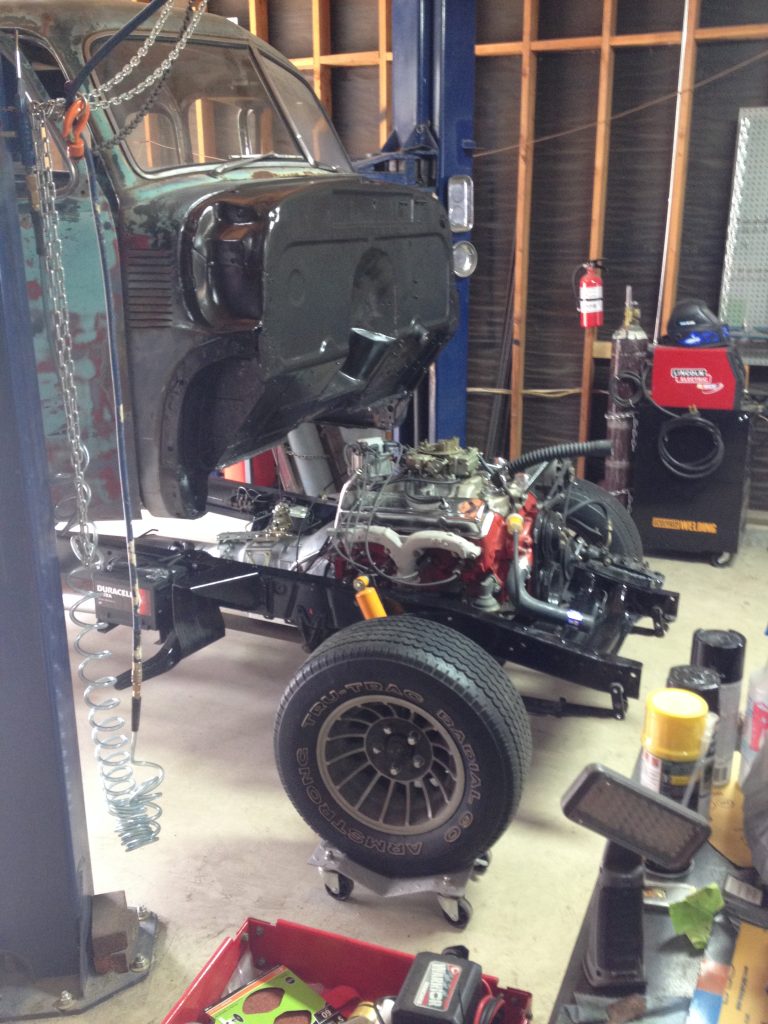
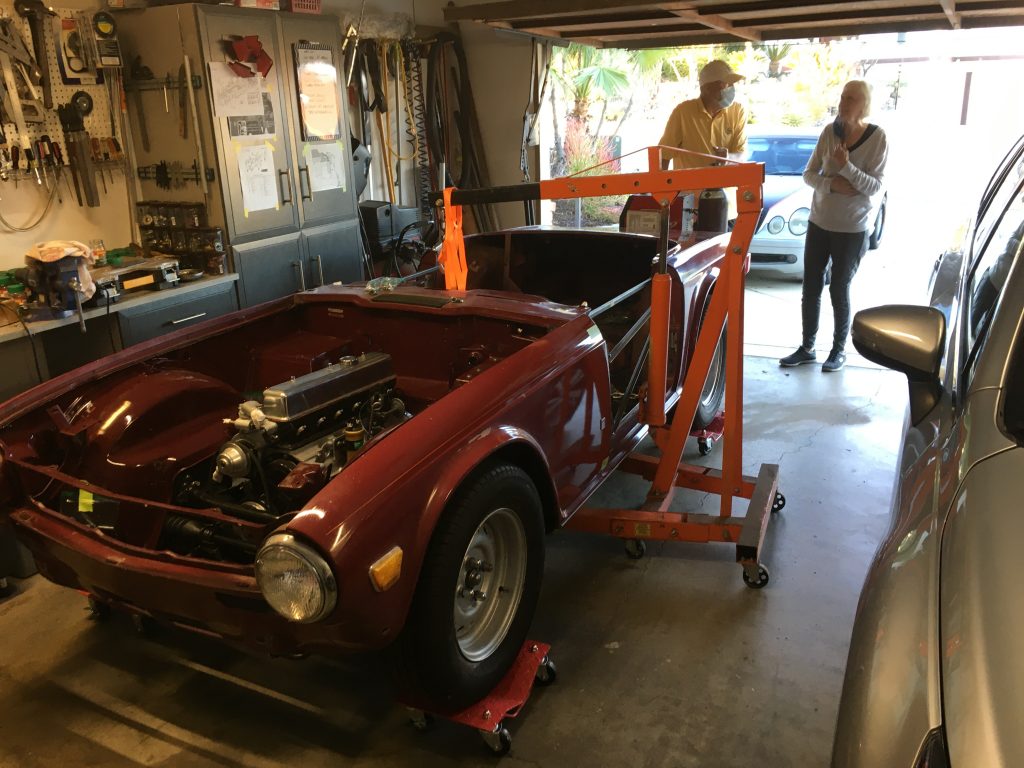
With a little help from friends we dropped the body onto the chassis. In retrospect I should have measured the height of each mounting point on the frame and adjusted with the spacers as needed. Instead I reinstalled the same number of spacers that were on the car when it was disassembled. The right front corner, measured at the top of the headlight ring is just slightly higher. It is hardly noticeable but perhaps one more spacer at the front would have been perfect. On the other hand, the doors fit nicely and work well, so maybe it shouldn’t be messed with.
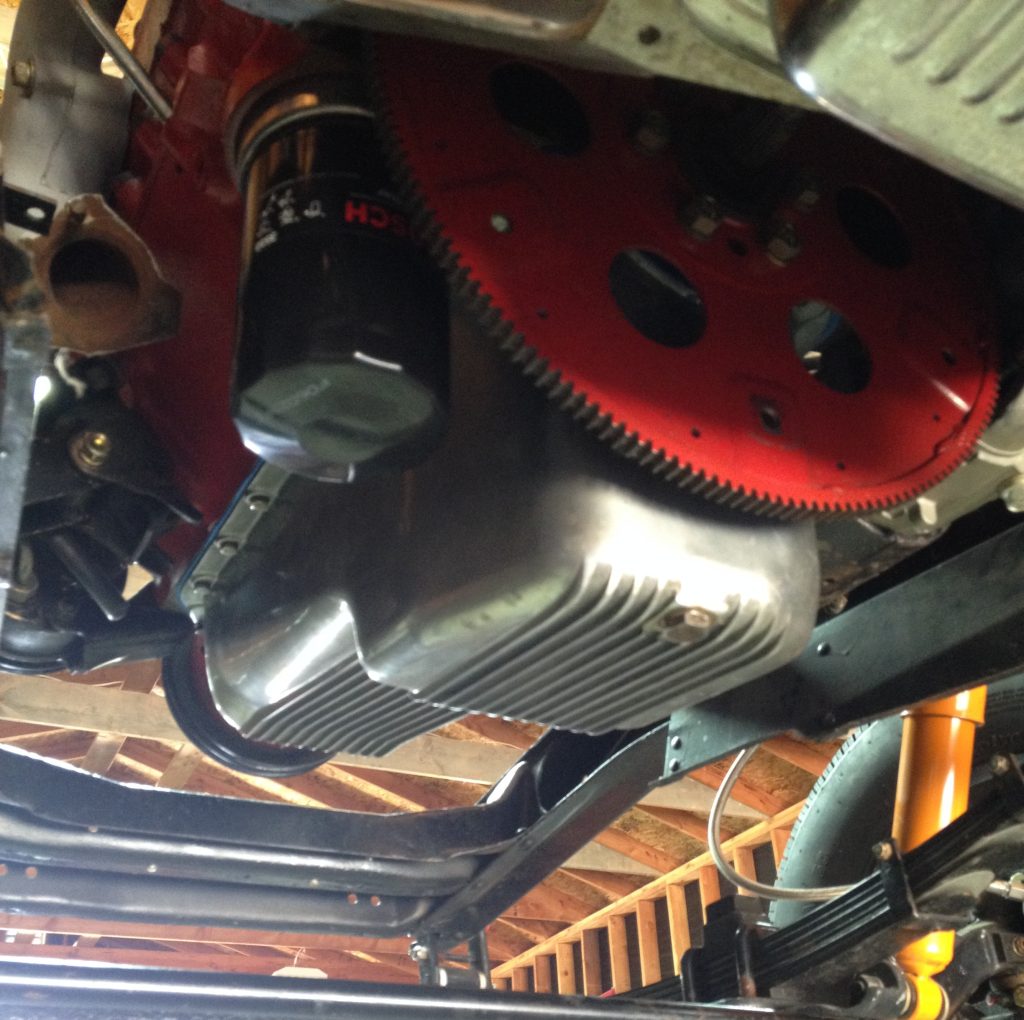
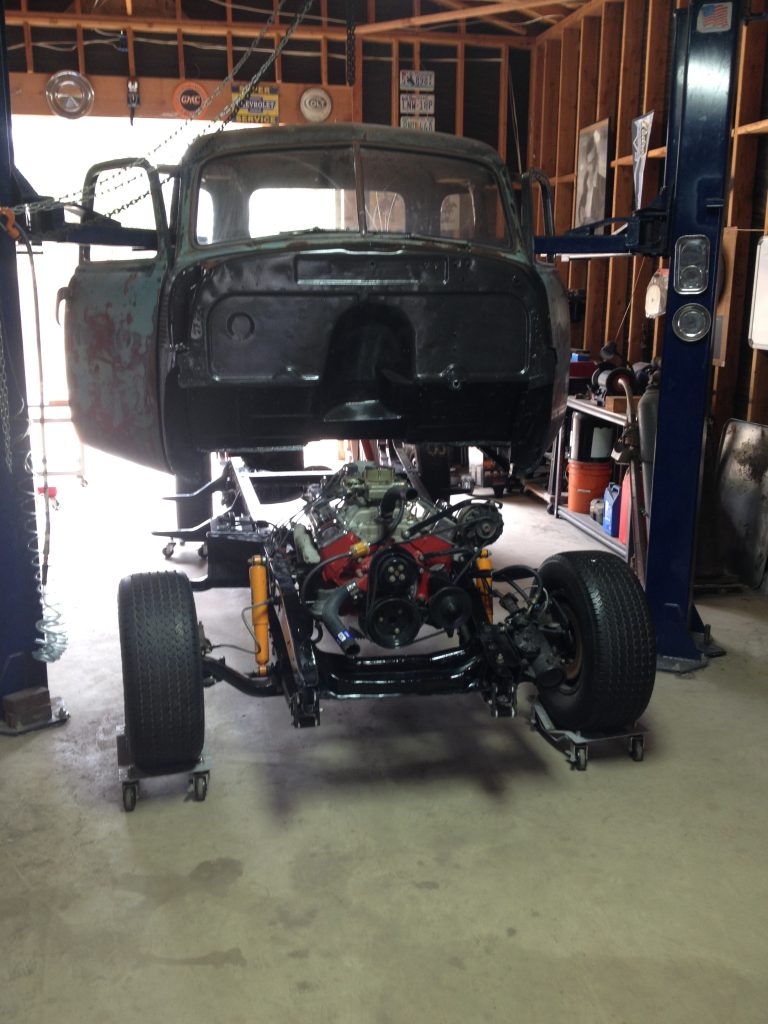
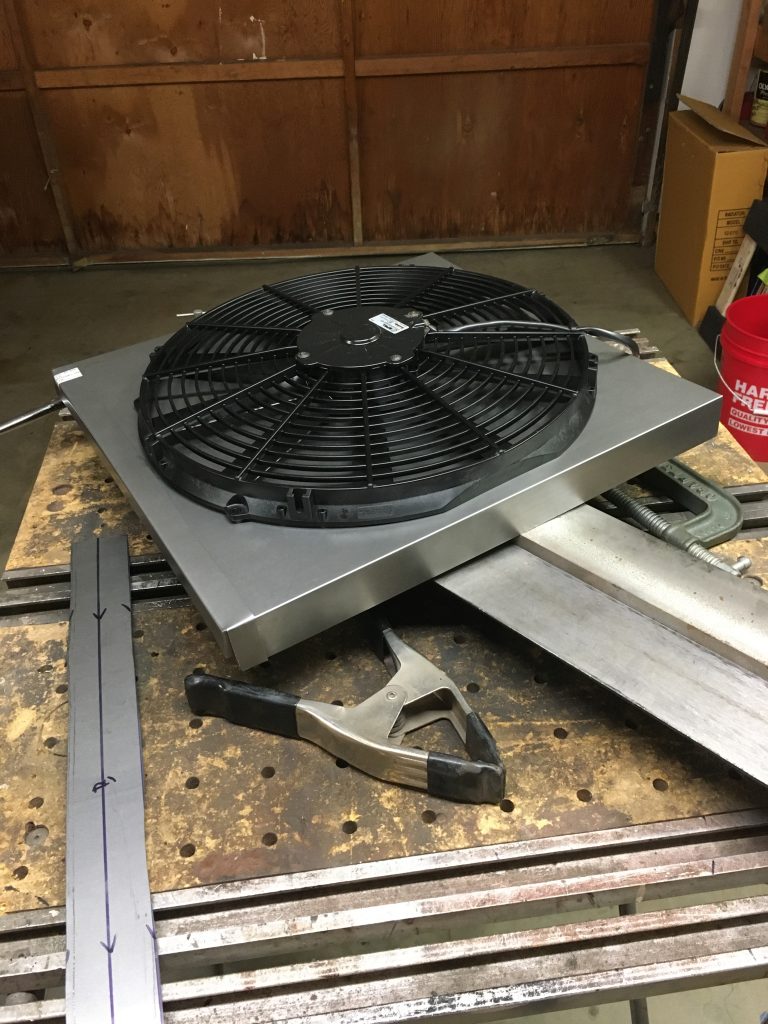
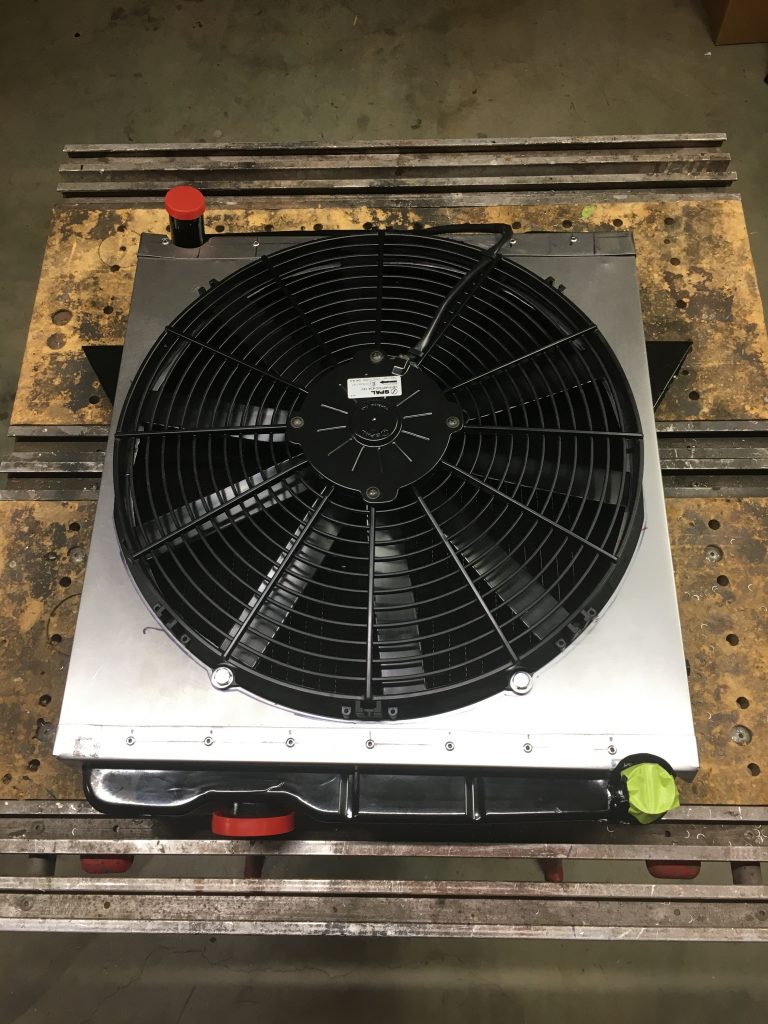
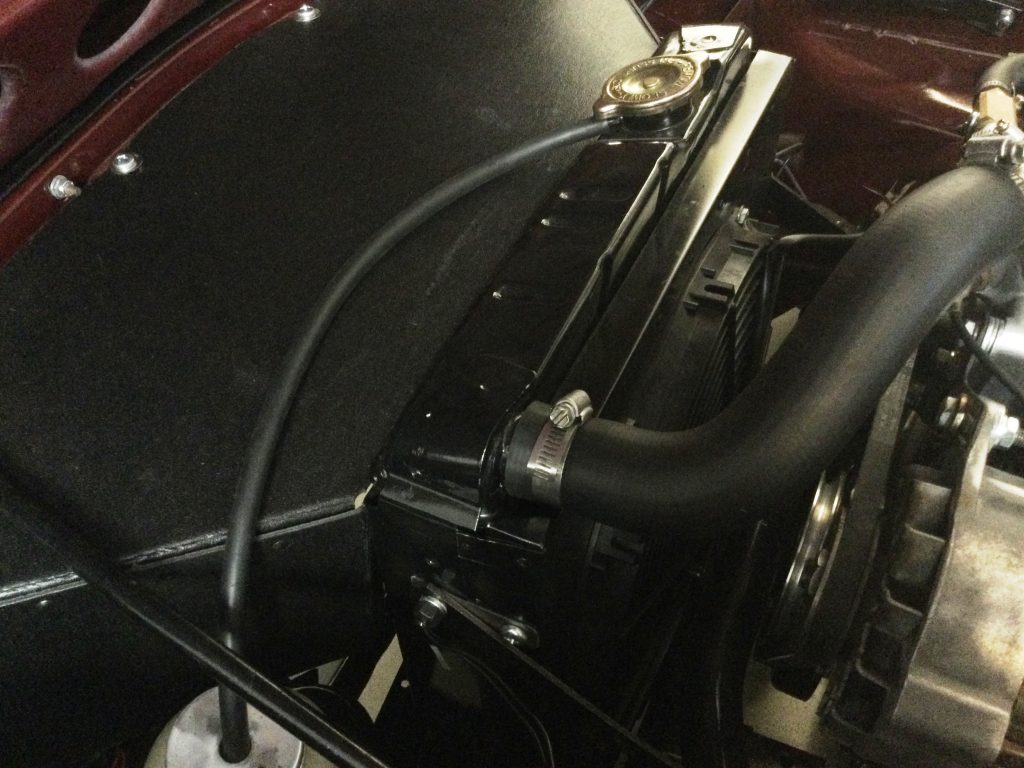
Since I was going to be producing a little more heat with the added power, I decided to use an electric fan and build a shroud for it so that it would draw air through the entire radiator core. I bought the shallowest fan I could find and it fit, just barely. At the end of these TR6 rebuild articles I will make a list of all the parts I bought, and total cost for the project.
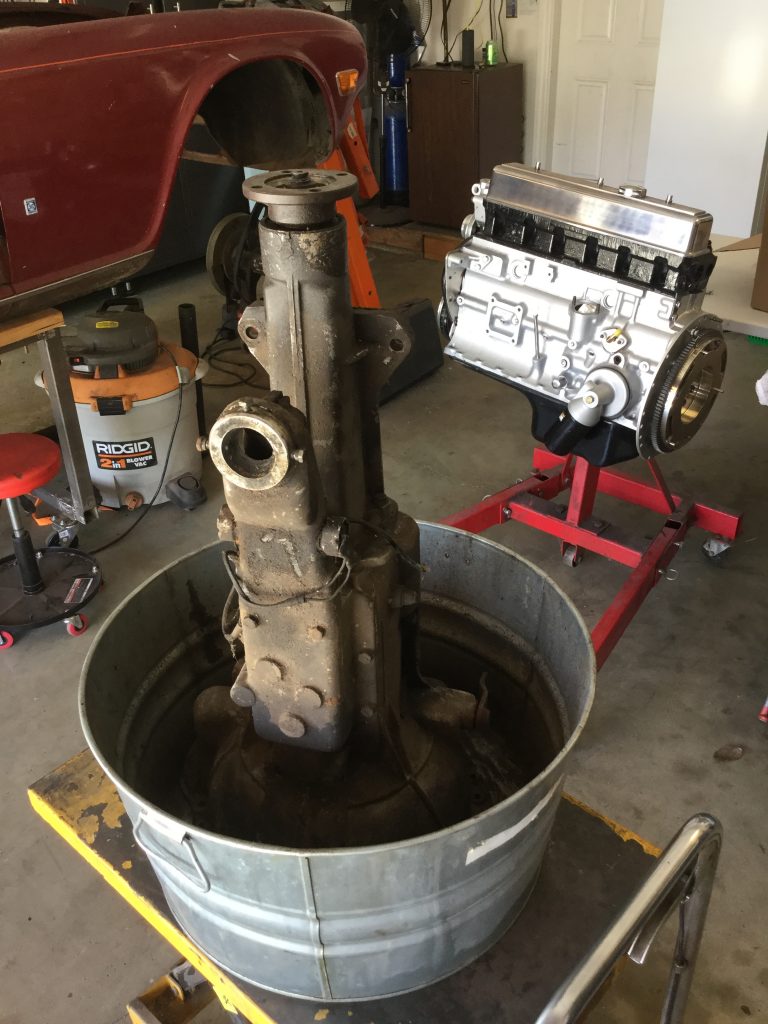
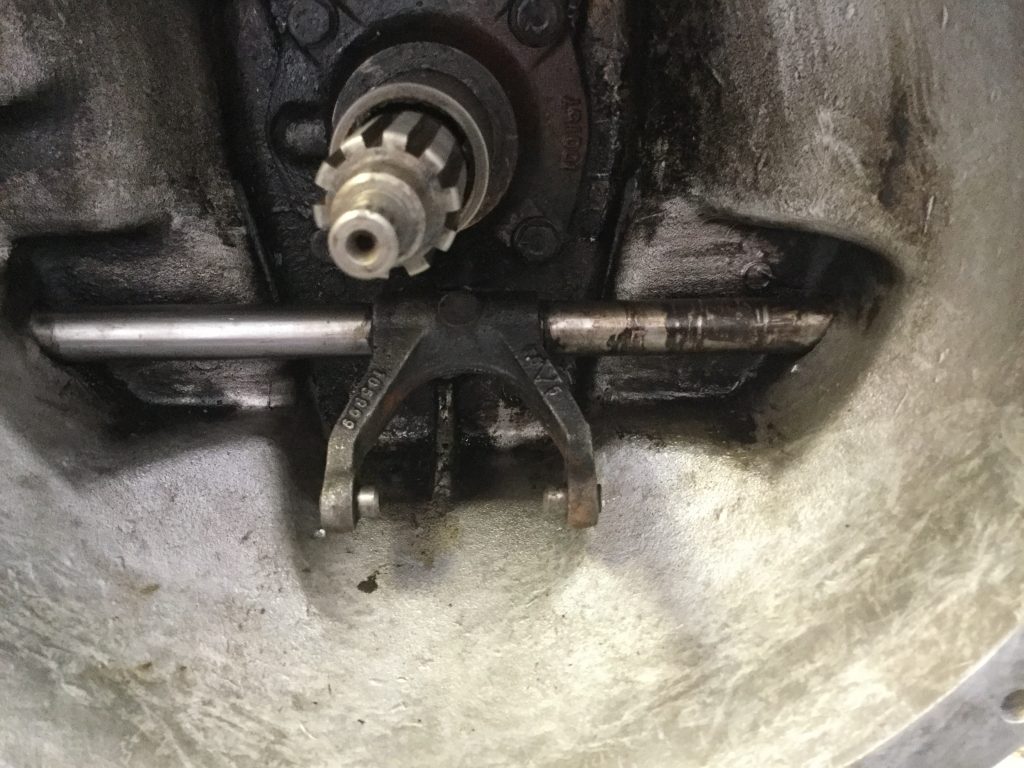
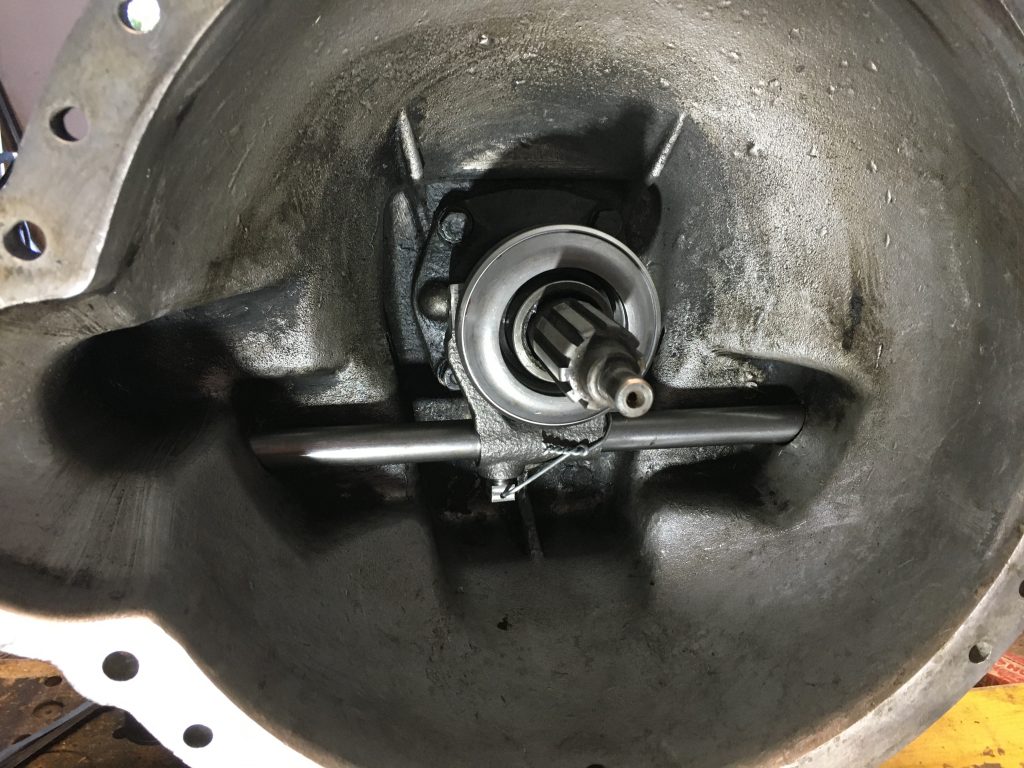

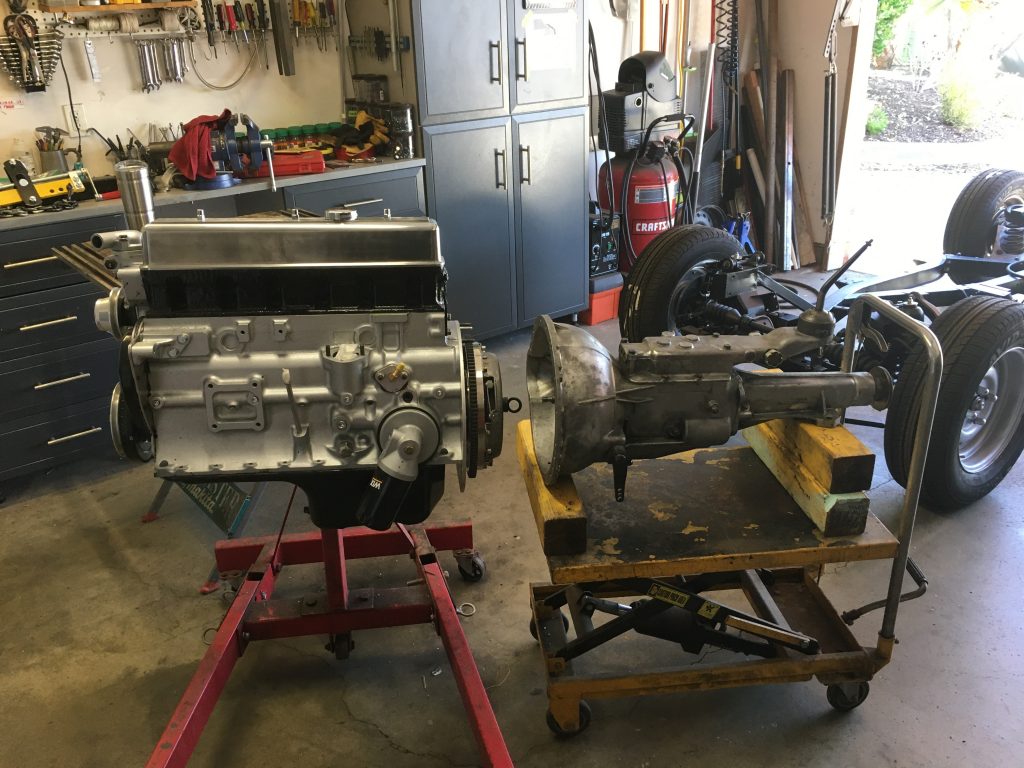
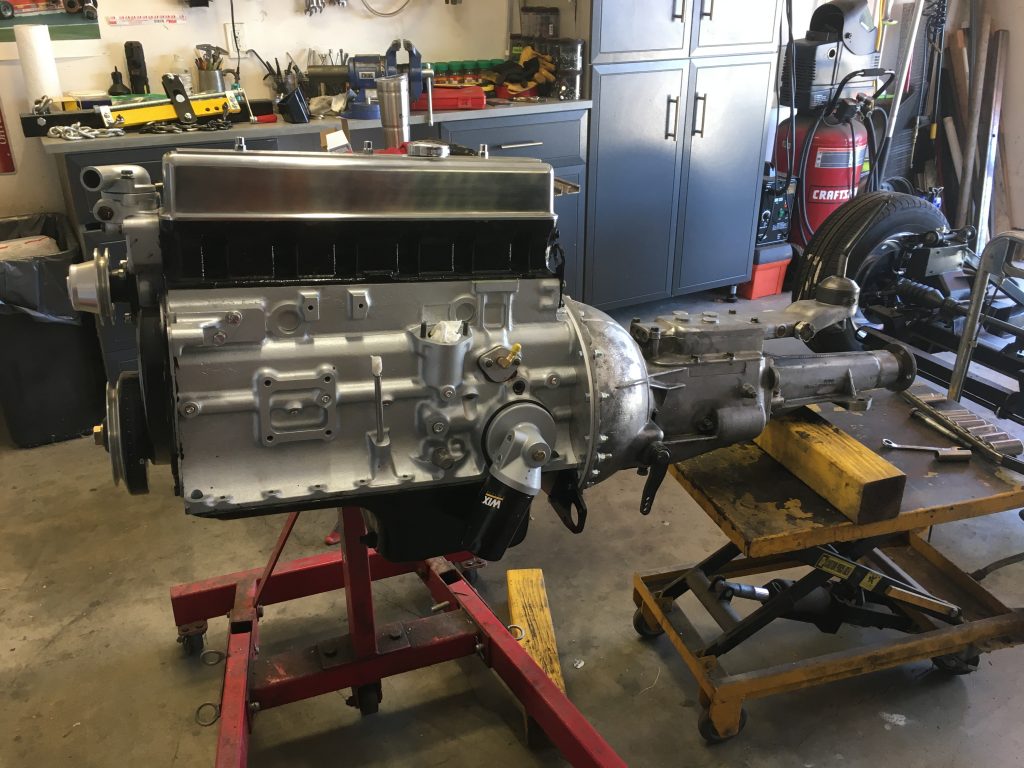
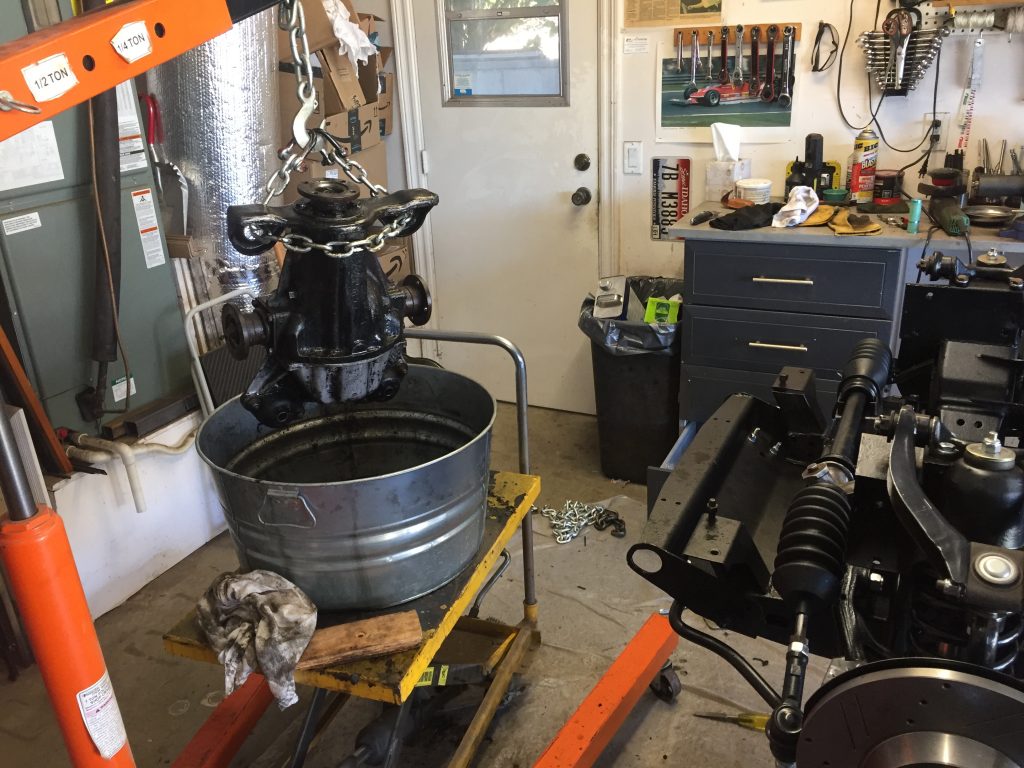
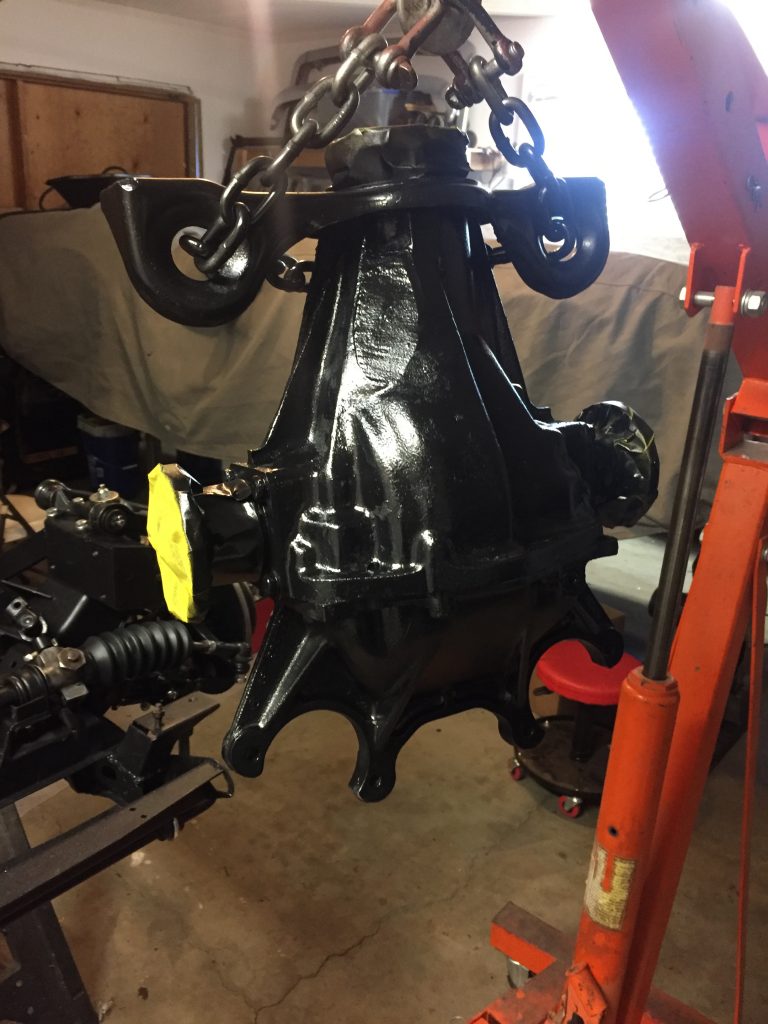

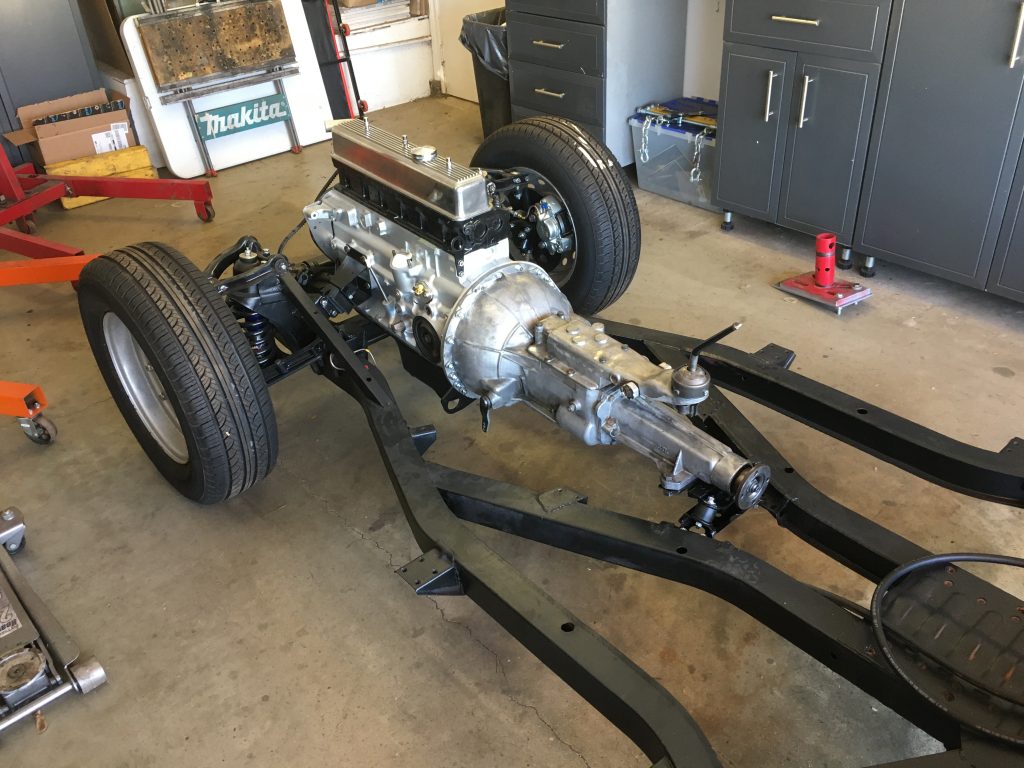
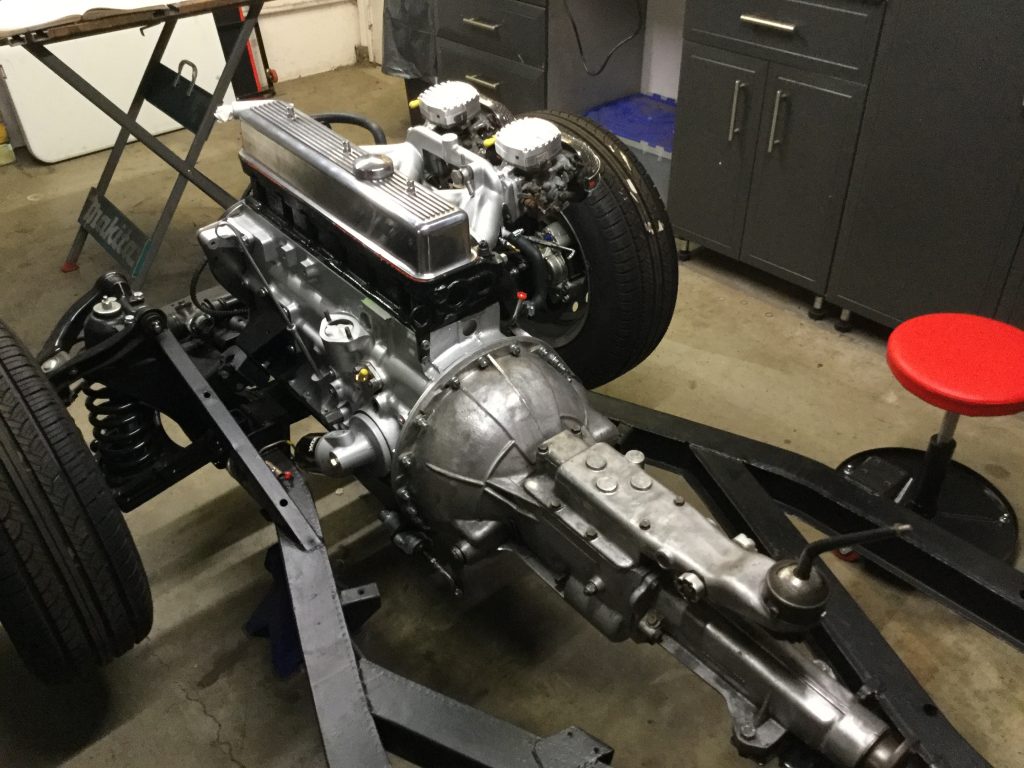

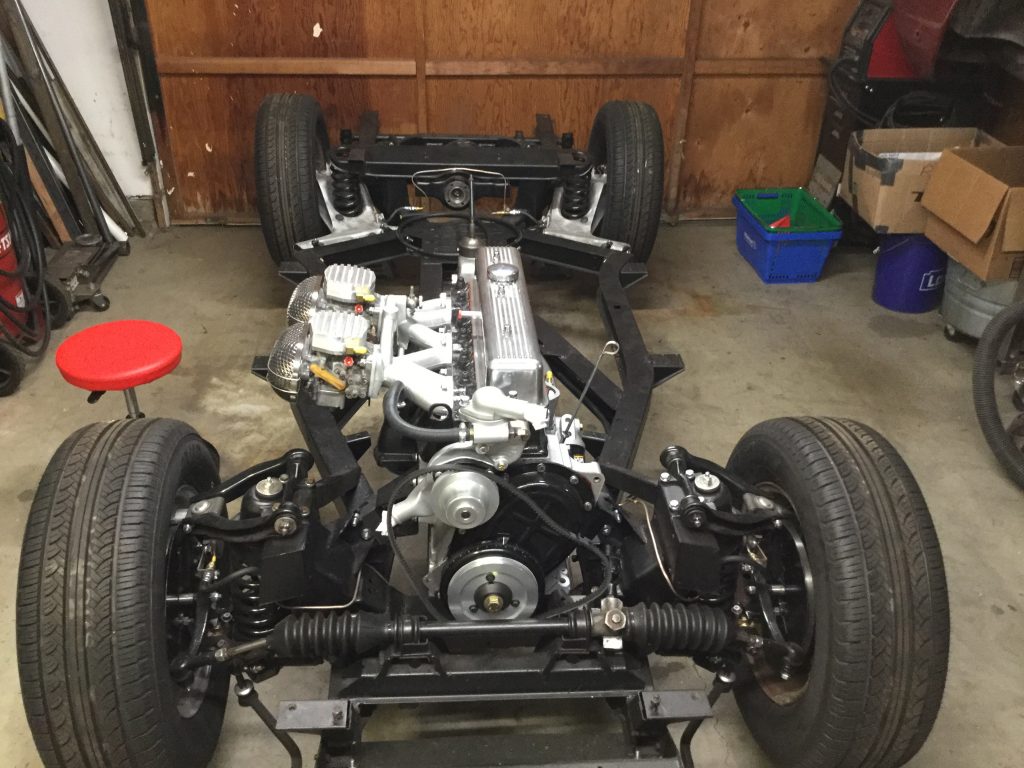

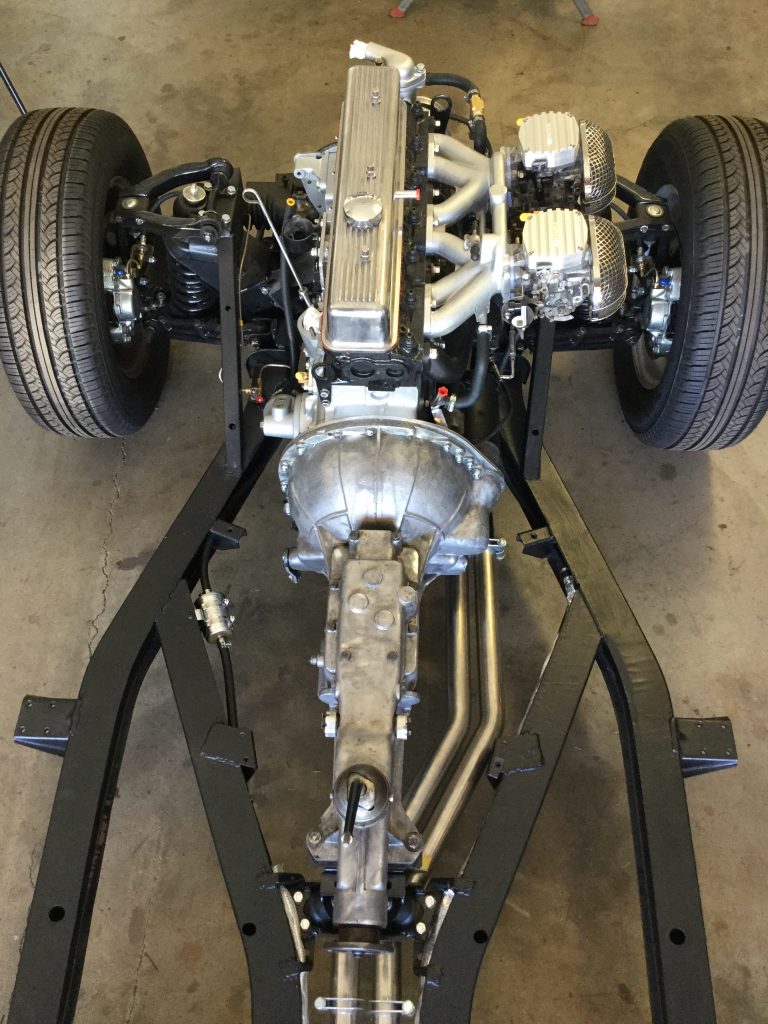
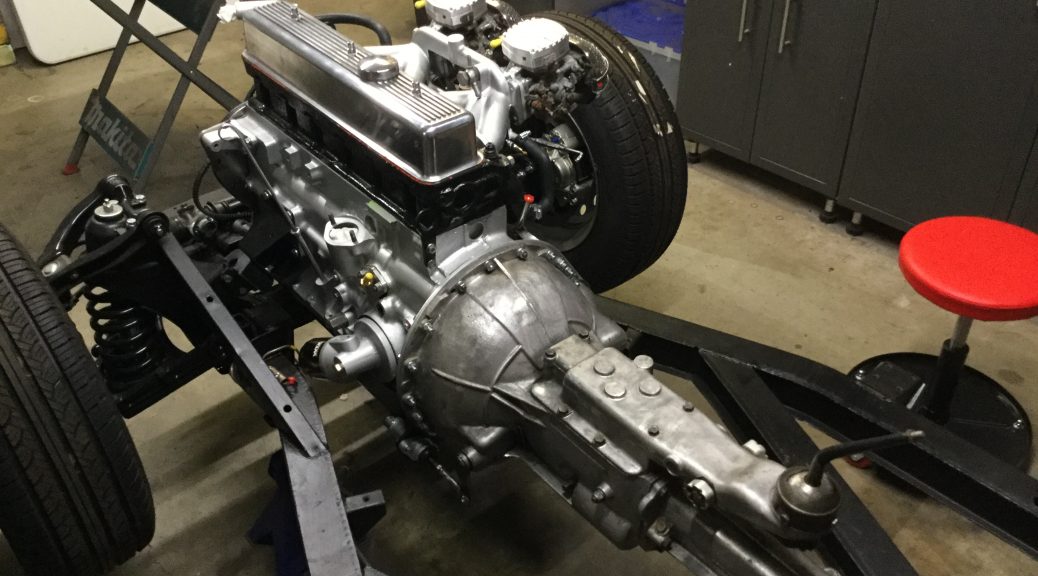
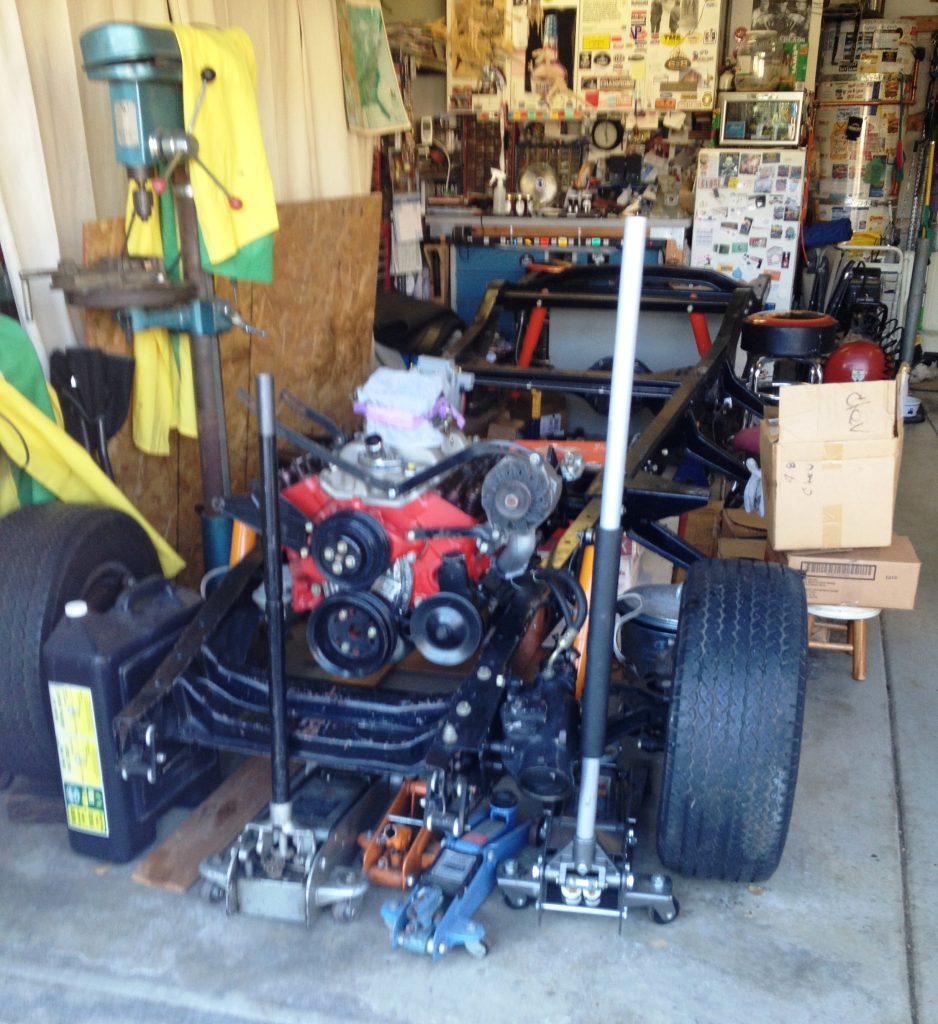
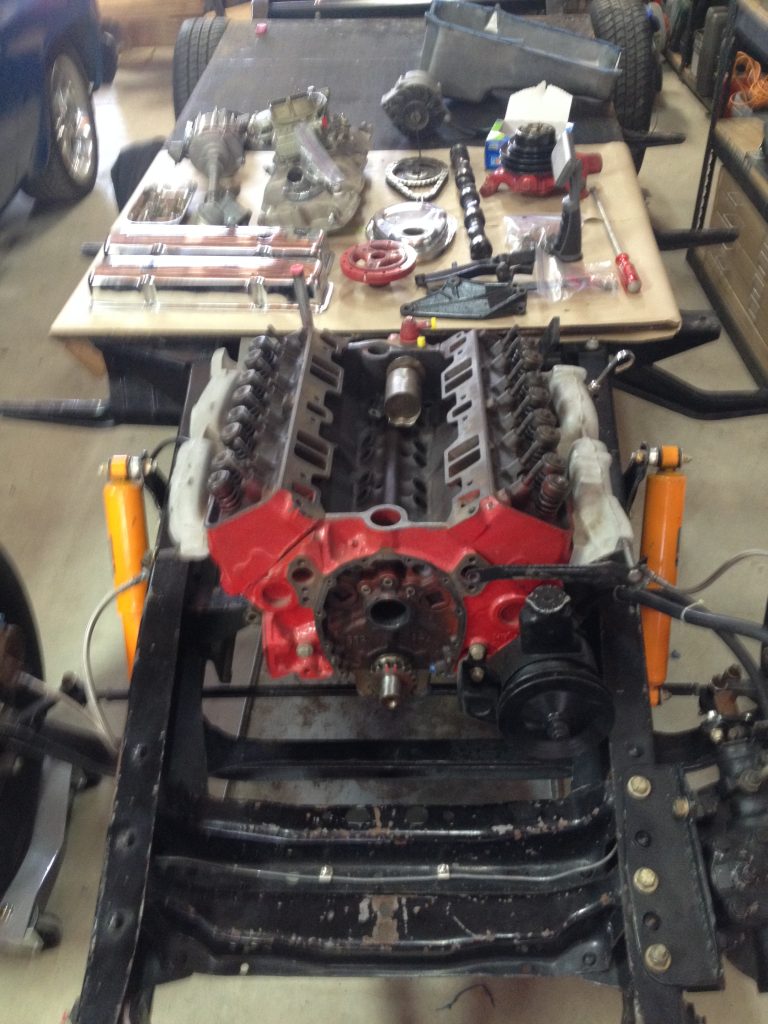
Installing the engine and transmission went smoothly, with the assistance of a friend to guide it into place. The hoist (tempted to capitalize and bold that word, it came in so handy) was used not only for installation, but also for the cleanup of the transmission as I hung it over a tub. The previous owner indicated that it shifted fine so I did not open it up. Just cleaned it, replaced front and rear seals and the clutch bits at the front of the transmission (throwout bearing, fork, and shaft). I did spin the trans with a drill to make sure the gears did in fact work.
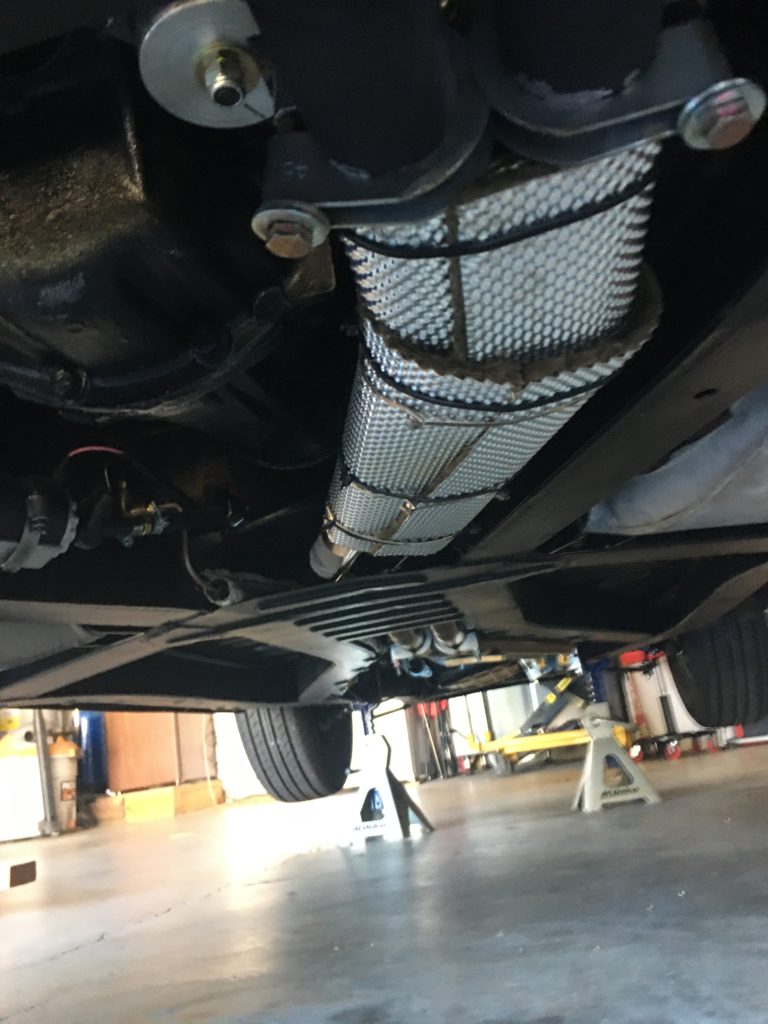
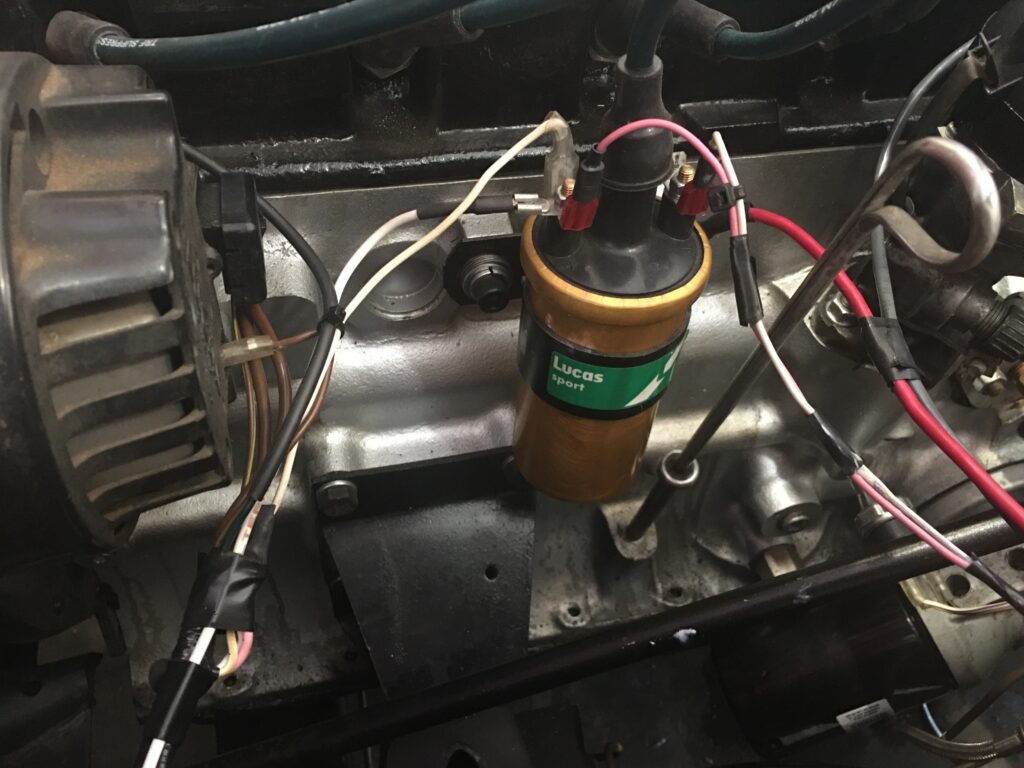
After reading about heat and noise factors in the various forums, I decided to stay with a stock exhaust system. The manifold is stout, the stainless steel pipes guarantee a long life, there was no need to worry about fitting headers, and the exhaust note with the stock system, including the muffler, is perfect.
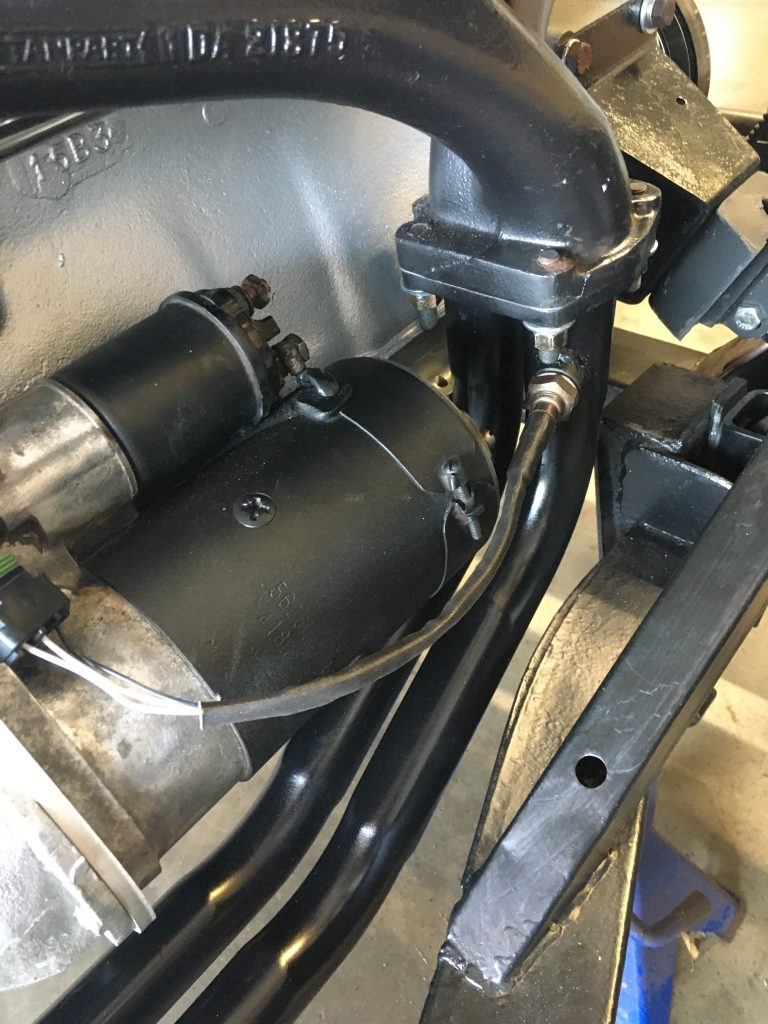
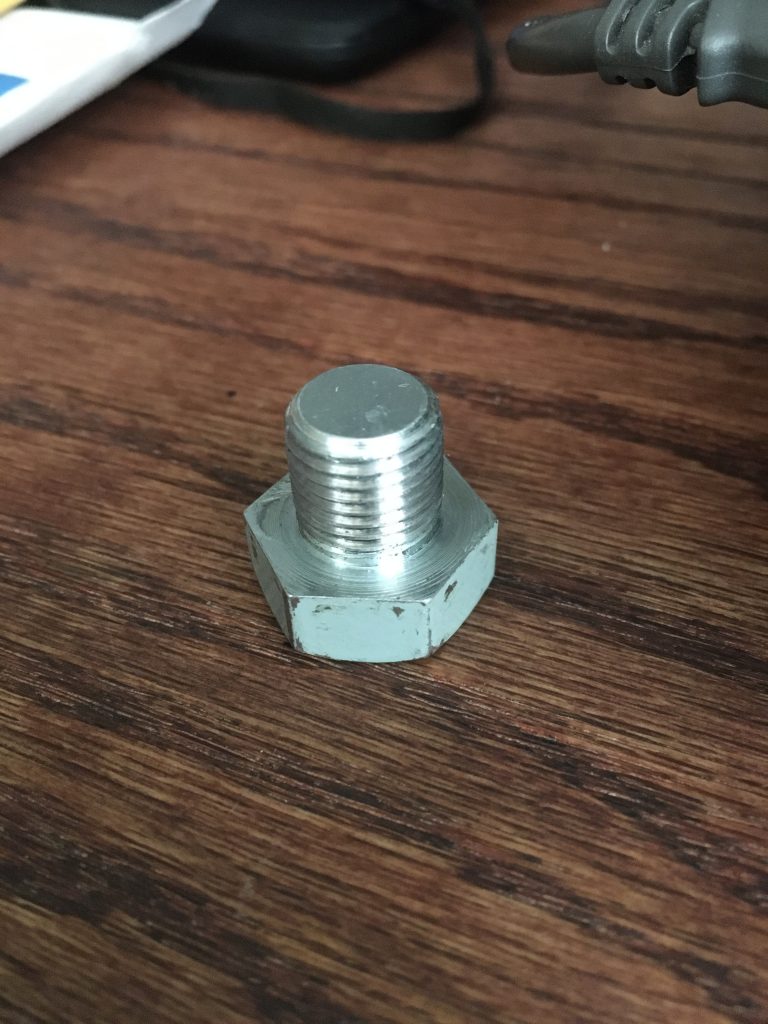
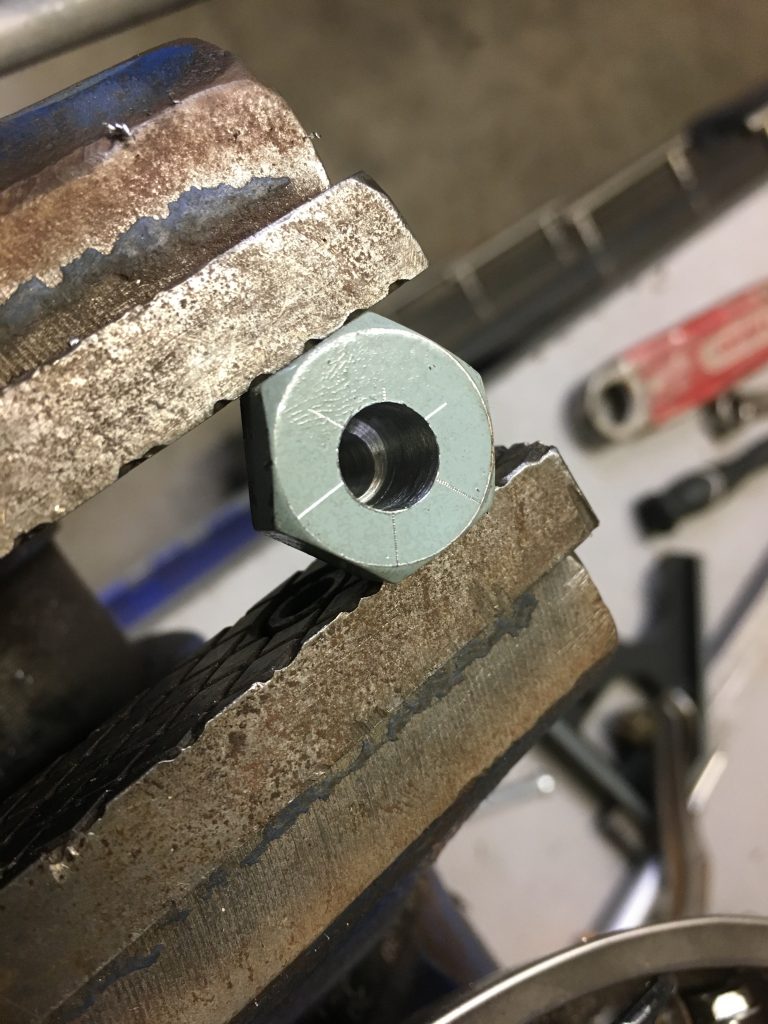
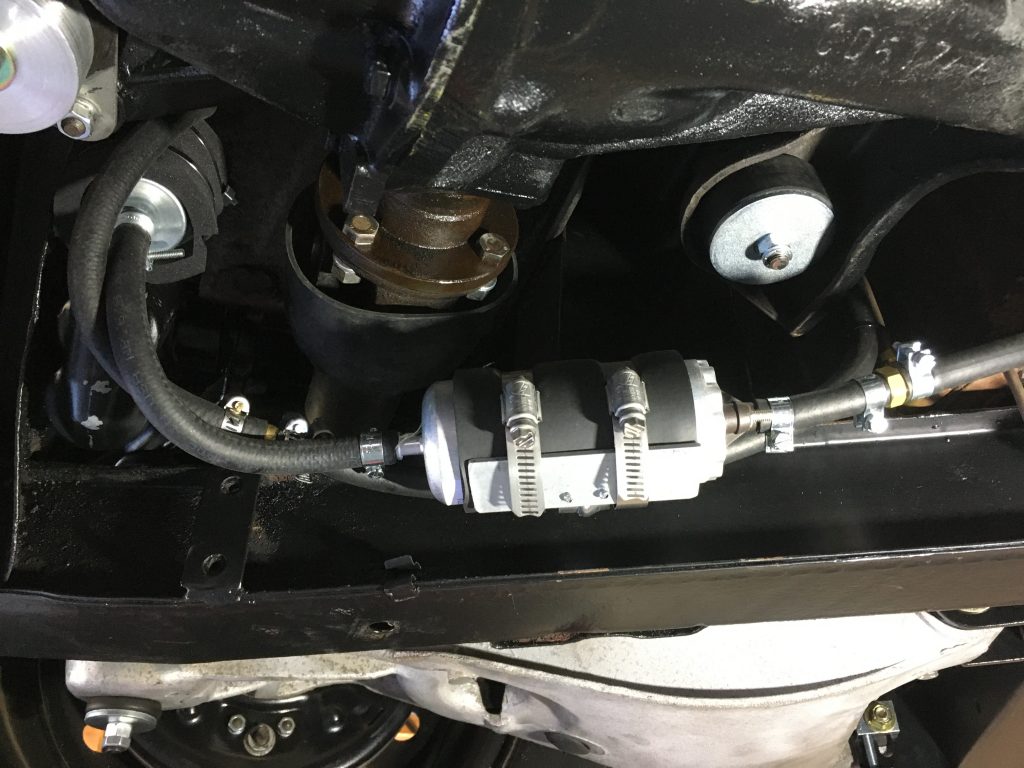
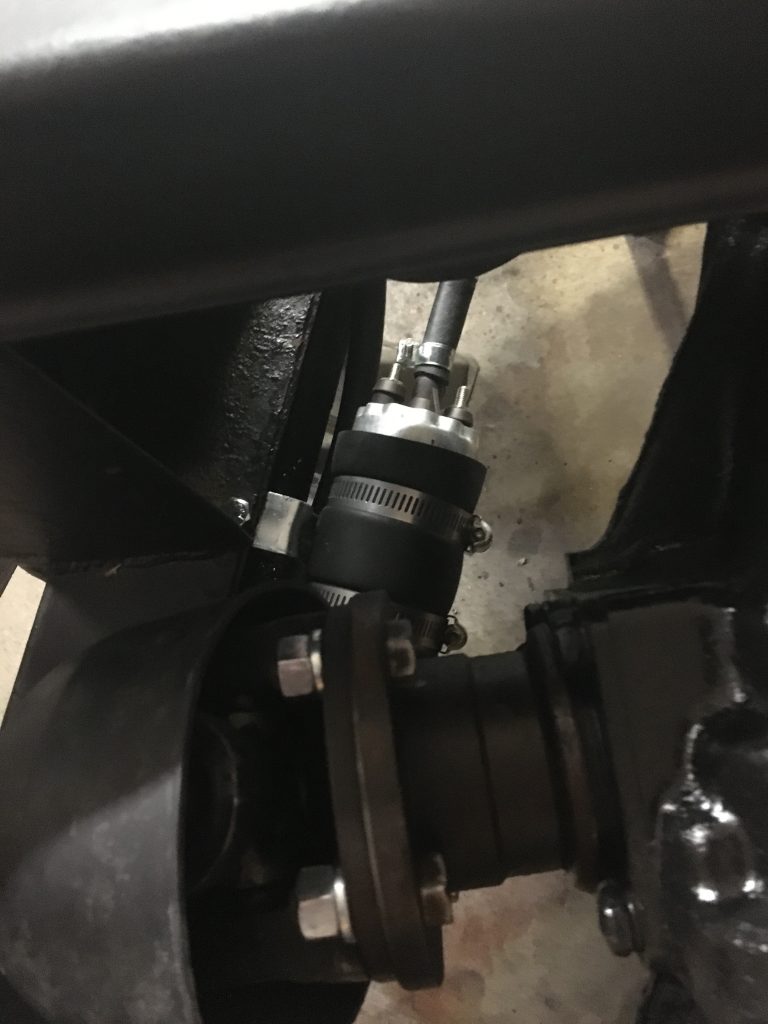
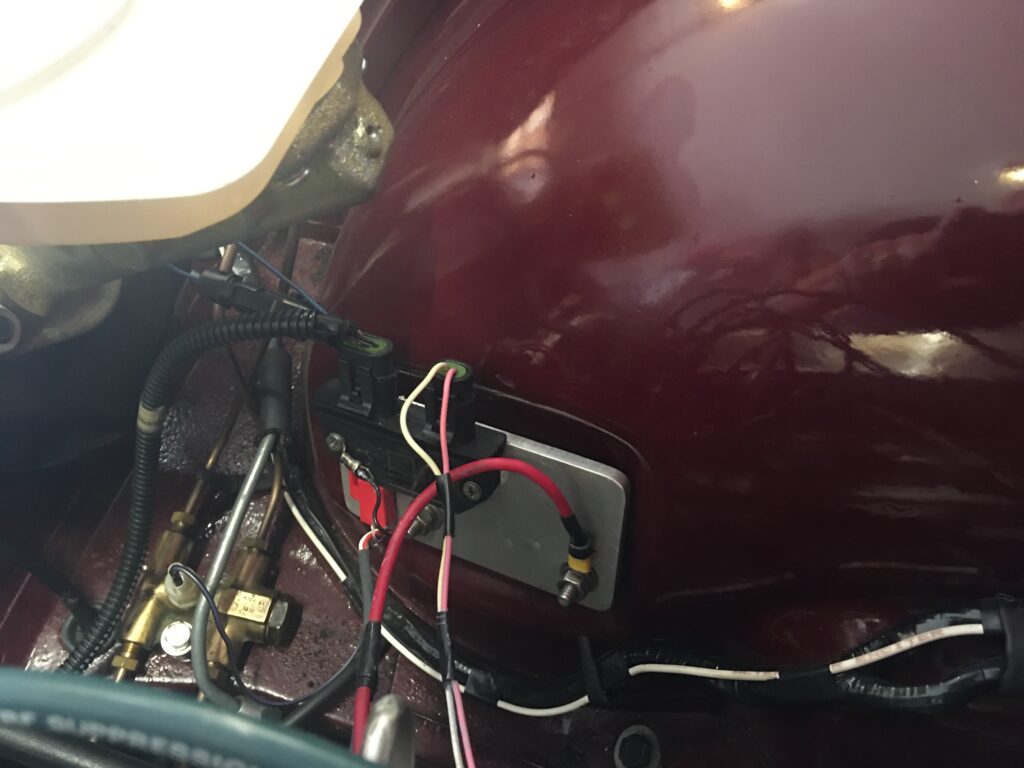
I added a bung into one of the downpipes for the O2 sensor, which is one of the inputs to the TBI computer. It just barely cleared the original starter, so I could have aimed it slightly more to the outside. Of course a single downpipe would have made more sense for the O2 reading but the ’73 is the dual downpipe manifold system so the bung was welded into the more accessible outside downpipe. It seems to work fine this way… no problems with the way the engine starts and runs.
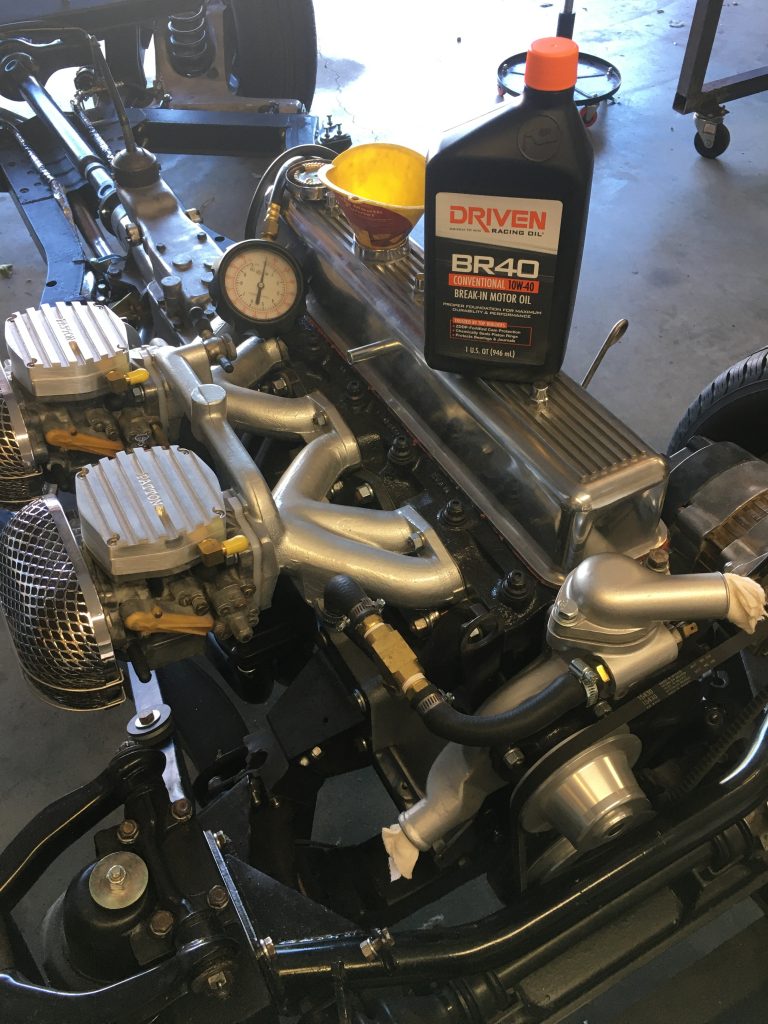
Even though I was months away from actually starting the engine, I decided to fill the engine with oil and spin the oil pump with my drill to make sure I had oil pressure before going any further. I used Driven 10w40 break in oil.

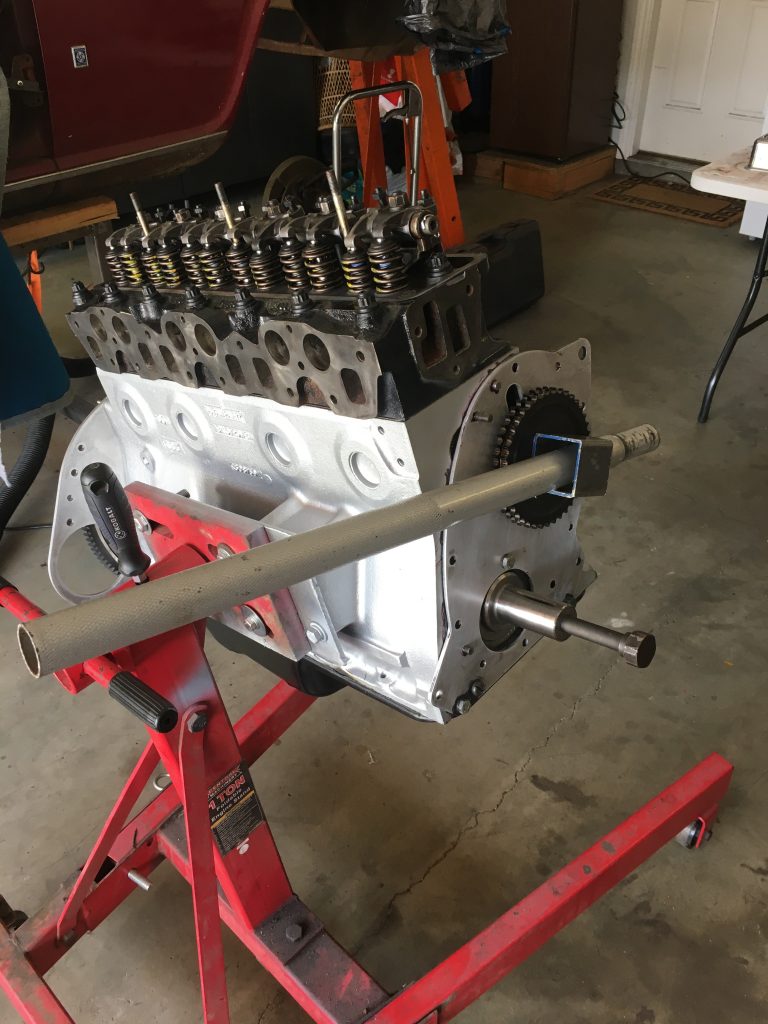

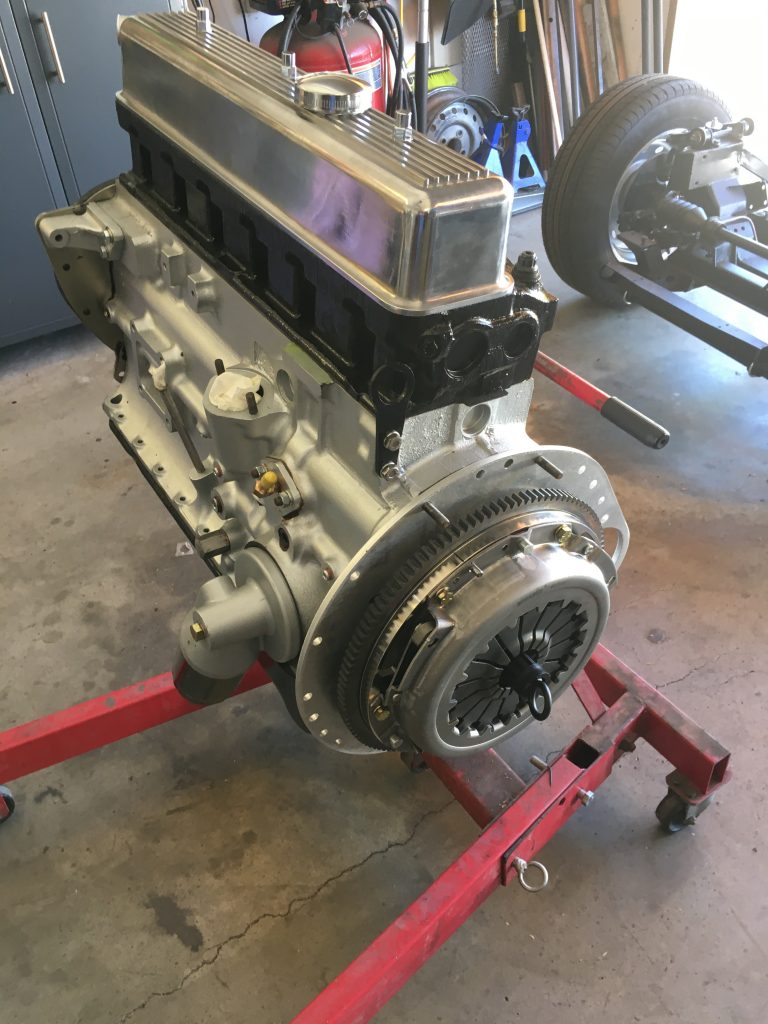

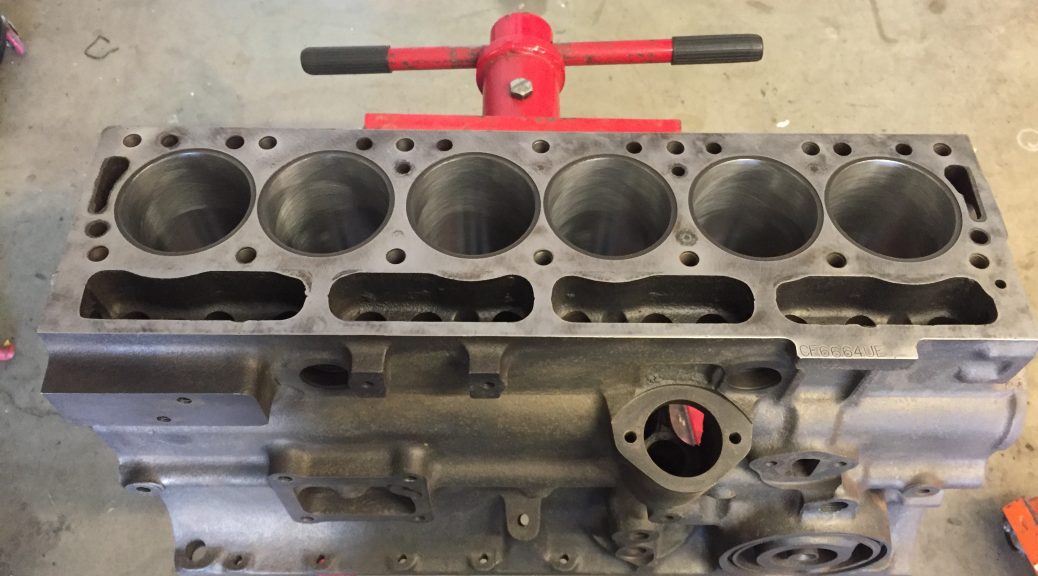
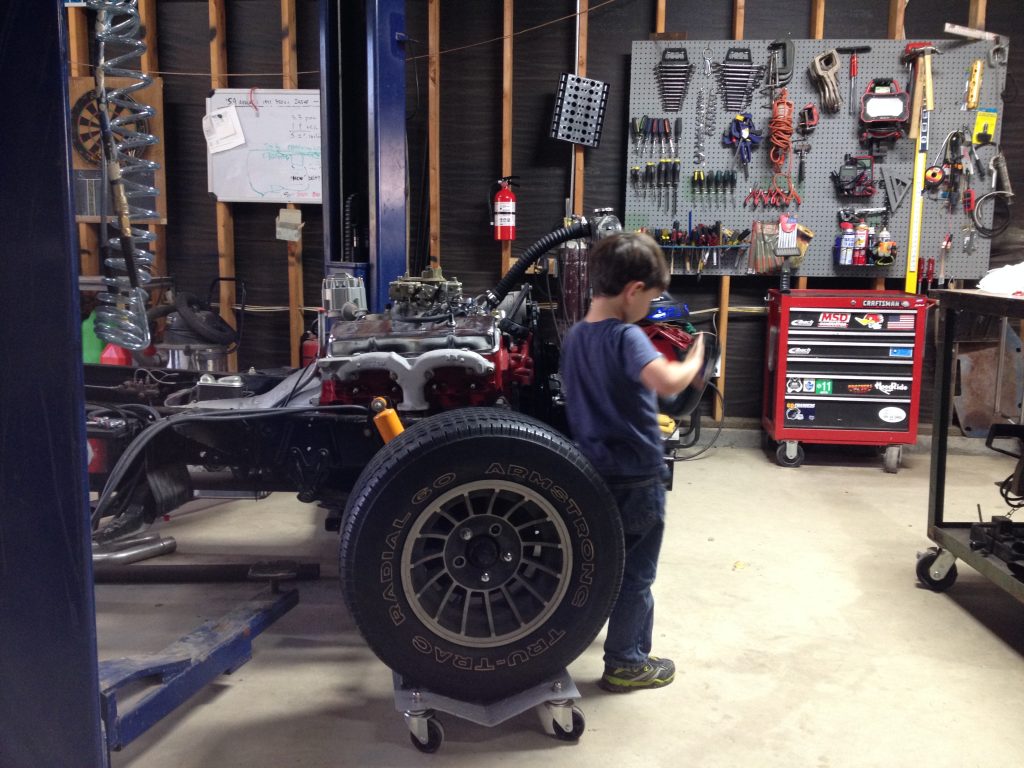
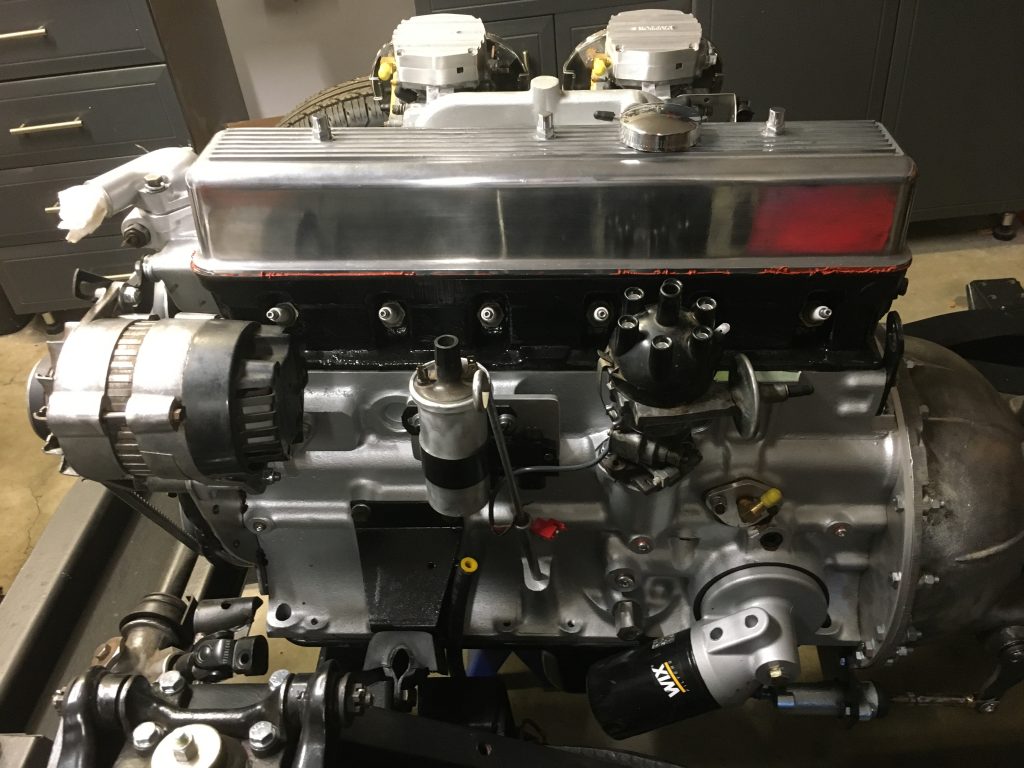
Naturally I wanted to do everything correctly in restoring the Triumph, but if there was one particular part of the build that REALLY needed to go right, it was the engine assembly. Pulling the engine and trans back out because something was screwed up is the last thing anyone would want to do. This is not my first rebuild, in fact there’s a write up of the SBC Chevy engine for the Apache truck elsewhere in barndogtrucks. But the Triumph engine was new territory for me compared to the Chevy engine. Thankfully we have our great shop manual available, plus live help from vendors like Richard Good and Casey over at HDS Machine shop. And, of course, the fantastic British car forums.
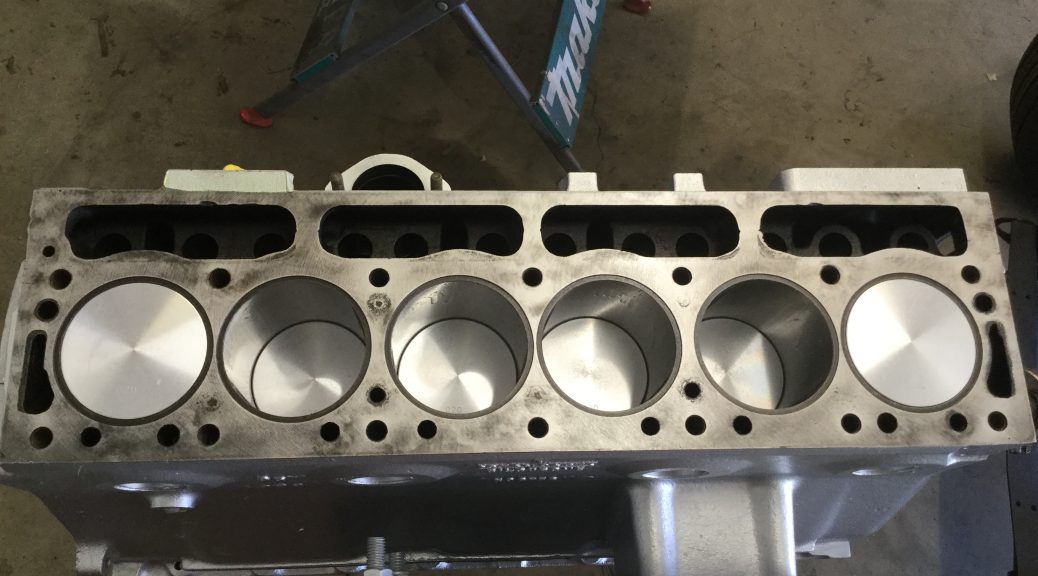
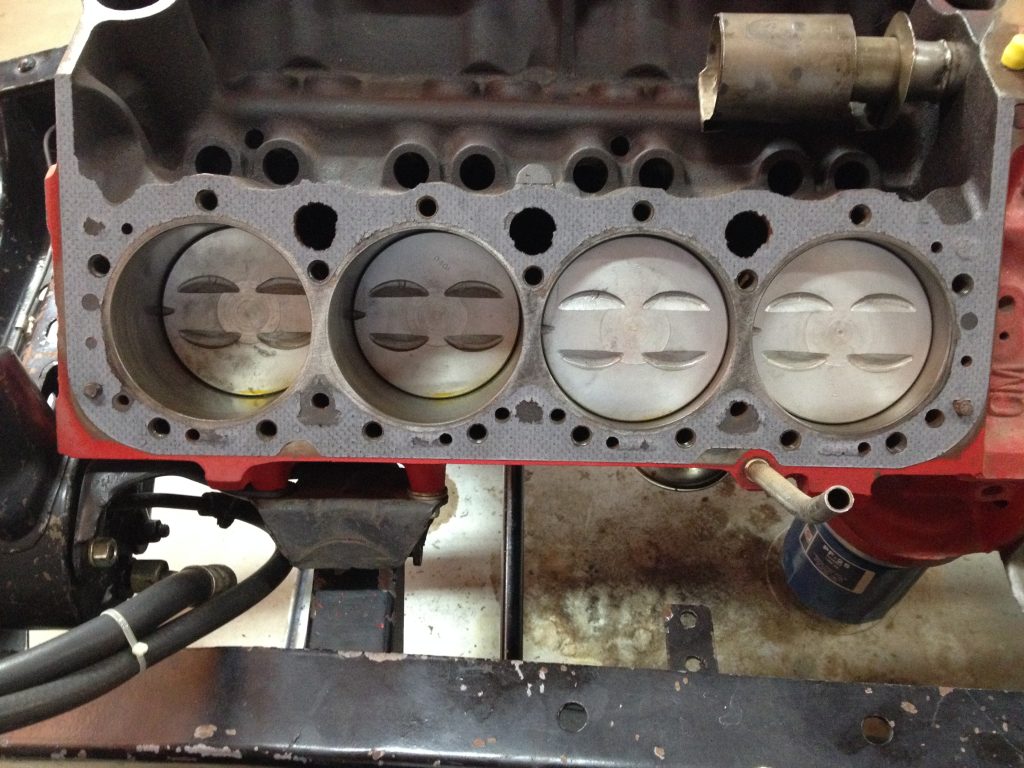
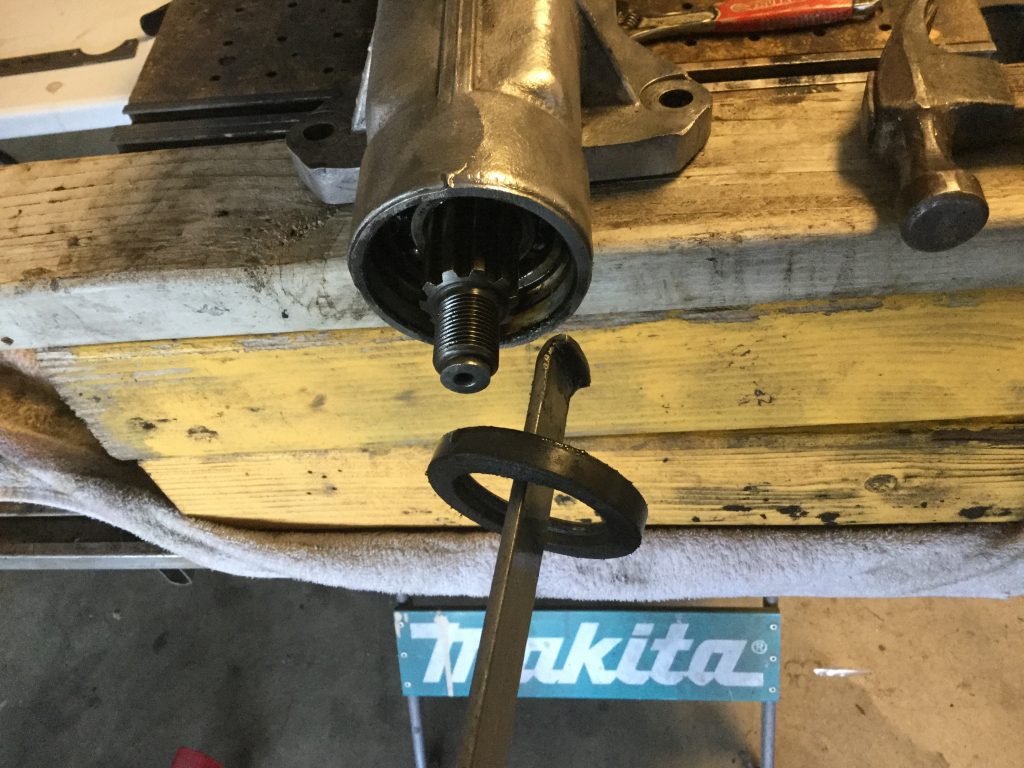
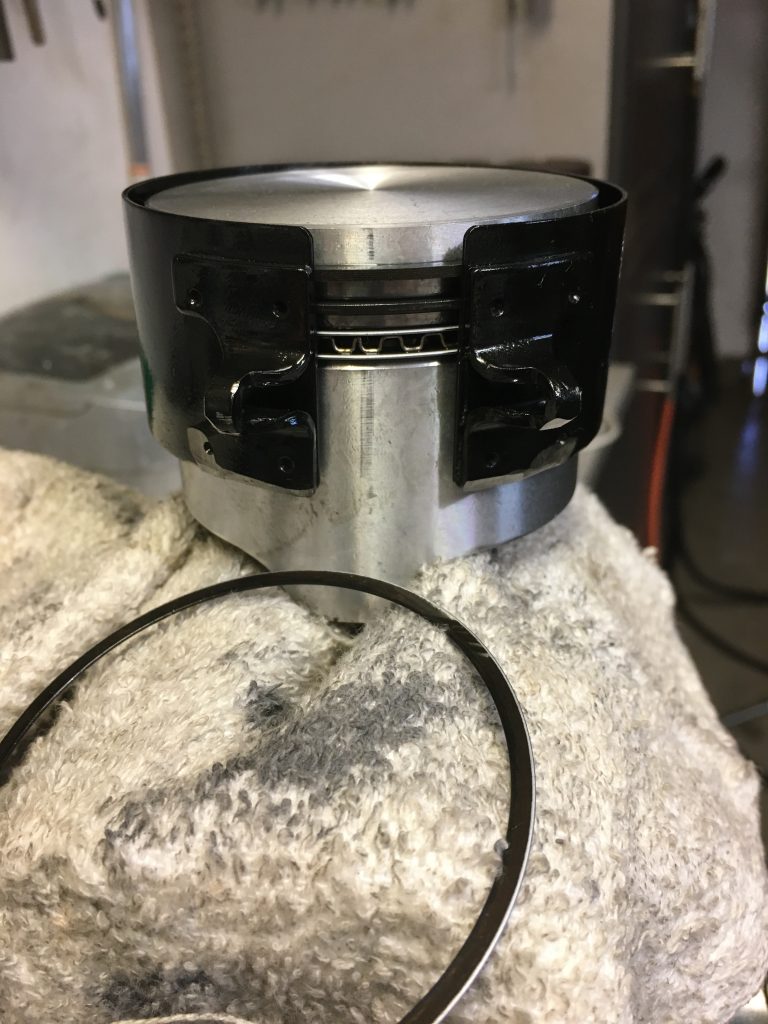
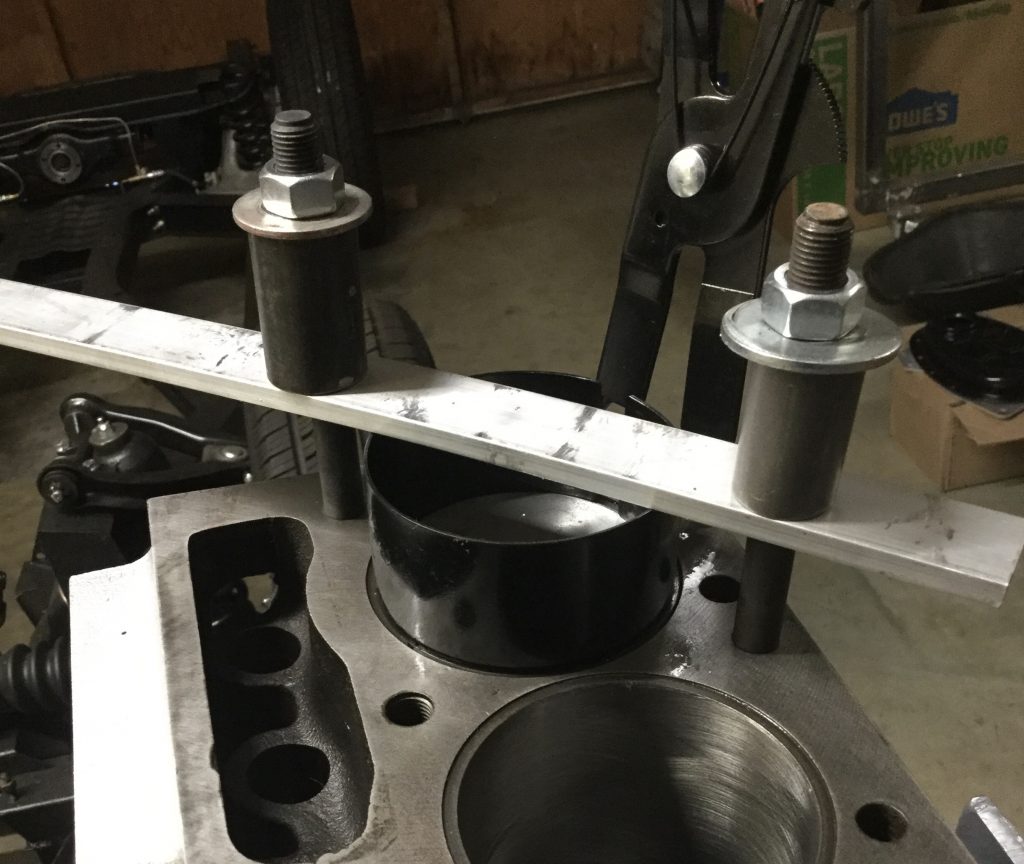
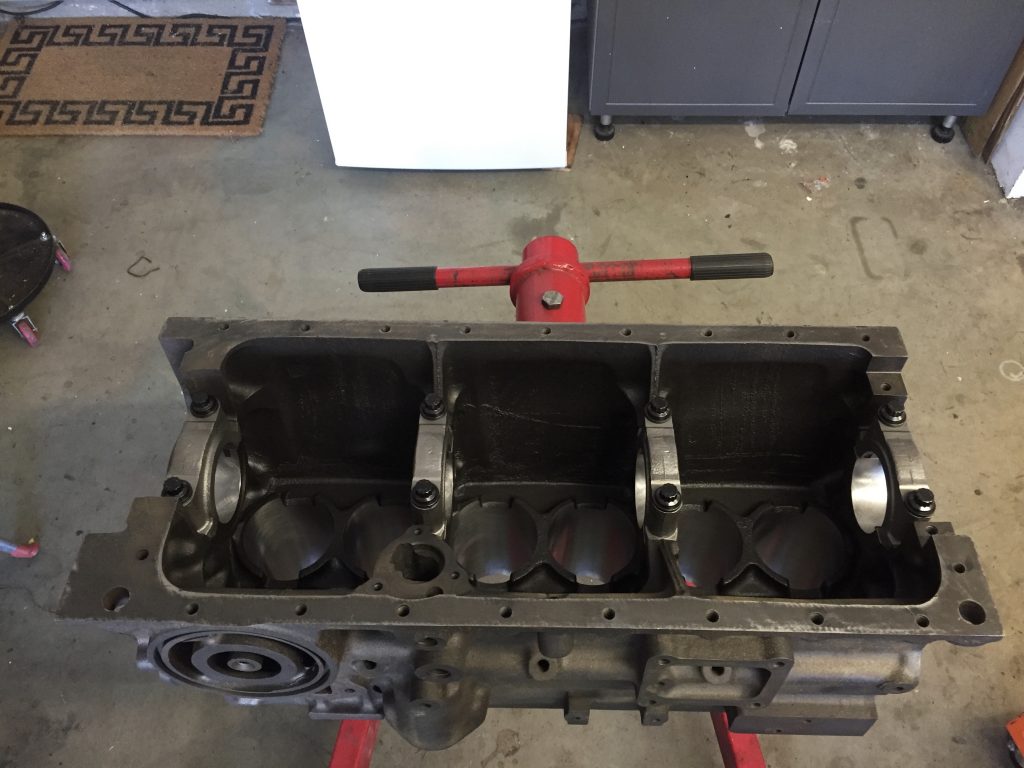
I had a bit of an issue installing the pistons with the pliers style ring compressor. By hand, I could not hold the compressor down firmly enough to squeeze the rings into the cylinders. As depicted above I came up with a solution that made it a breeze. With the Chevy engine I had the advantage of a tapered ring compressor which really made it simple. No such thing seems to exist for the Triumph bores. I do like the pliers style compressor with the locking ratchet, but that recess at the top of the block complicated things for me, thus the mechanical help holding the compressor down.
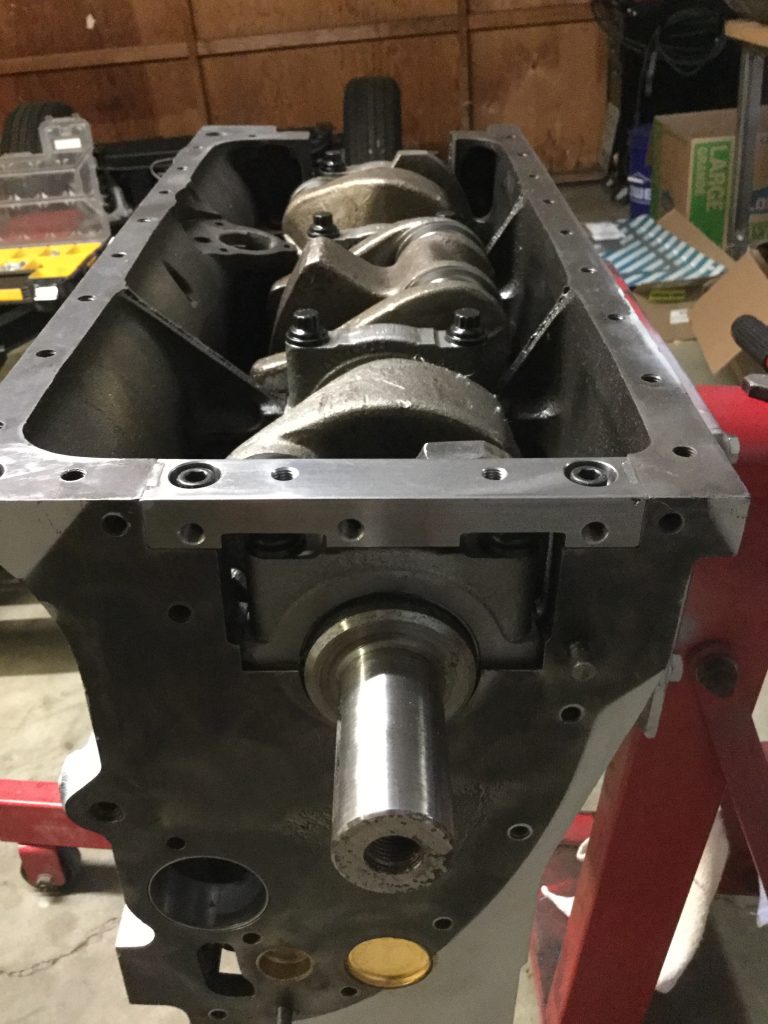
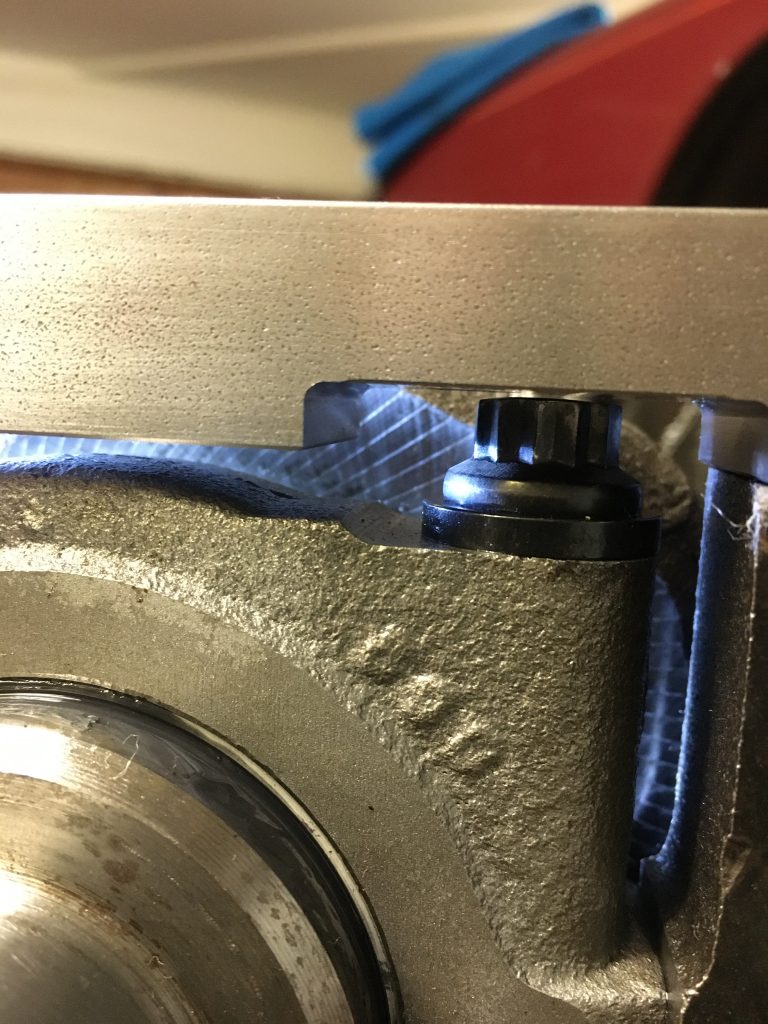
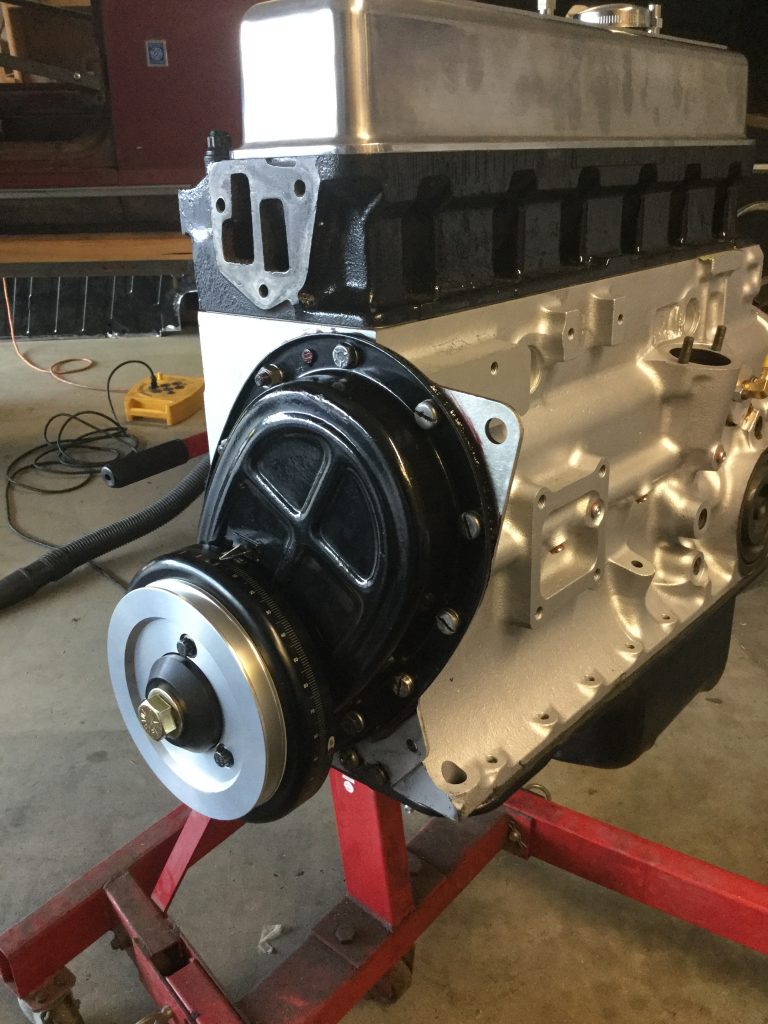
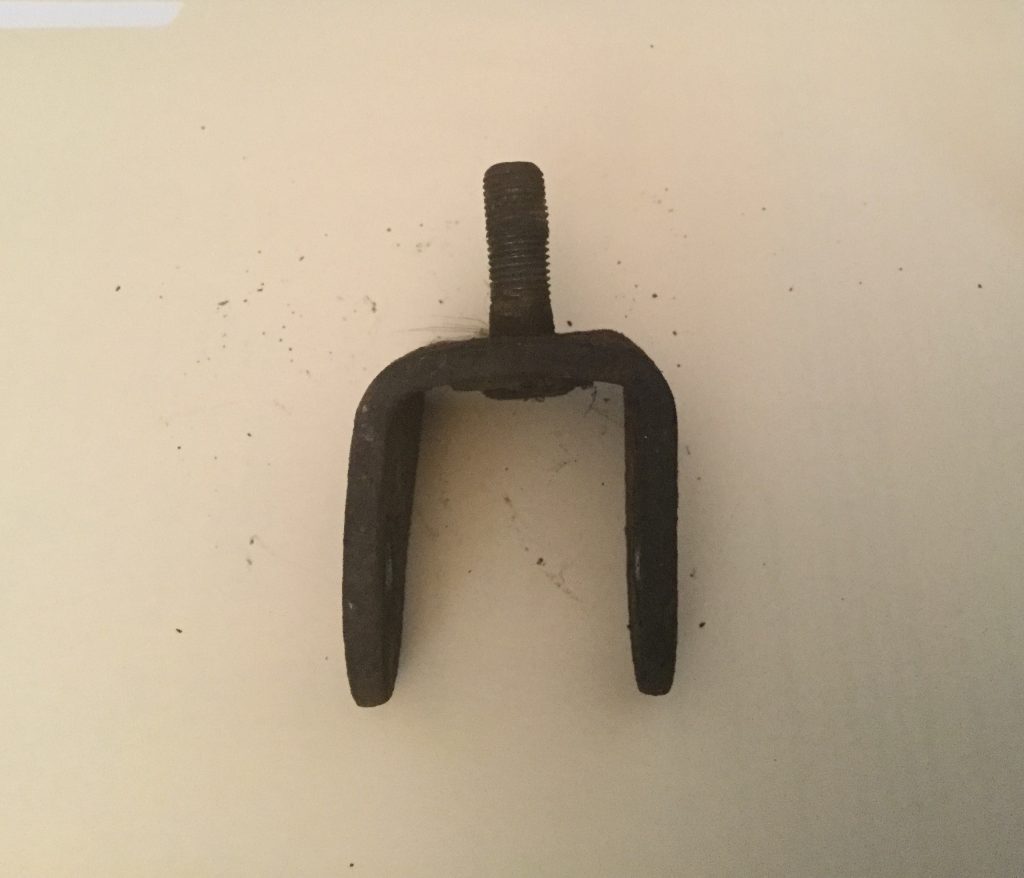
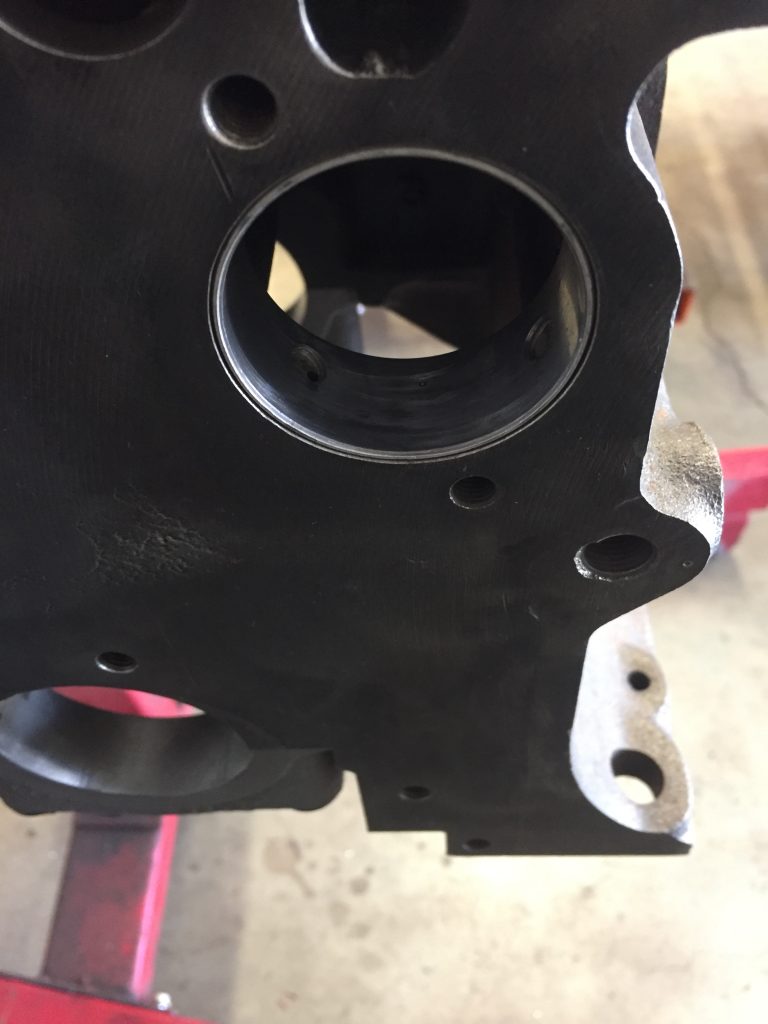
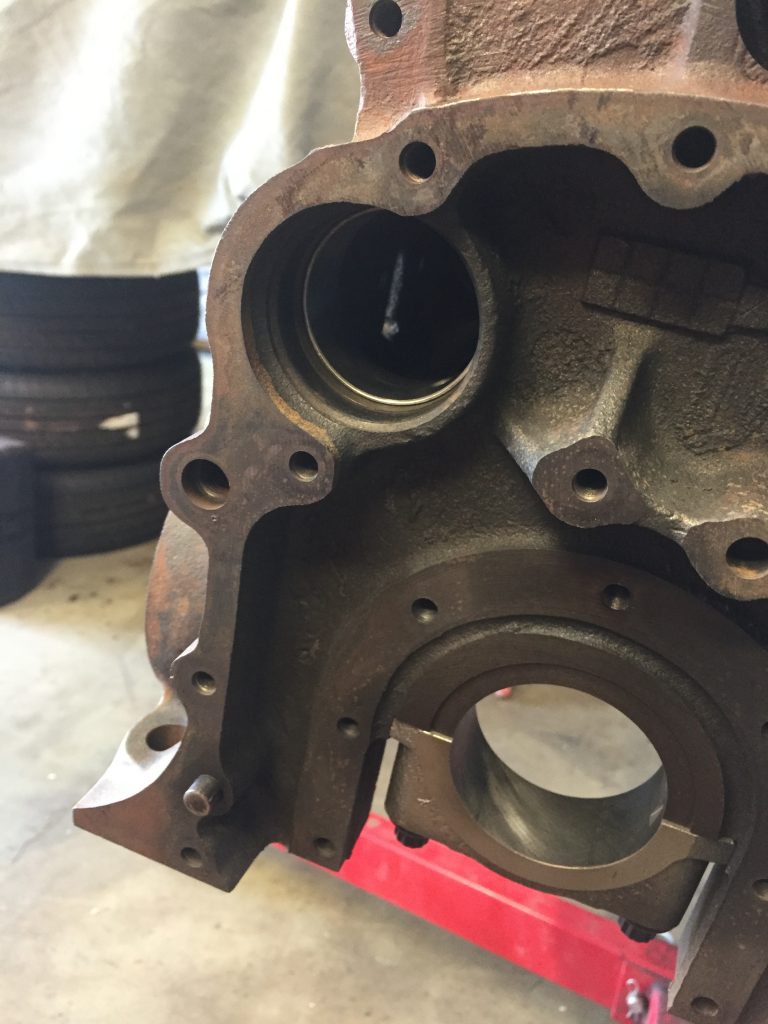
I chose to use Classic Technologies steel sealing block for the front of the engine for my peace of mind. However, I had to grind down the top of the ARP main bearing cap bolts for clearance.
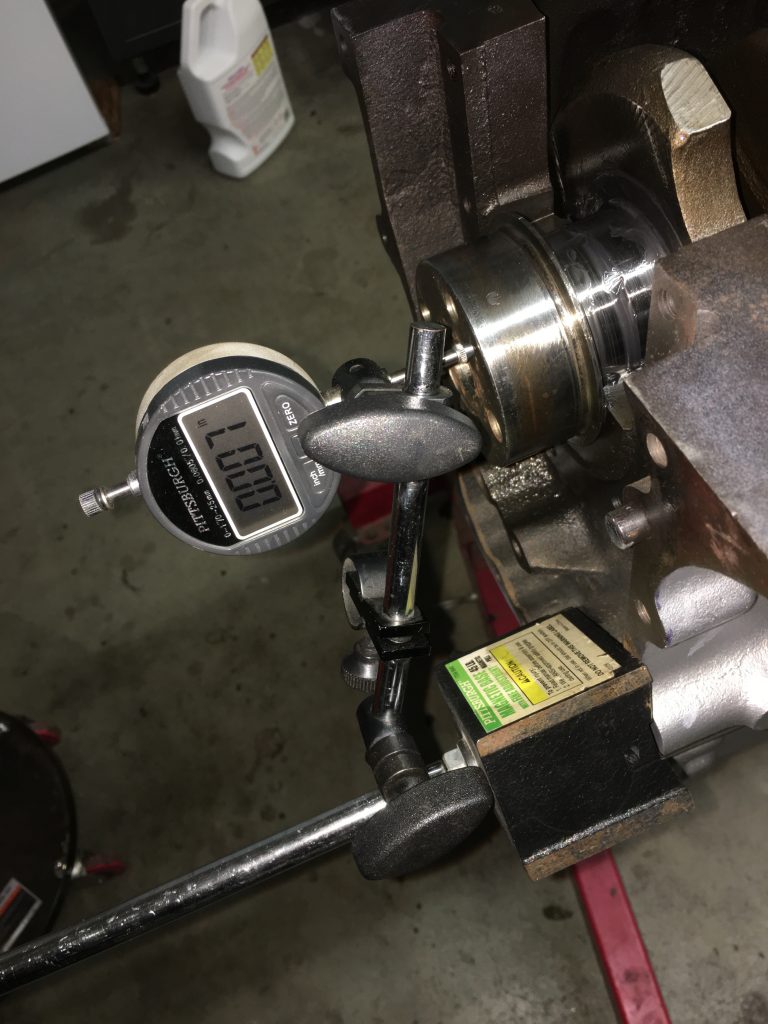
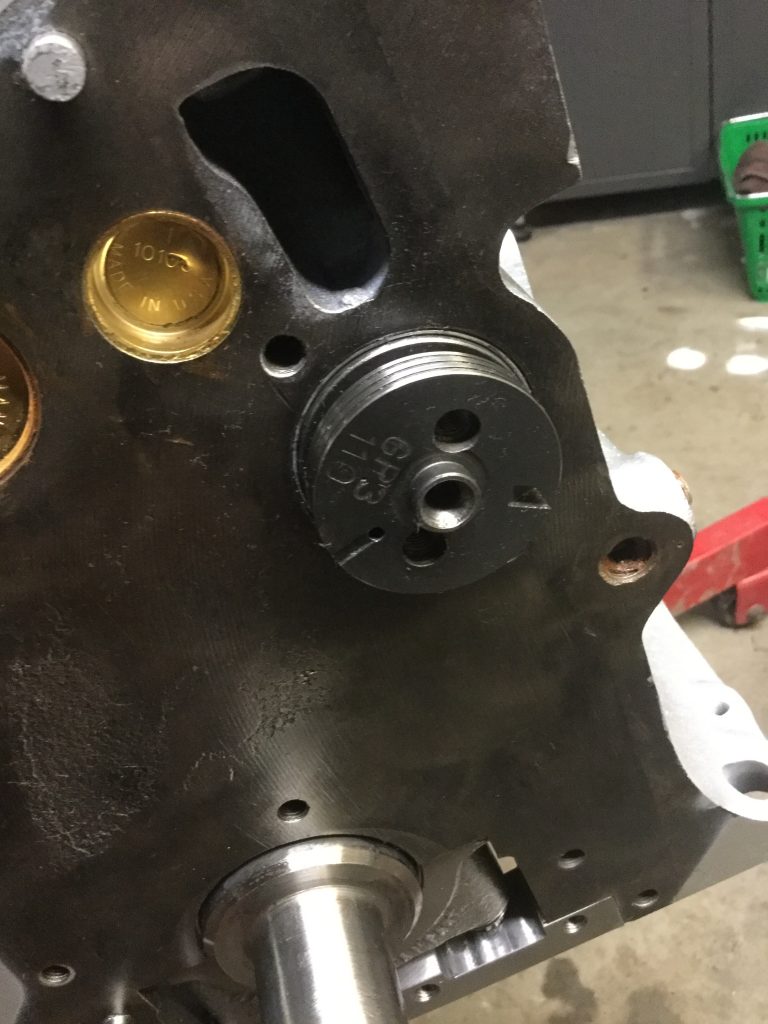
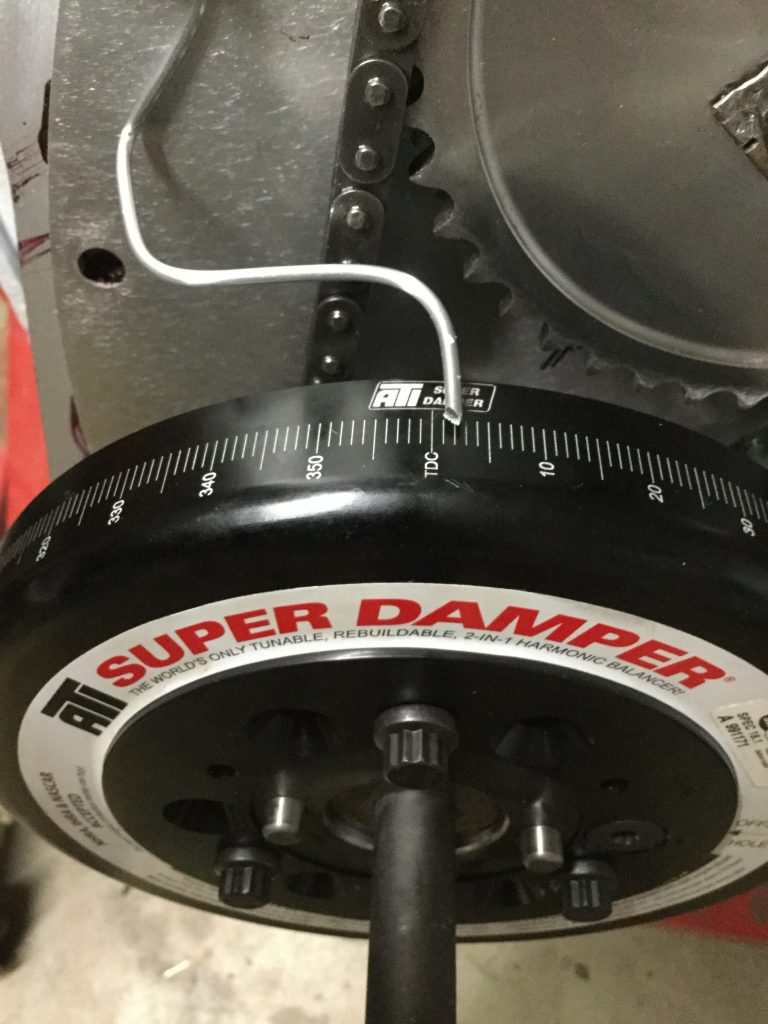
With help from Richard Good and a magnetic dial indicator, setting up the camshaft was pretty straightforward. It is great to find people who back up their sales with enthusiastic customer service, and I encountered that throughout the restoration of the TR6 with Richard and everyone else along the way. He spent a good amount of time on the phone with me diagnosing a problem I found AFTER the car had been driven for a few weeks. My bad, of course…
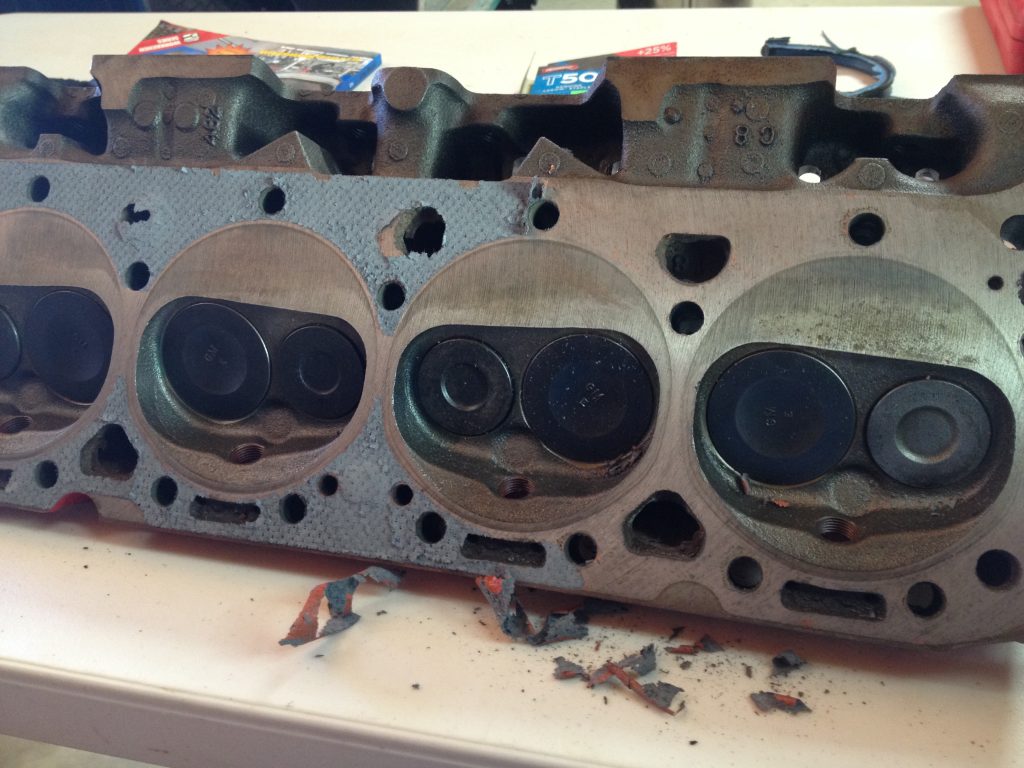
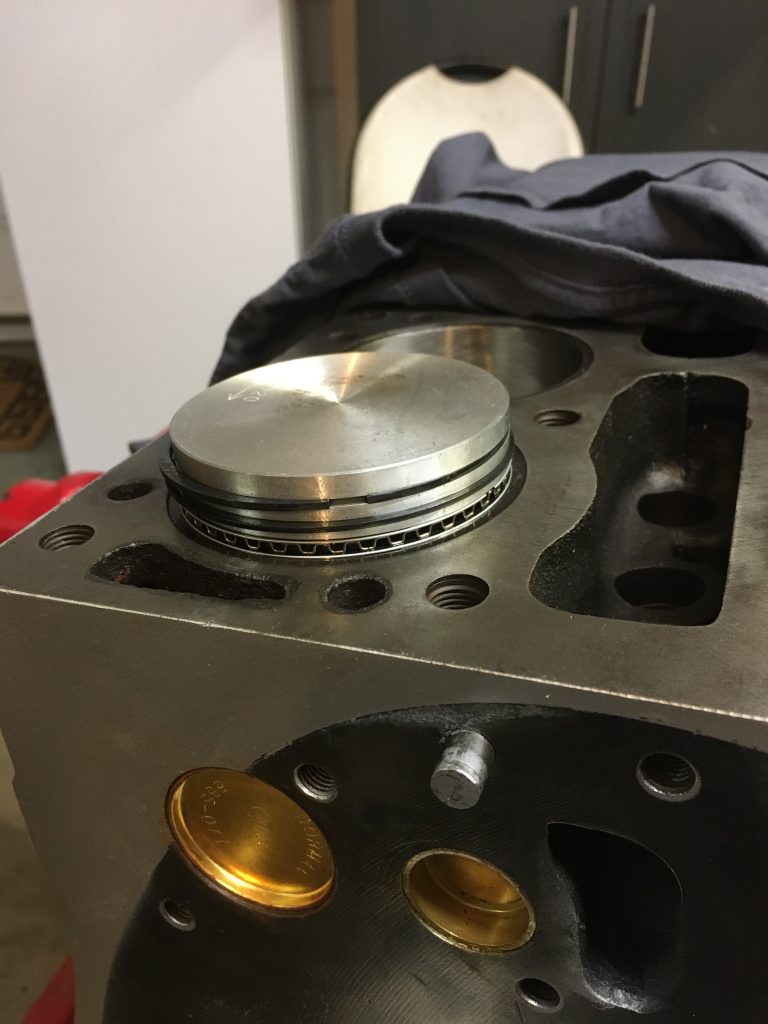
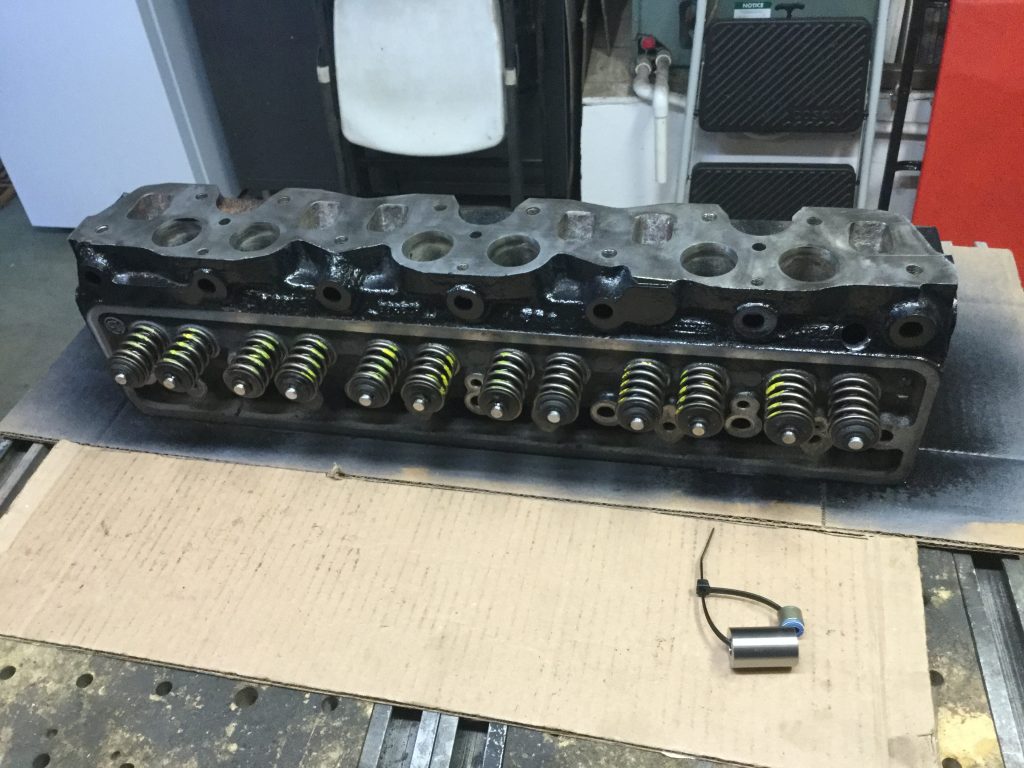
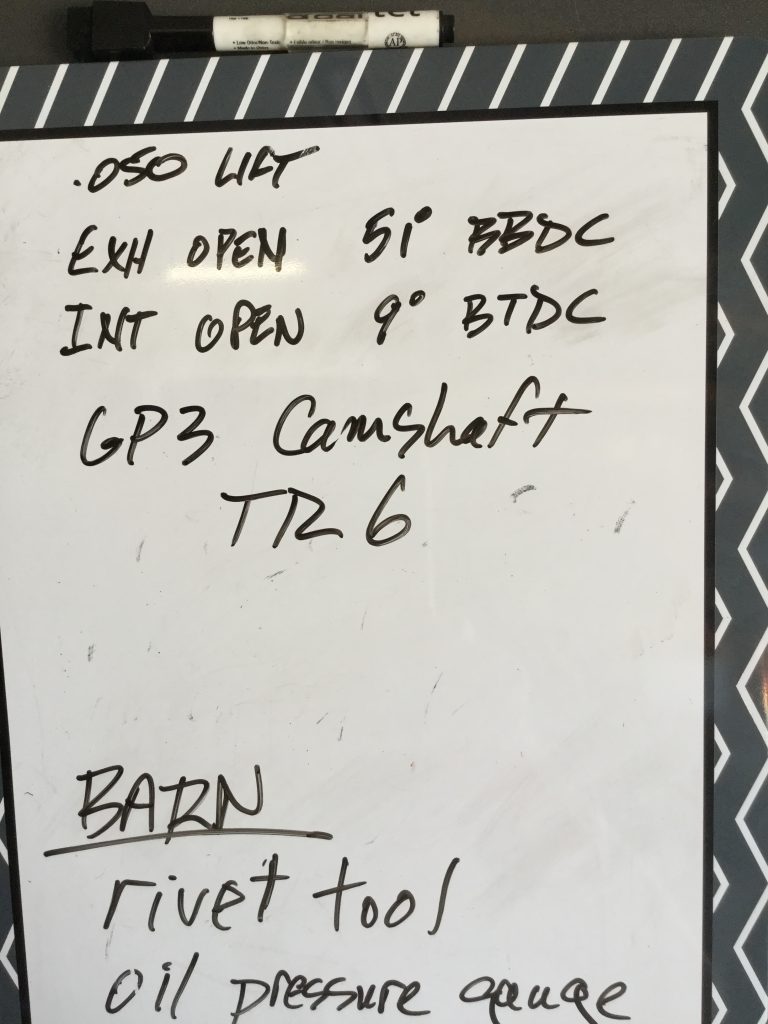
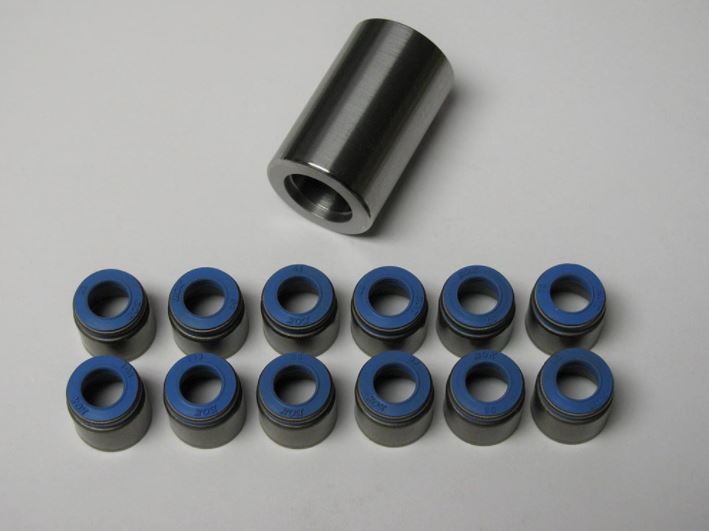
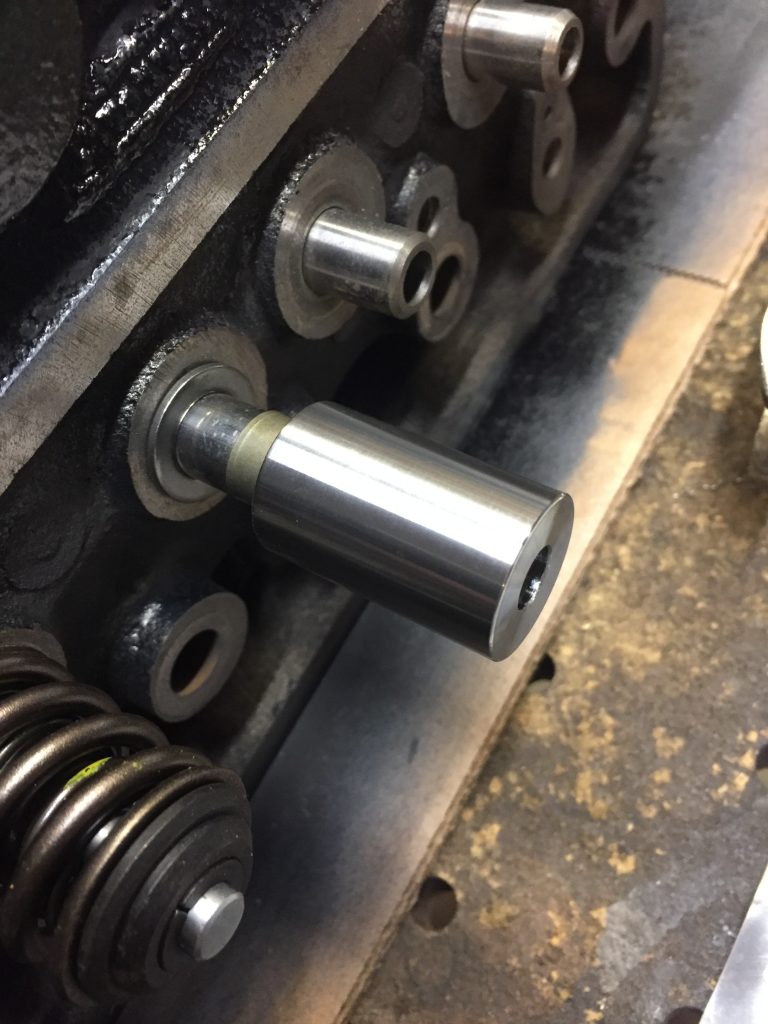
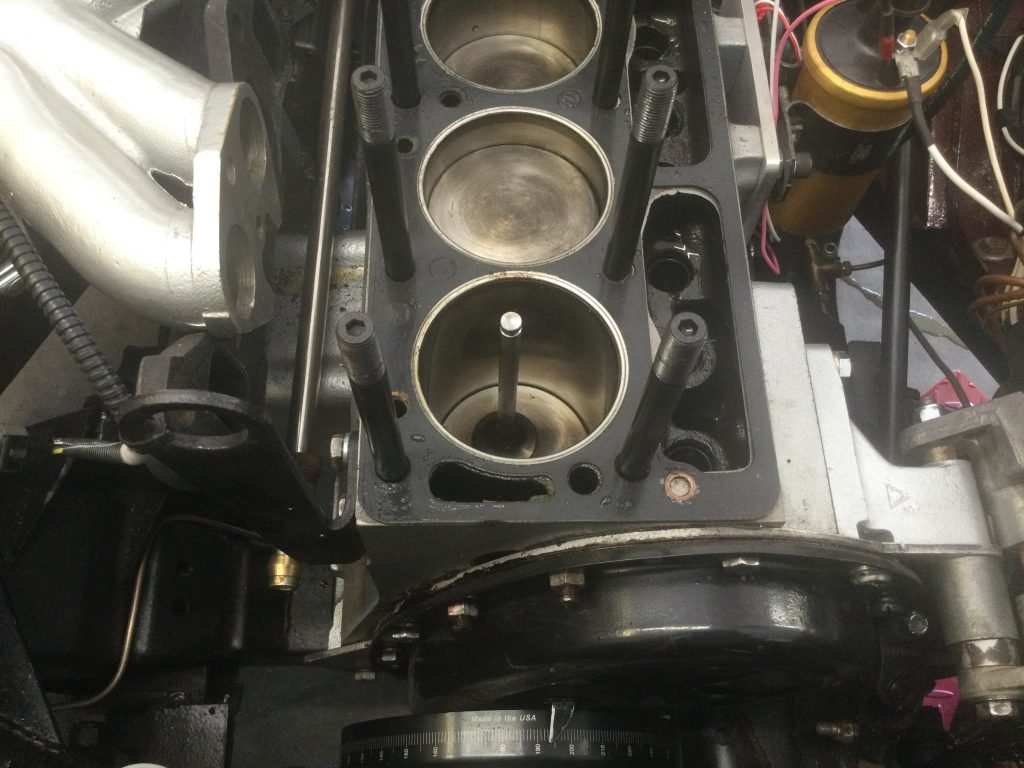
I had decided to use Viton valve stem seals, but I told Casey at HDS to set the height of the valve guides per the factory manual number. After driving the car for a couple hundred miles, I popped the valve cover off to re-torque the head and I found that the oil seals had been smashed and there were little bits lying around the cylinder head near the valve springs… see the picture. With the higher lift camshaft, the stock valve guide height spec is a little too tall. In fact, their installation tool, which I used to install the seals, is also to be used to set the valve guide height. Didn’t even occur to me.
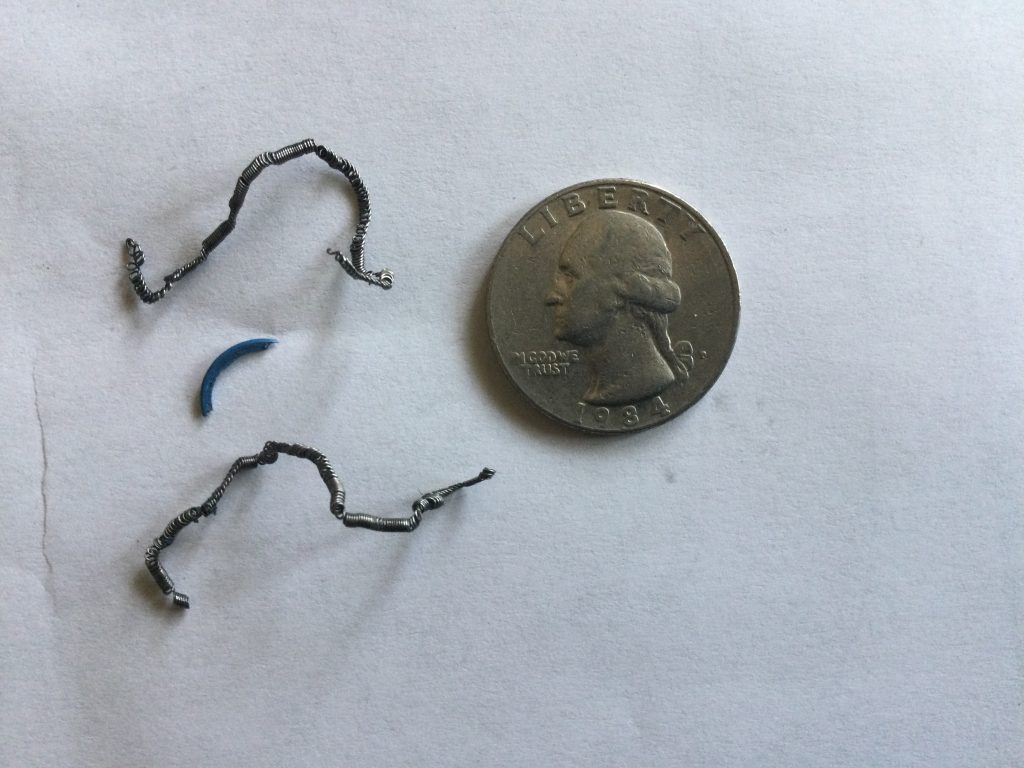
I attempted to rectify the problem by discarding the seals, using compressed air to hold the valves up while I removed the springs. After all, the factory doesn’t install seals. But, dang, I didn’t use enough air pressure and the first valve dropped into the cylinder, onto the top of the piston. When I removed the head it was standing upright, as my son-in-law Russel said “like it was giving you the finger.” Ouch. So the head came off, and it was painful, but for the best. The Lisle “hit it with a hammer” tool works very well for removing valve springs but was problematic for installation. I reverted to my old valve spring compressor to finish the job.
Helluva a lot more than I wanted to do, but after putting it all back together and changing oil and filter, all is well. No damage done.

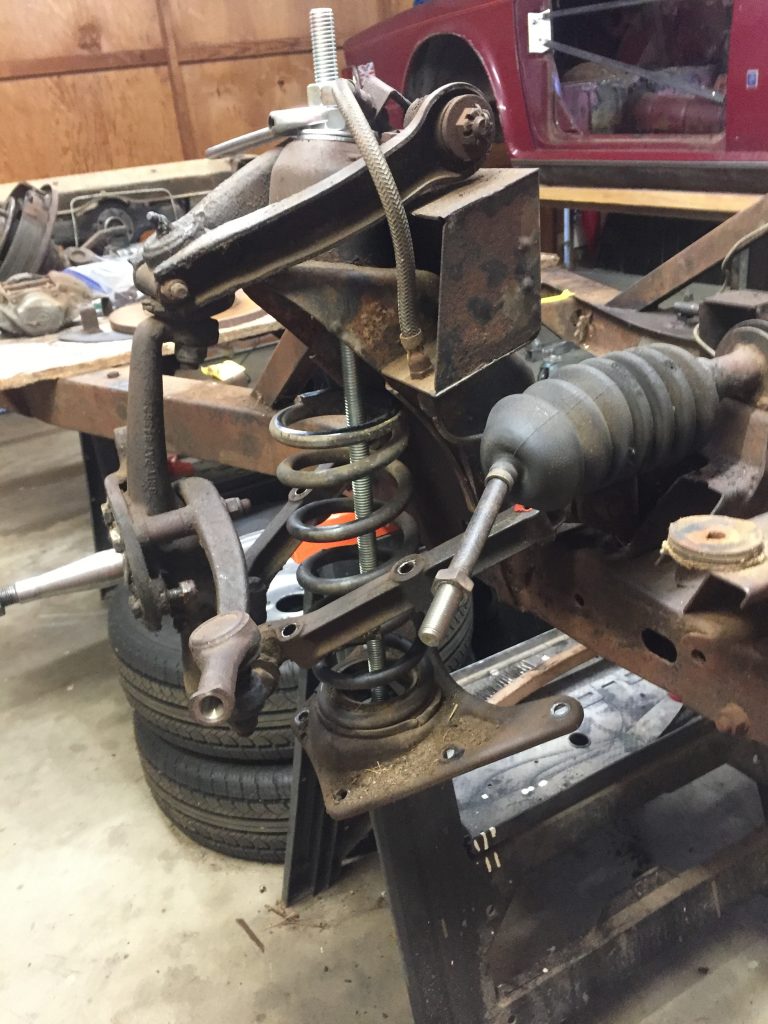
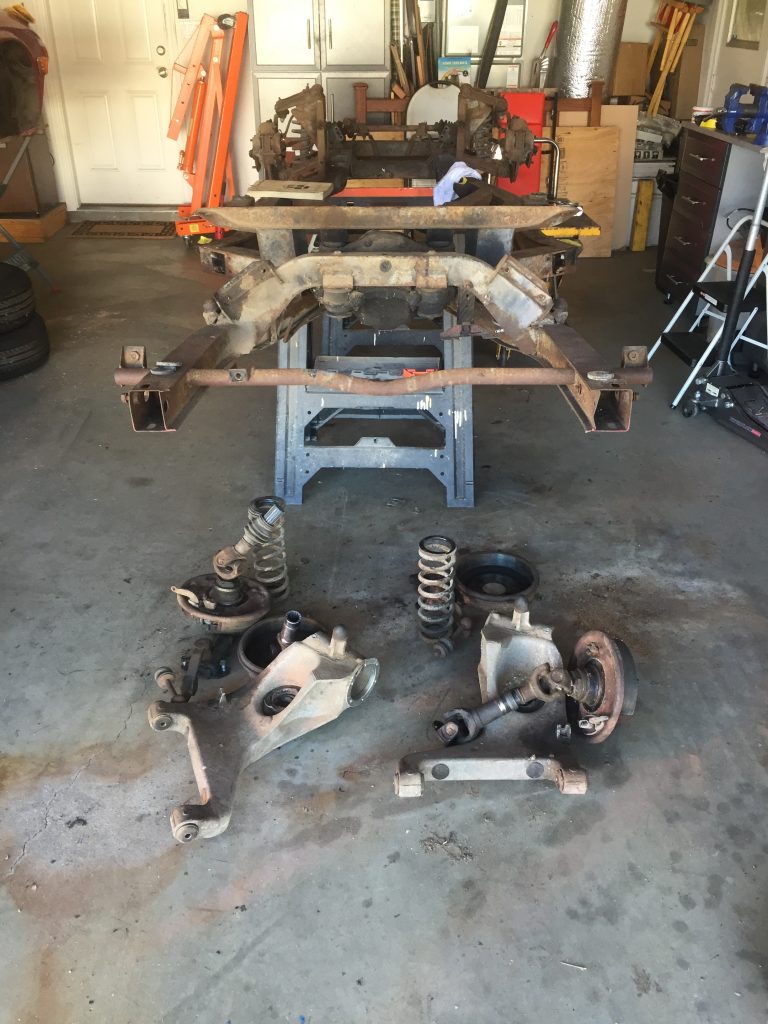
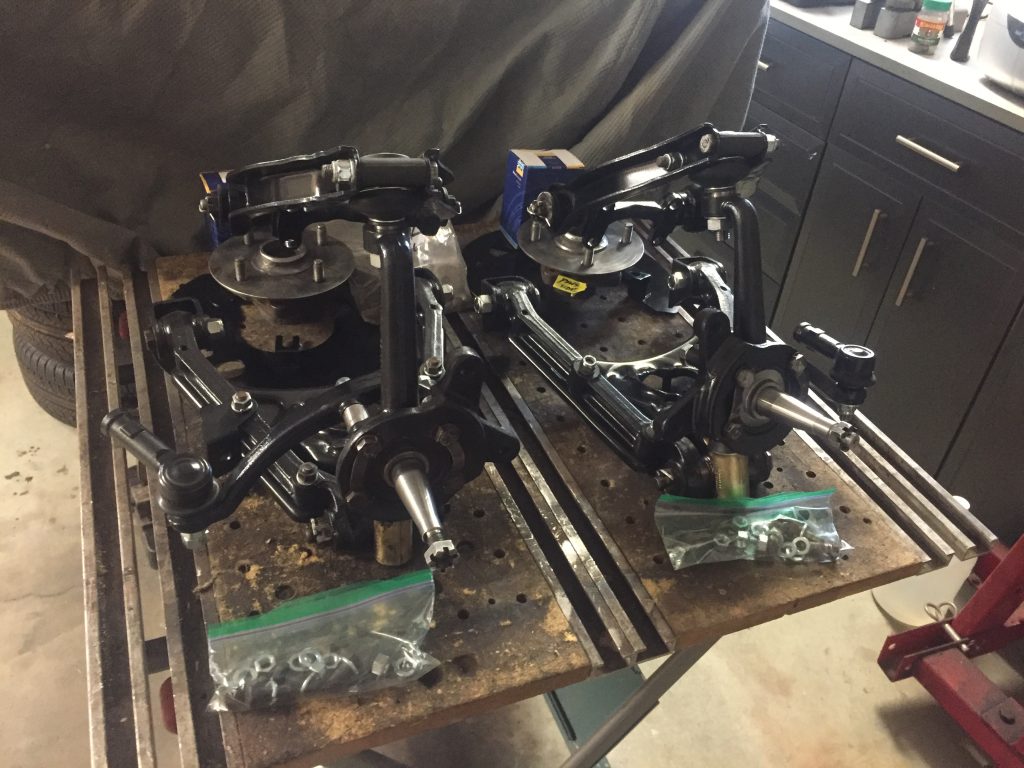
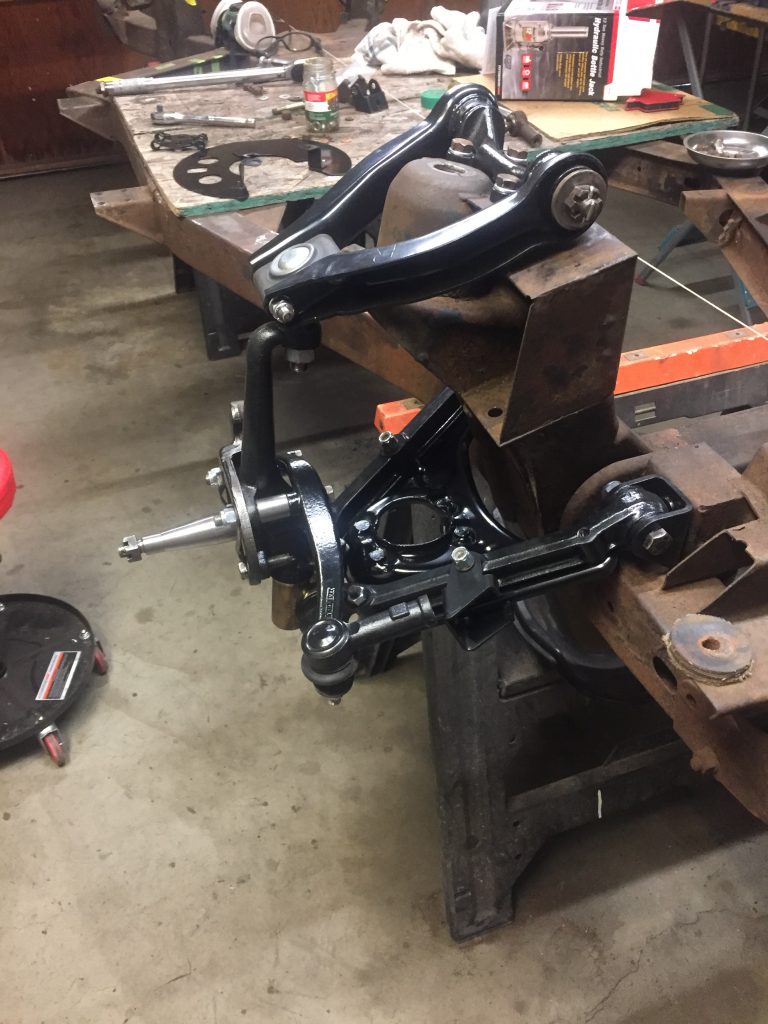
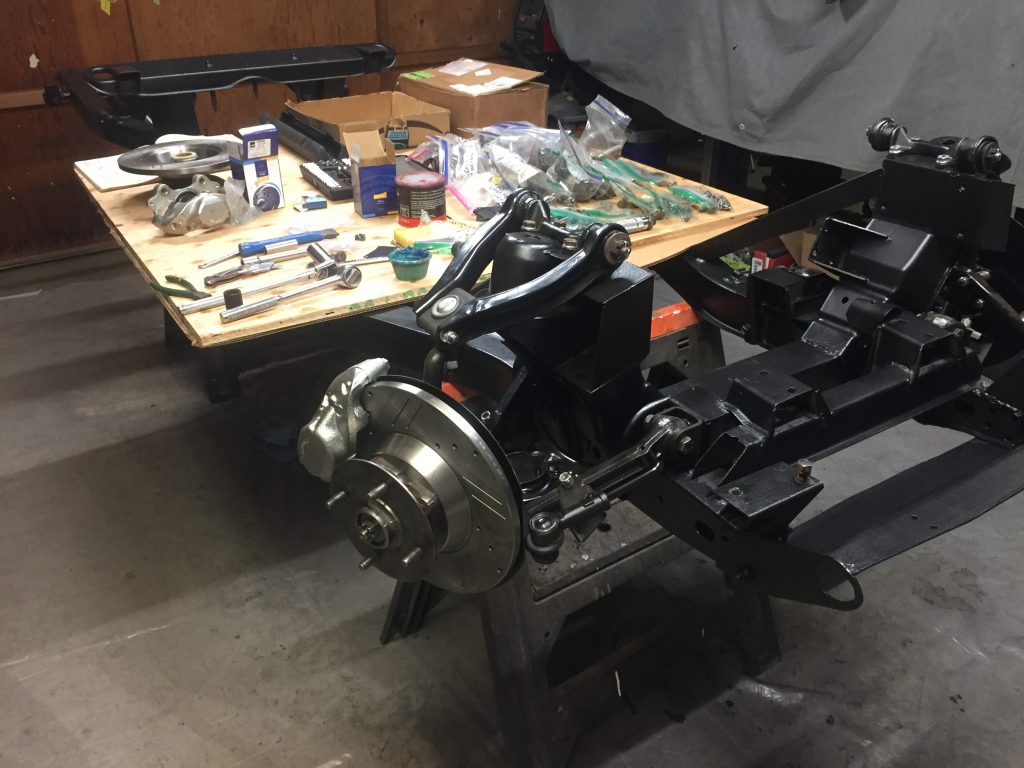
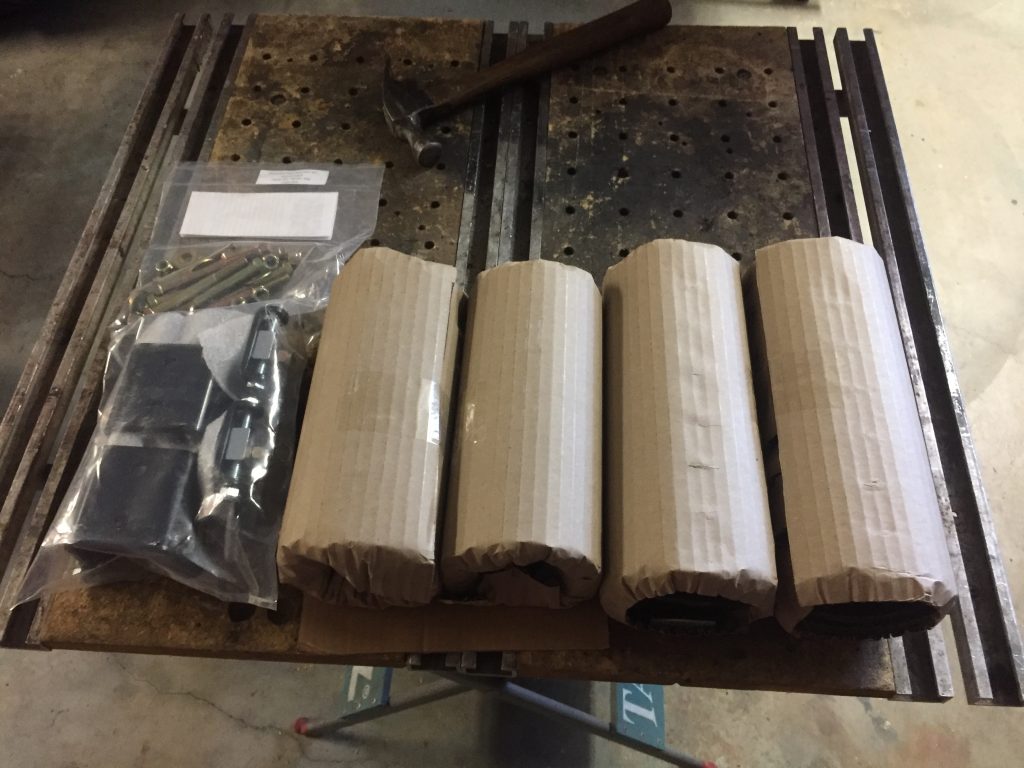
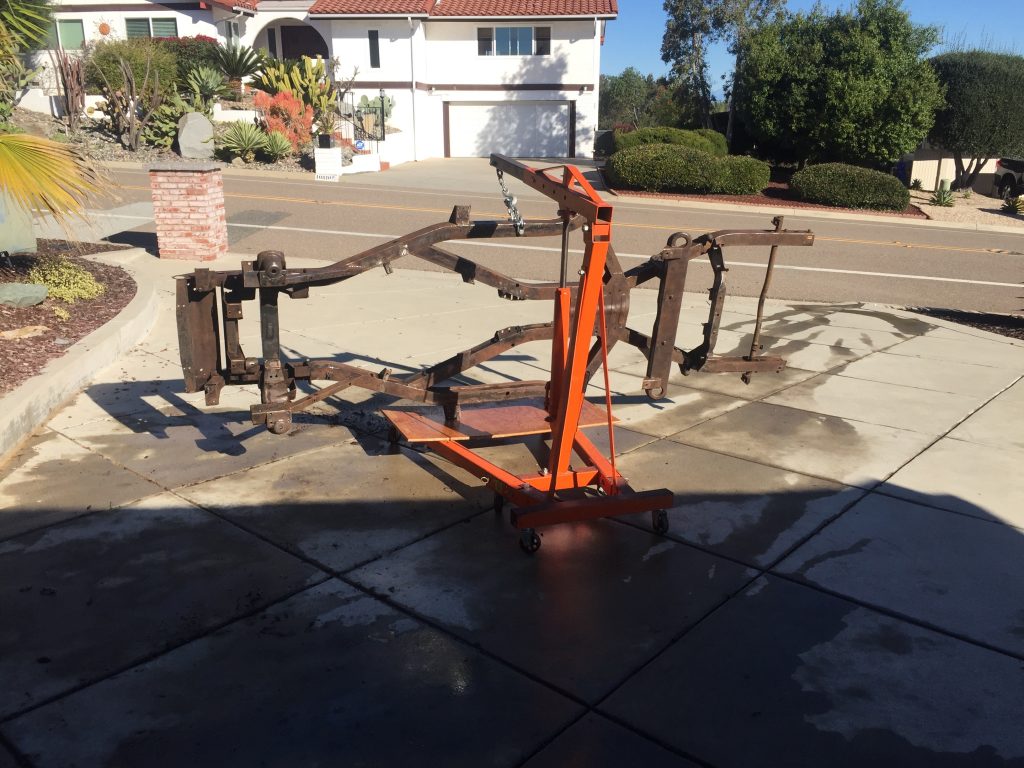

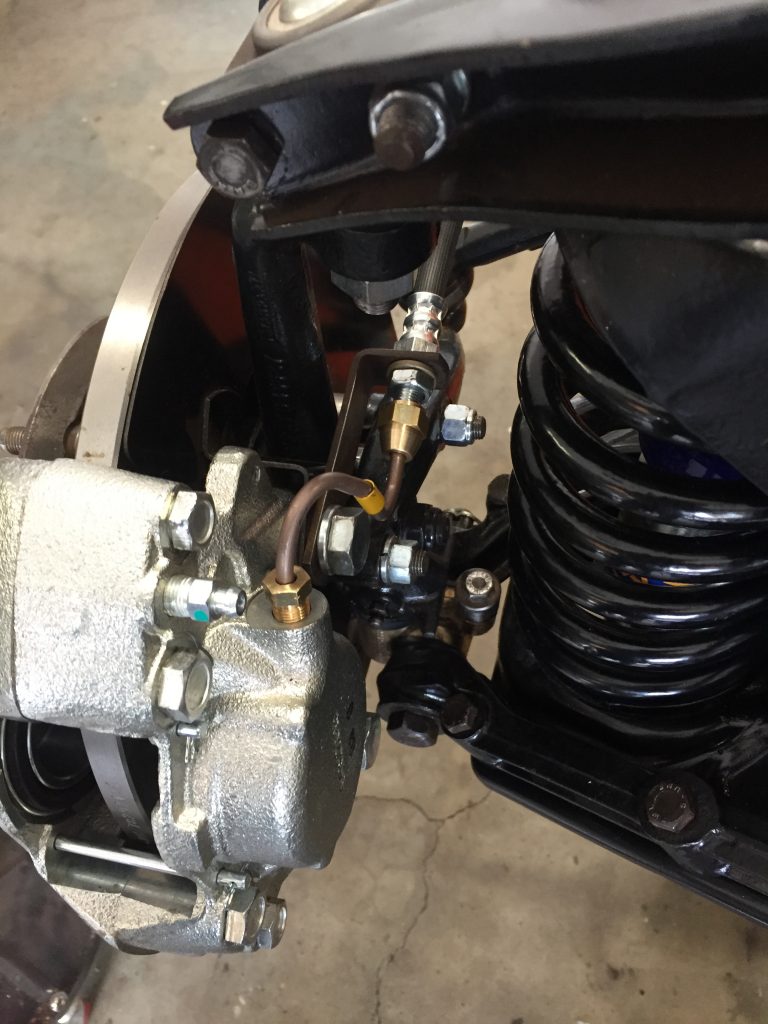
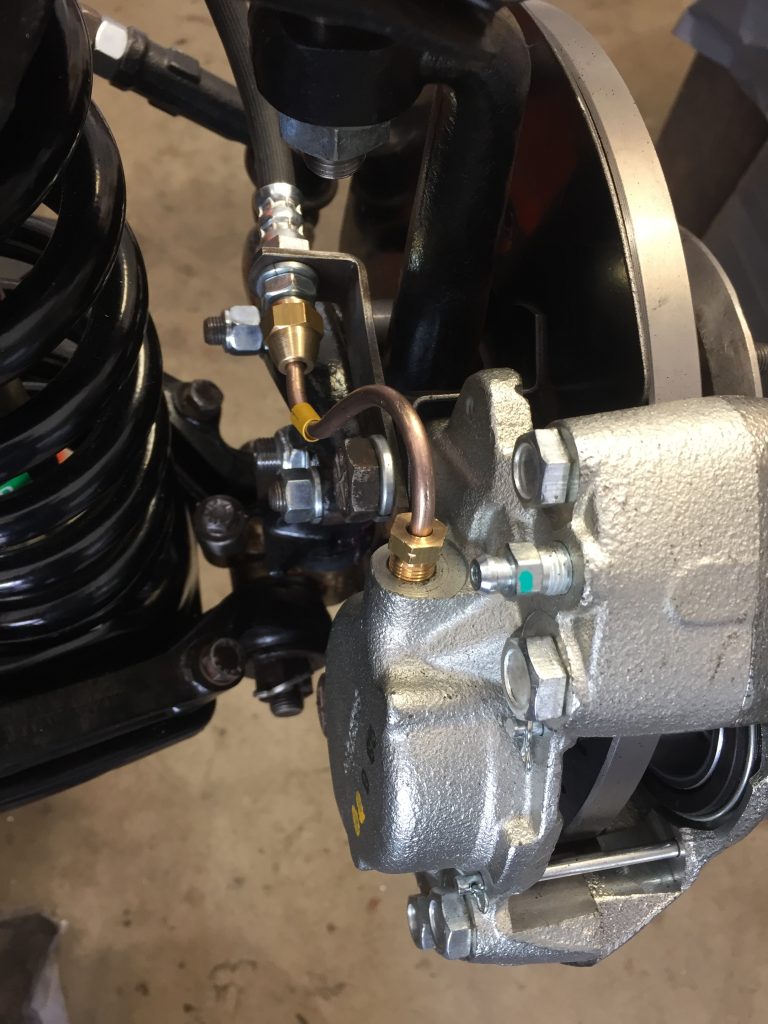
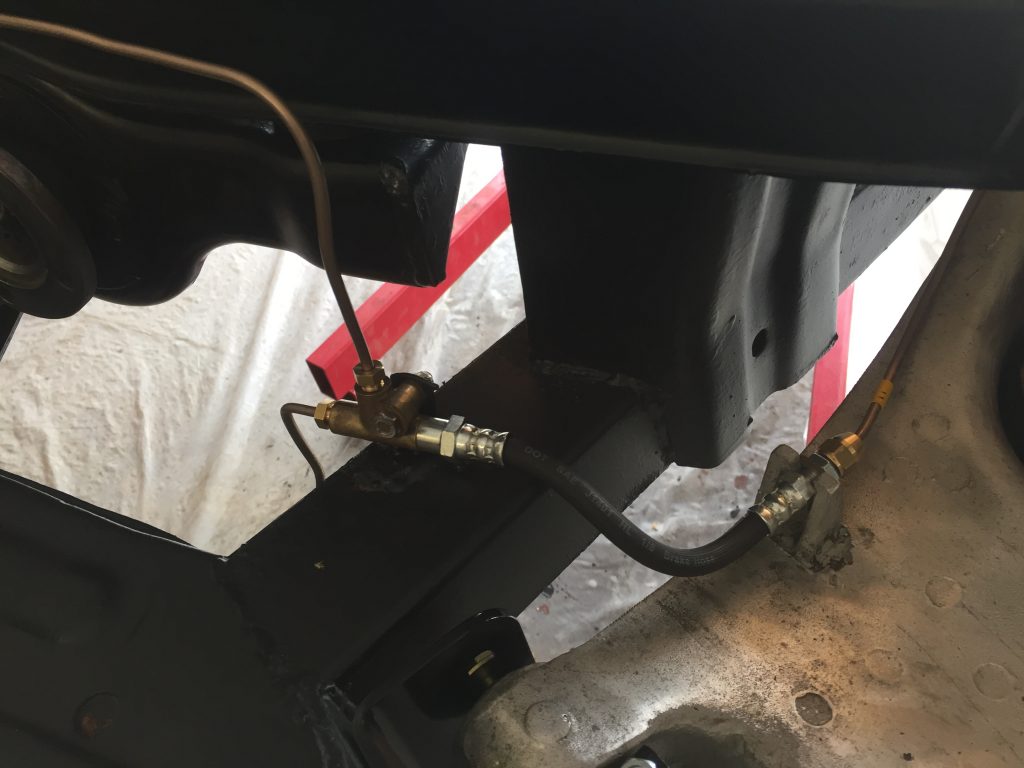
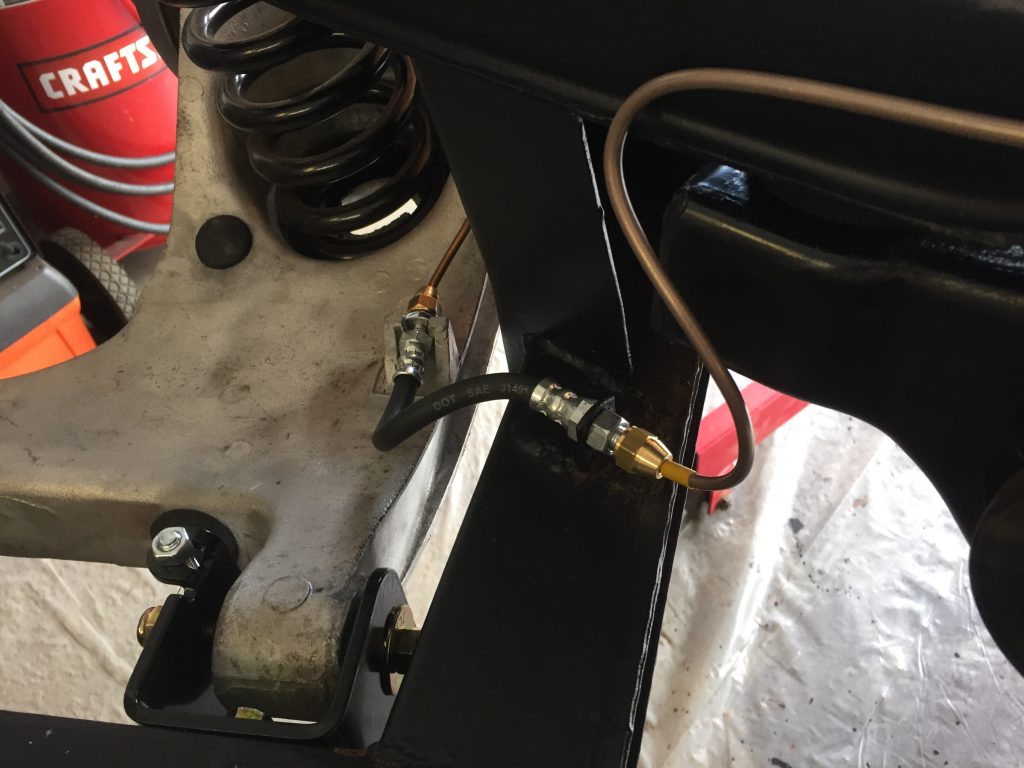
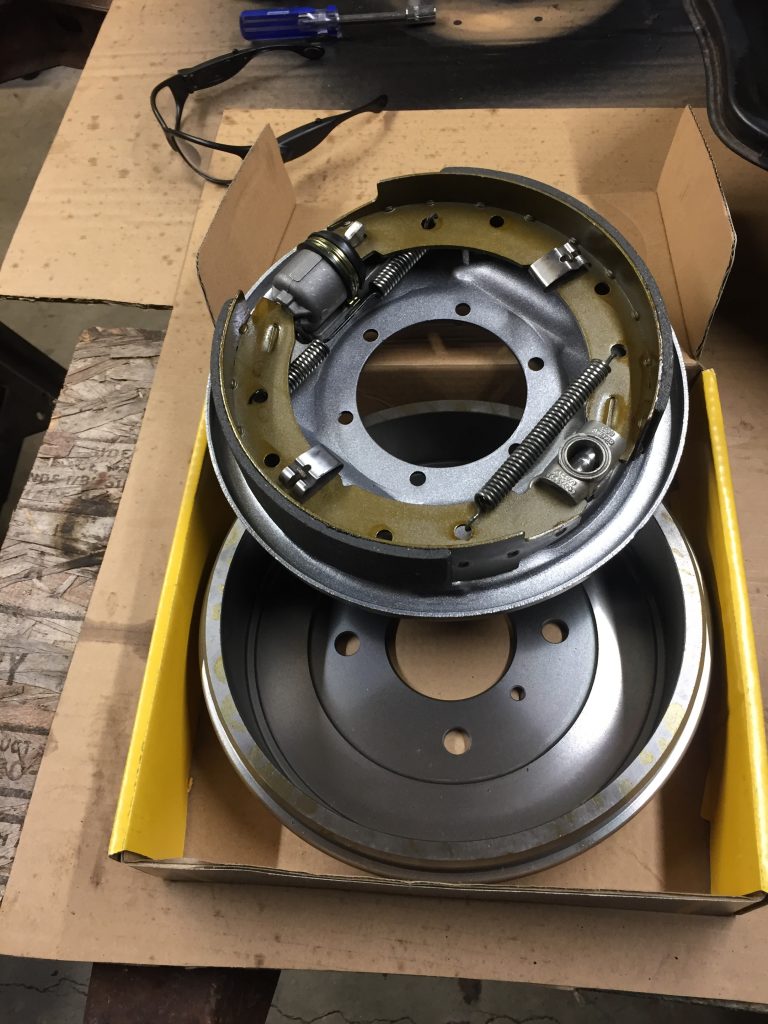
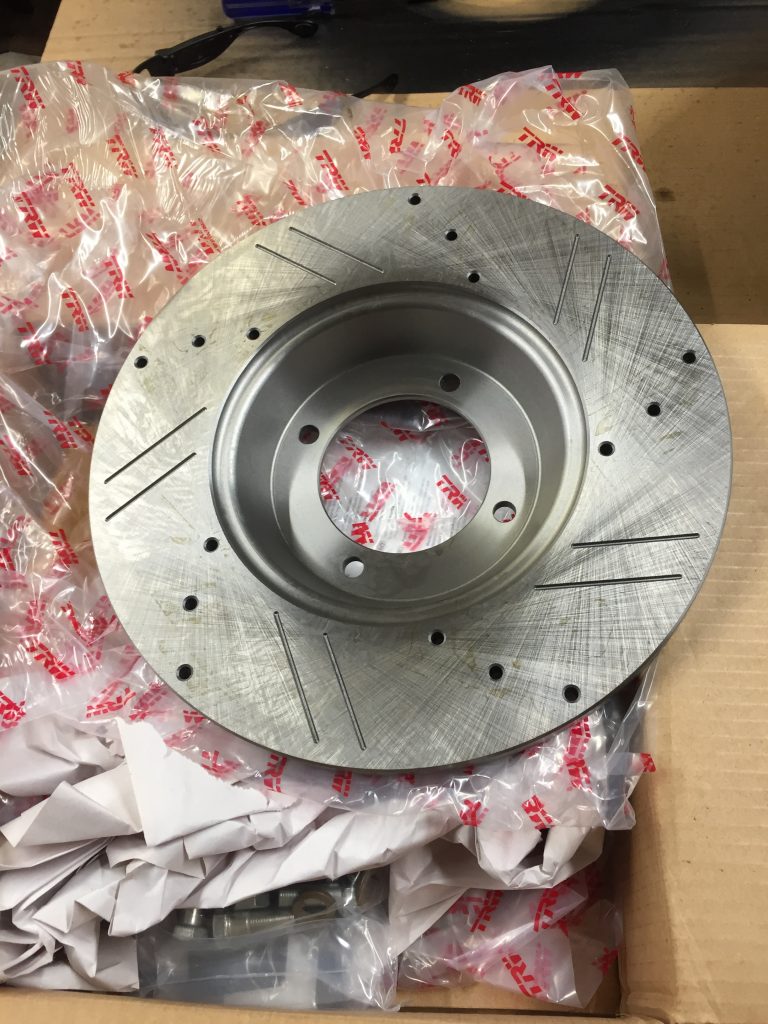
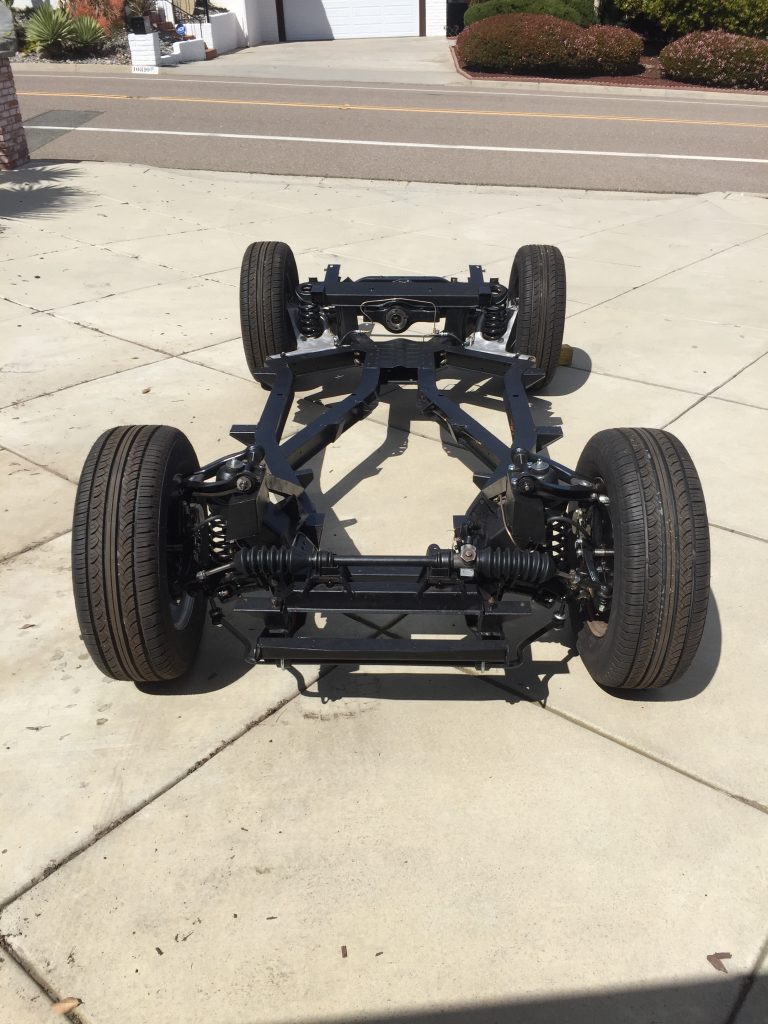
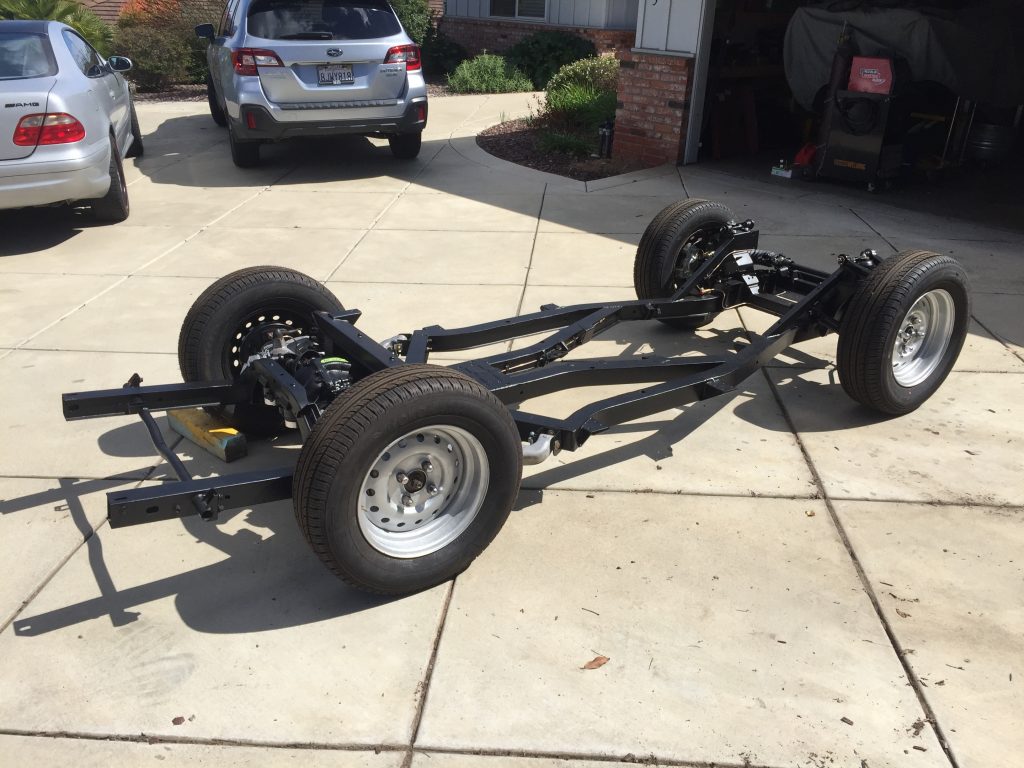
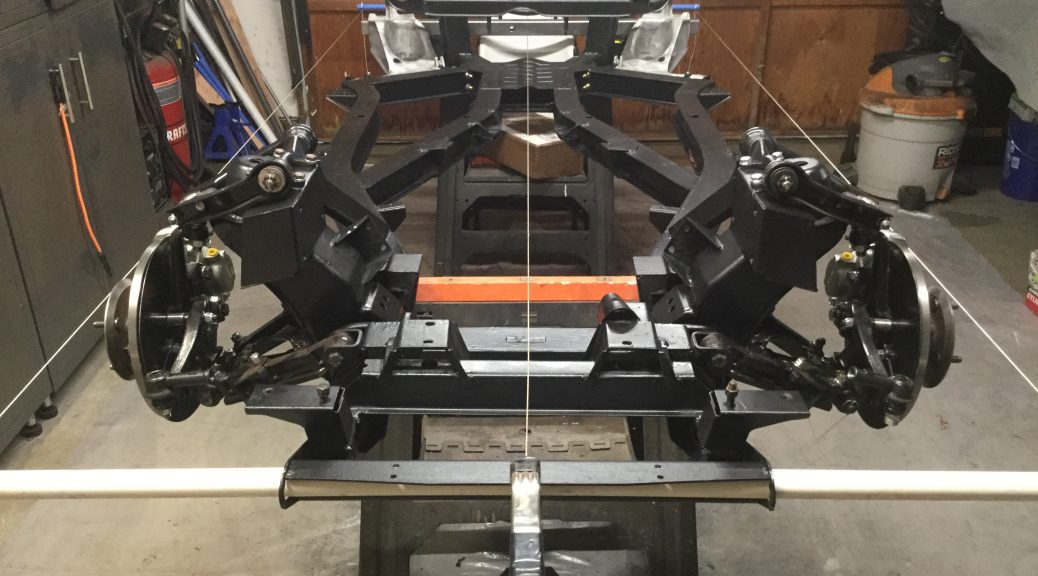
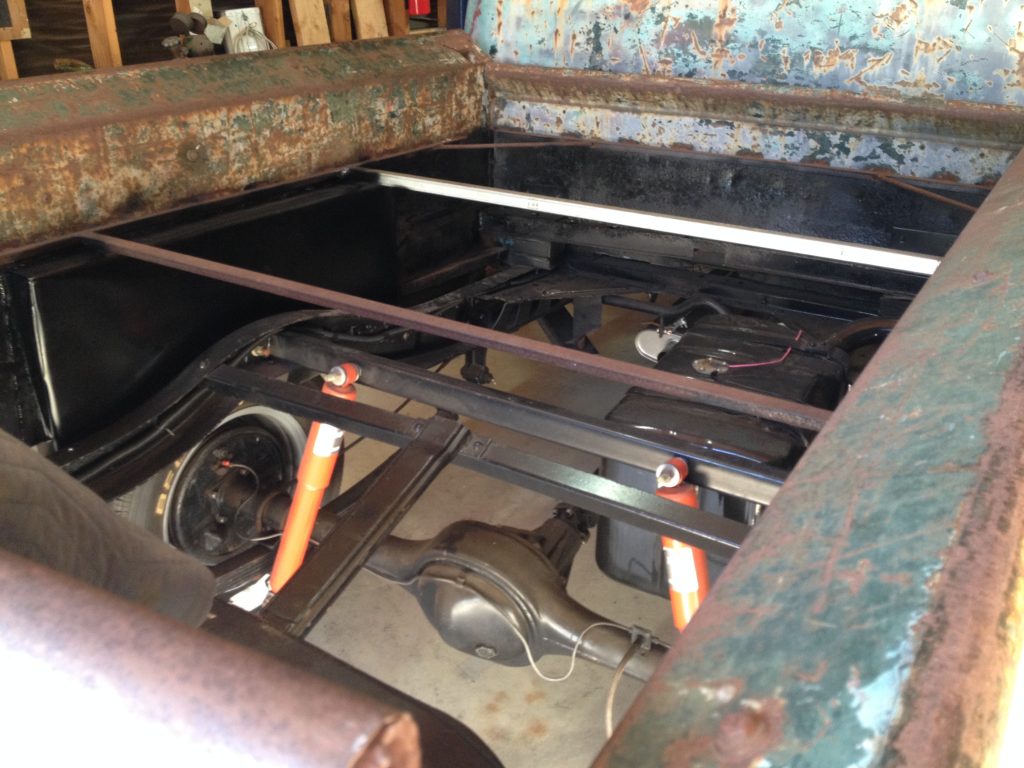
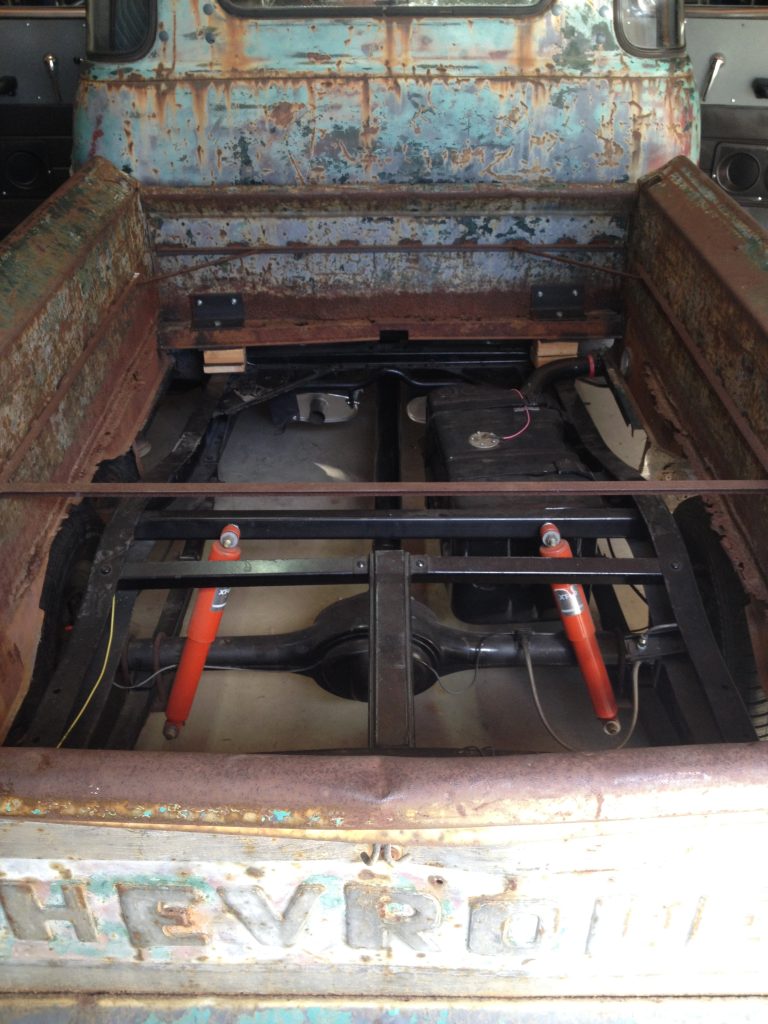
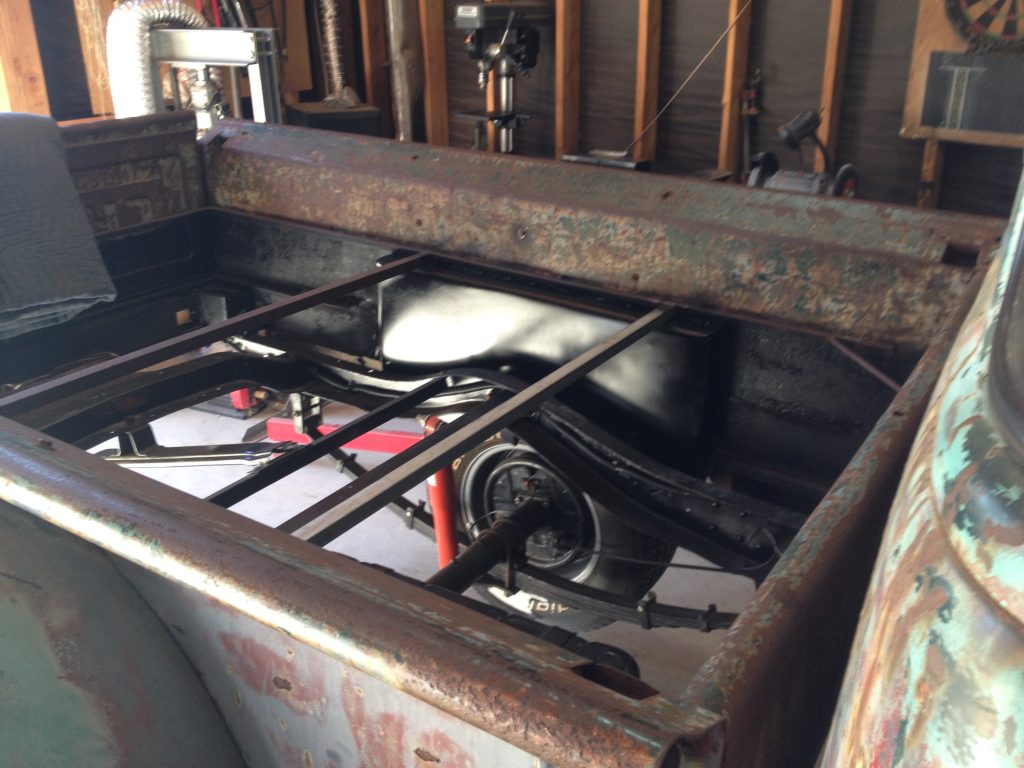
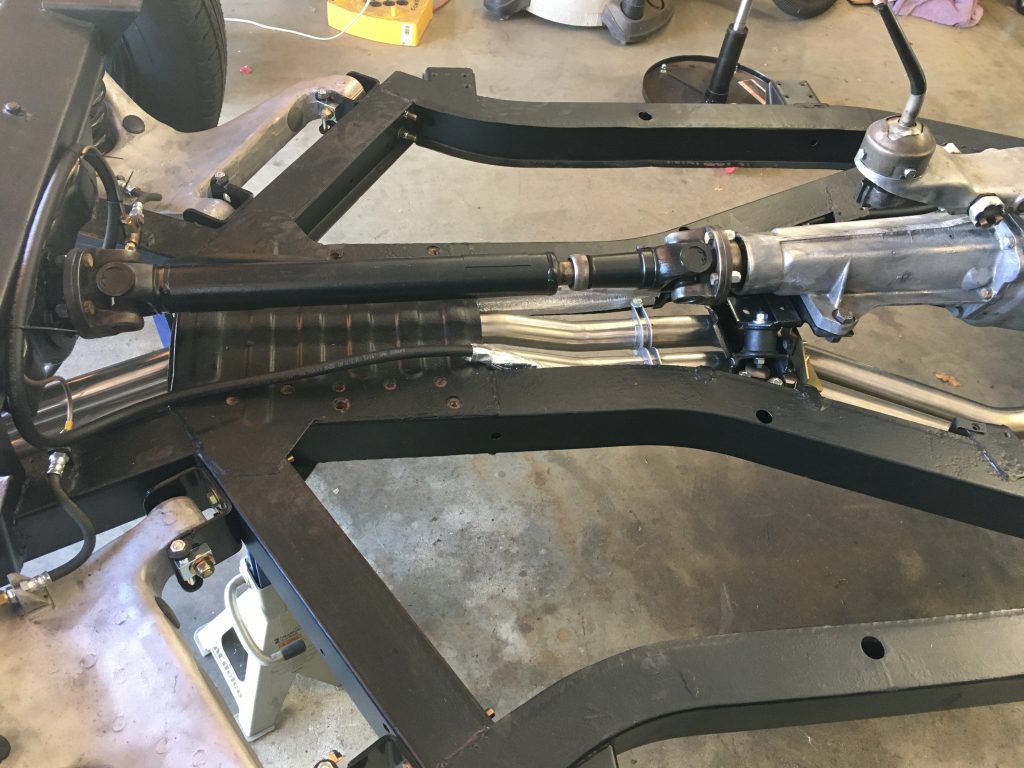
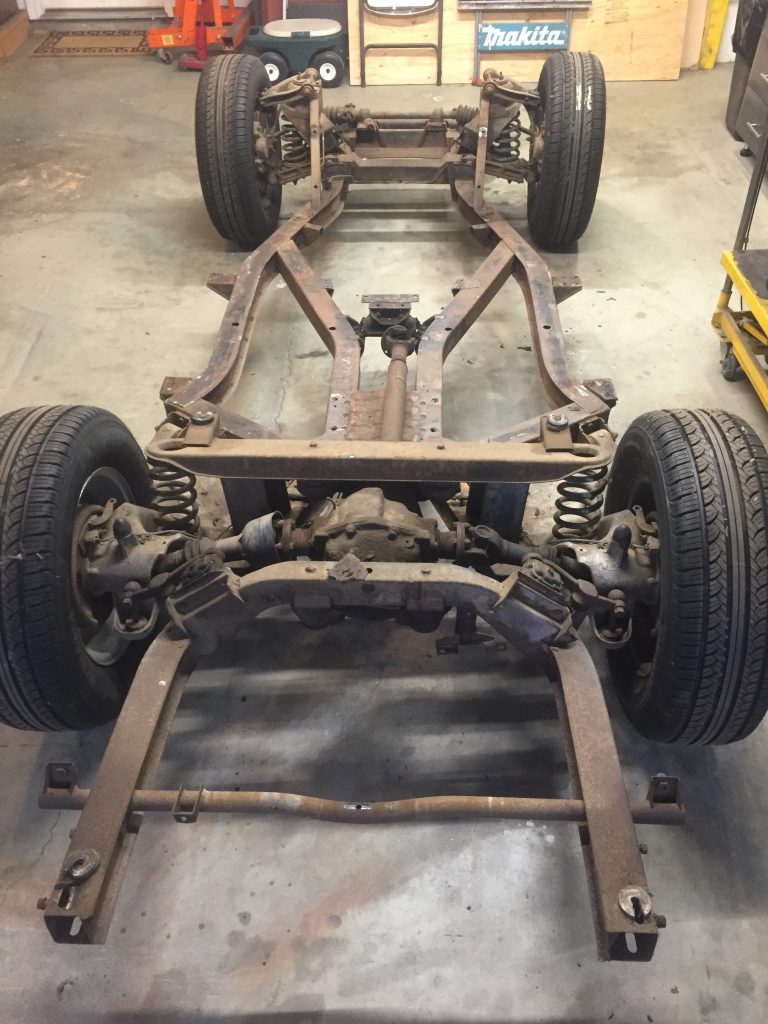
Rebuilding the suspension and restoring the frame was very satisfying, and it feels good to have all new bushings and bearings, brakes and brake lines, shocks and springs, and a fresh coat of paint on everything.
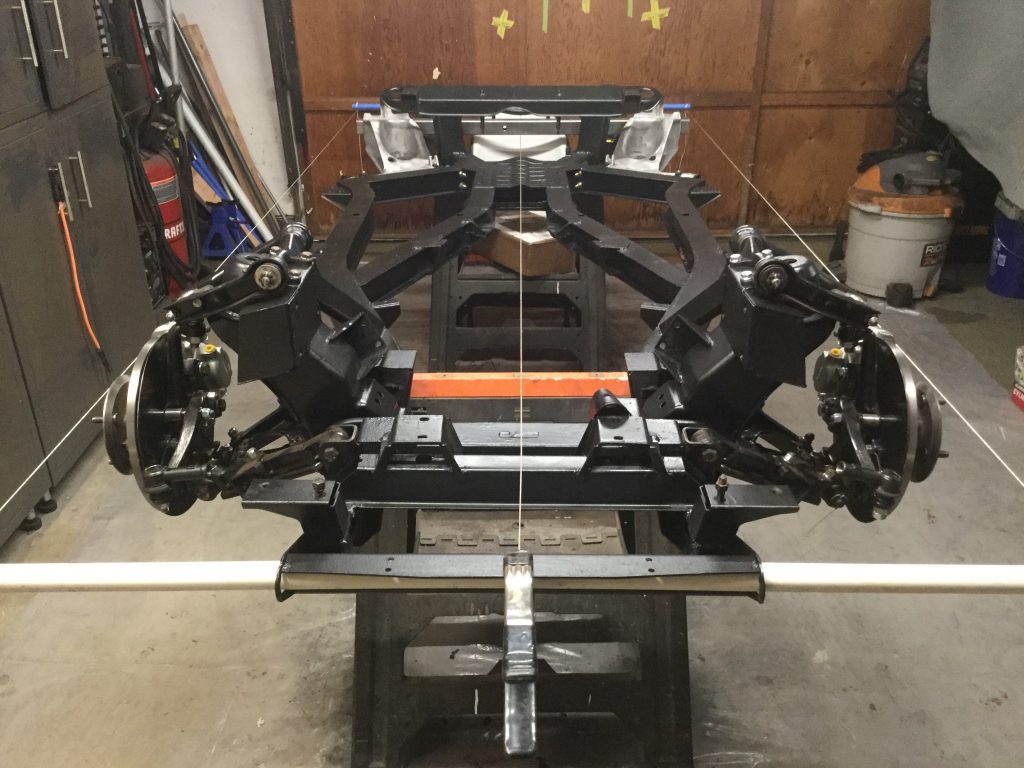
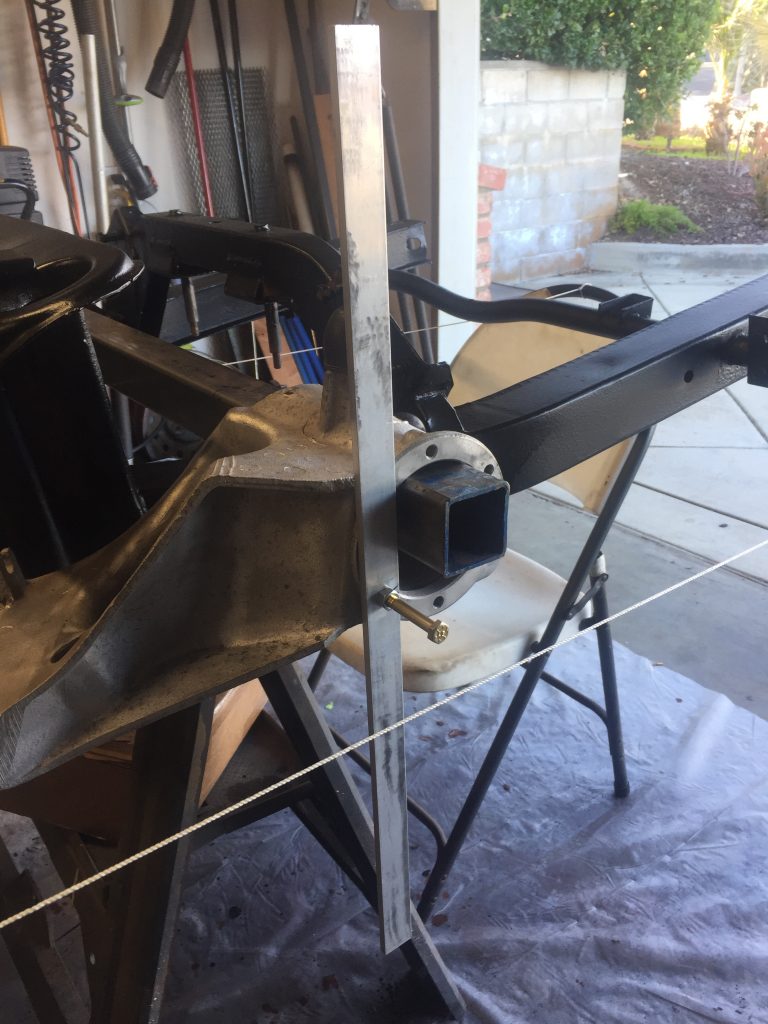
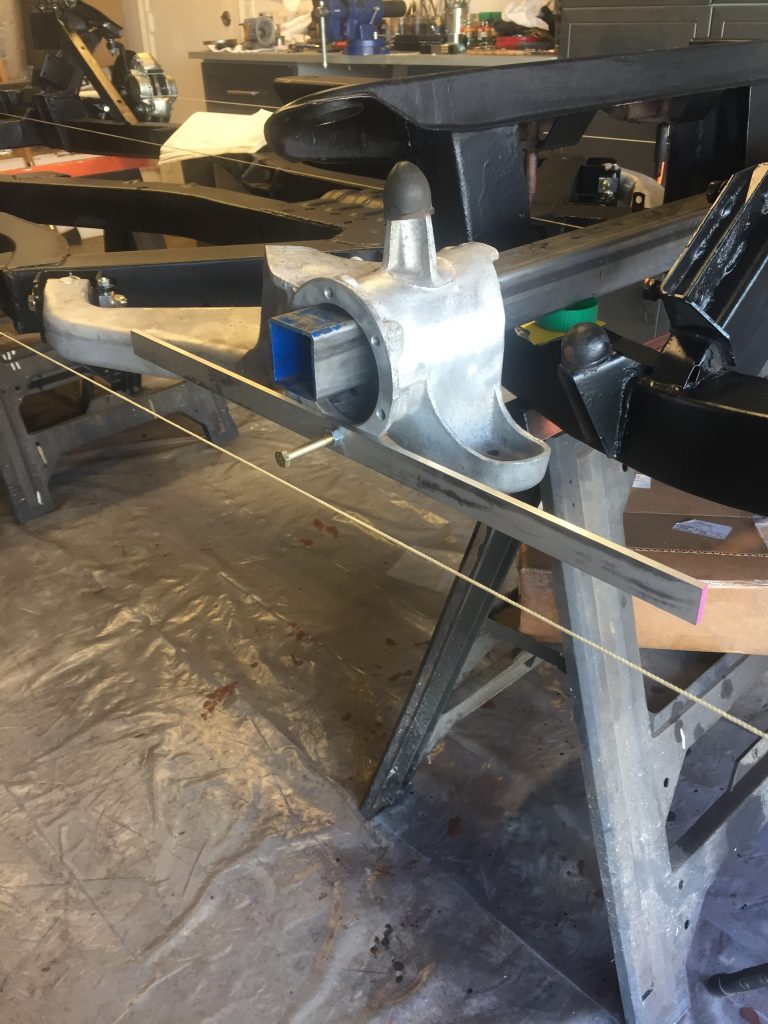
The alignment process was simple enough. First I found the centerline of the car and then set up a couple parallel strings running along the length of the chassis, a little wider than the car’s track and running through the centerline of the wheel hubs. I used a length of 1/4 thick aluminum bar to represent the wheels. With the bar vertical I adjusted the camber angle. With the bar horizontal I was able to adjust the toe. I set it up without the springs installed so I could raise the suspension to where I estimated they would be if the car was sitting on the ground. Any additional adjustments will come after the car is driven.
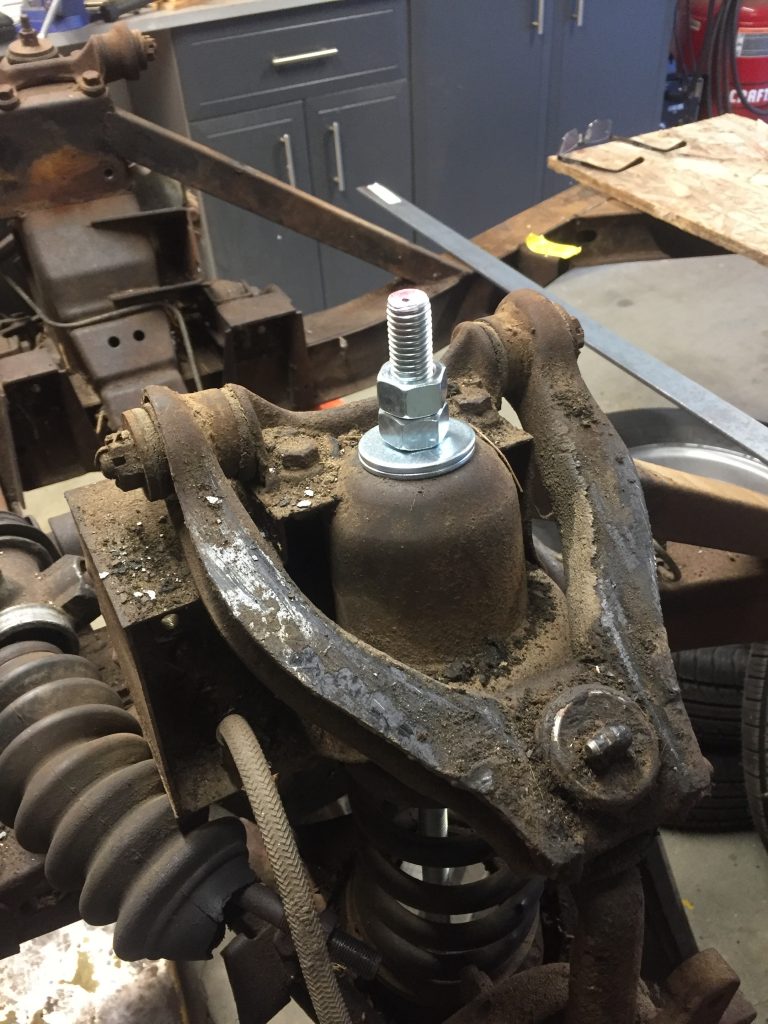
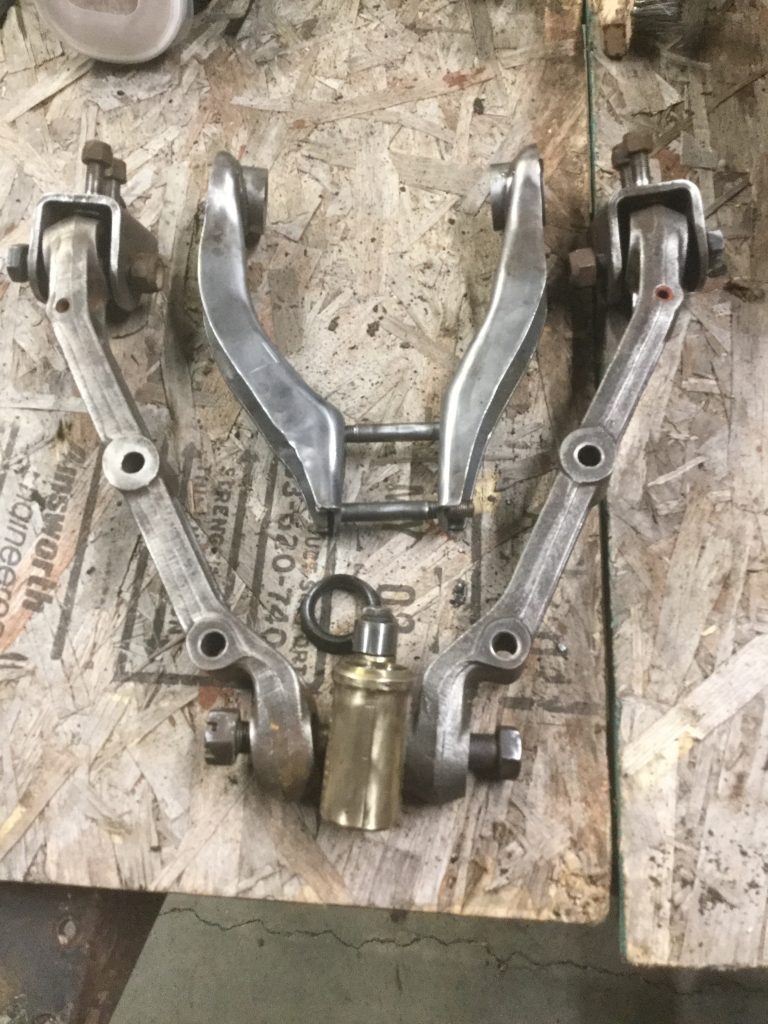
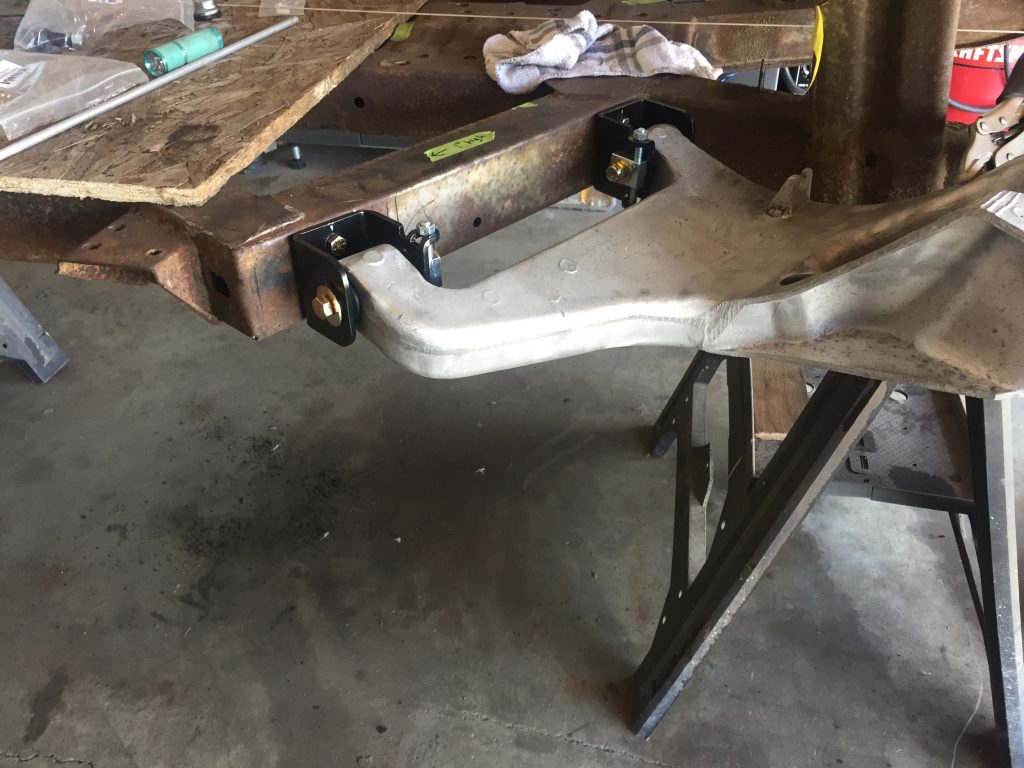
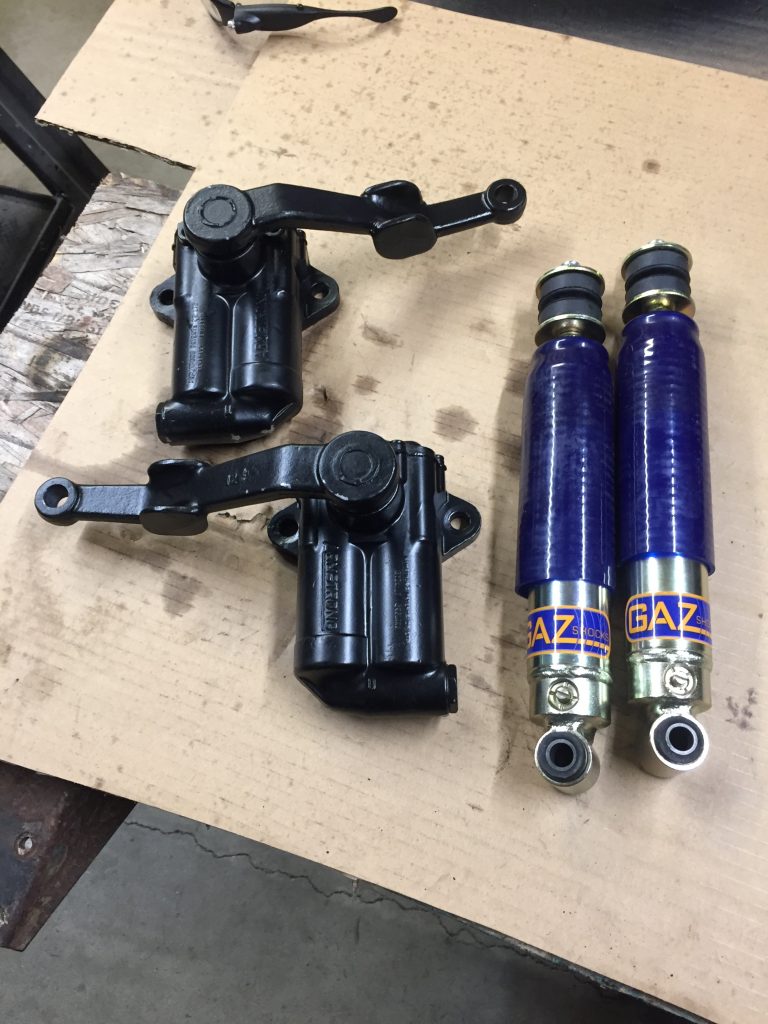
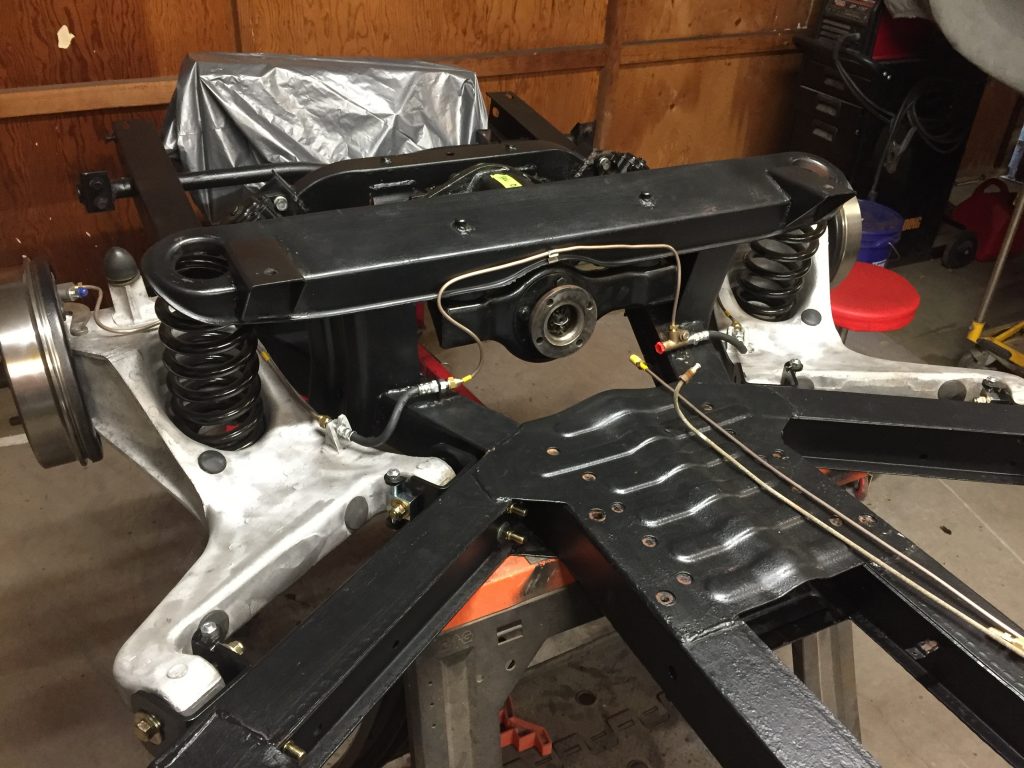
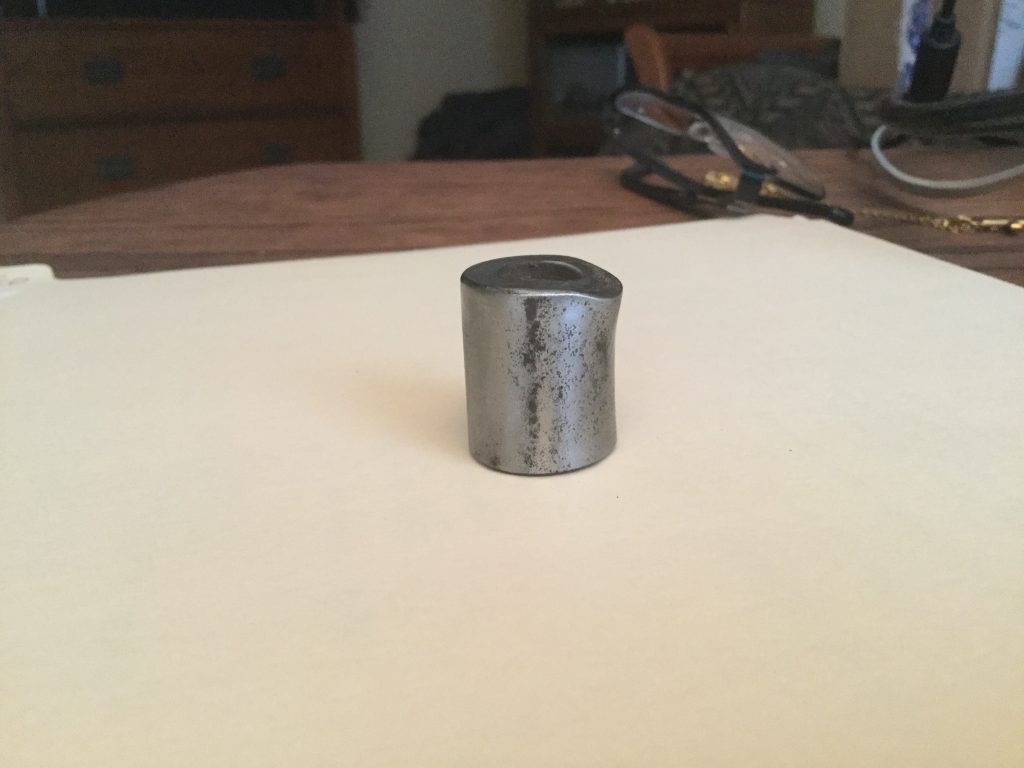
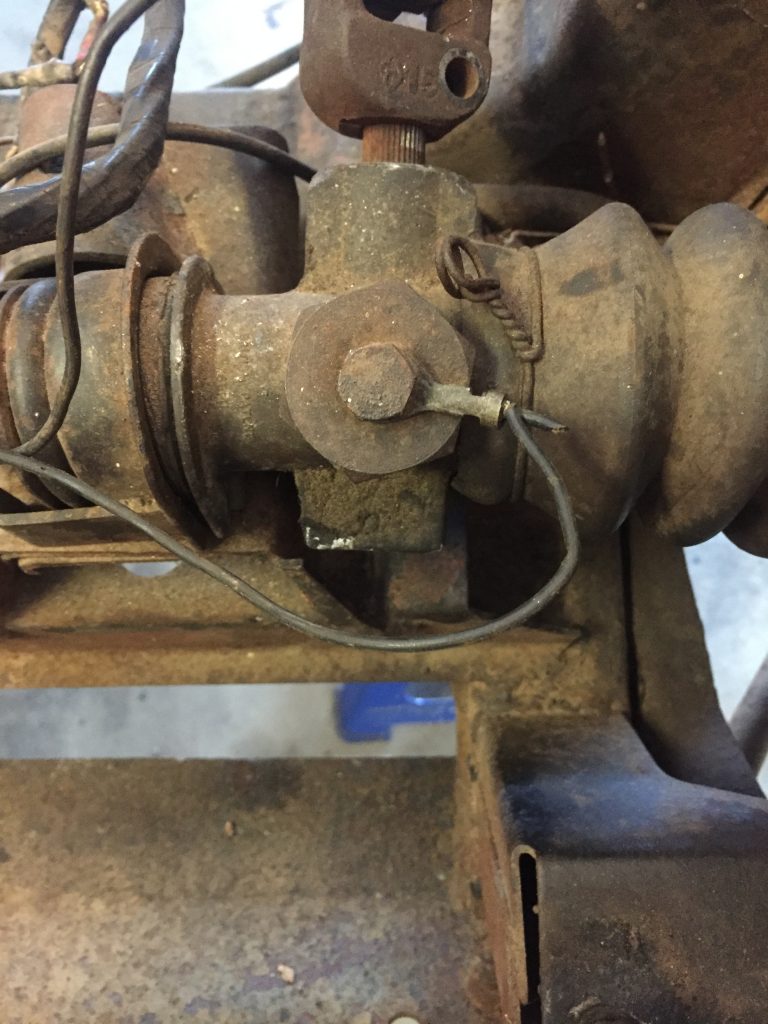
In addition to replacing all the bushings, nuts and bolts, and worn out stuff, I replaced both upper fulcrum pins and the passenger side vertical link. New parts also included 390 lb front springs and 470 lb rear springs from Goodparts, which lowered the ride height by an inch and stiffened up the ride. GAZ adjustable shocks in front and rebuilt lever shocks in the rear with custom valves to suit the stiffer springs. World Wide Auto Parts did the rebuild of the lever shocks.
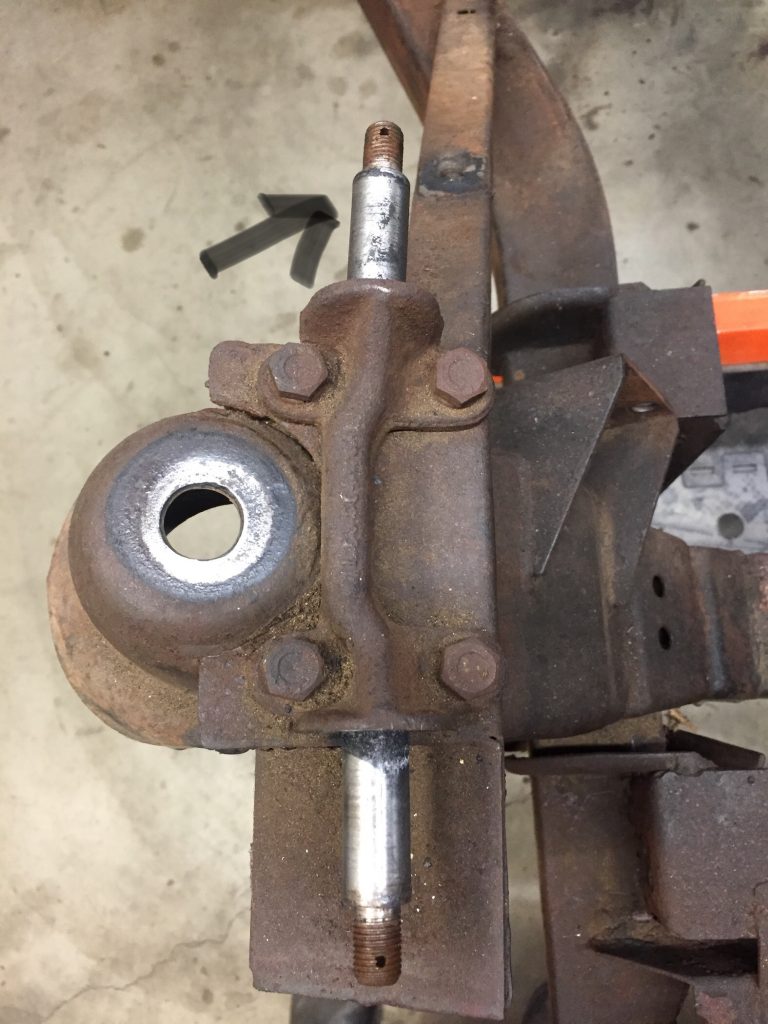
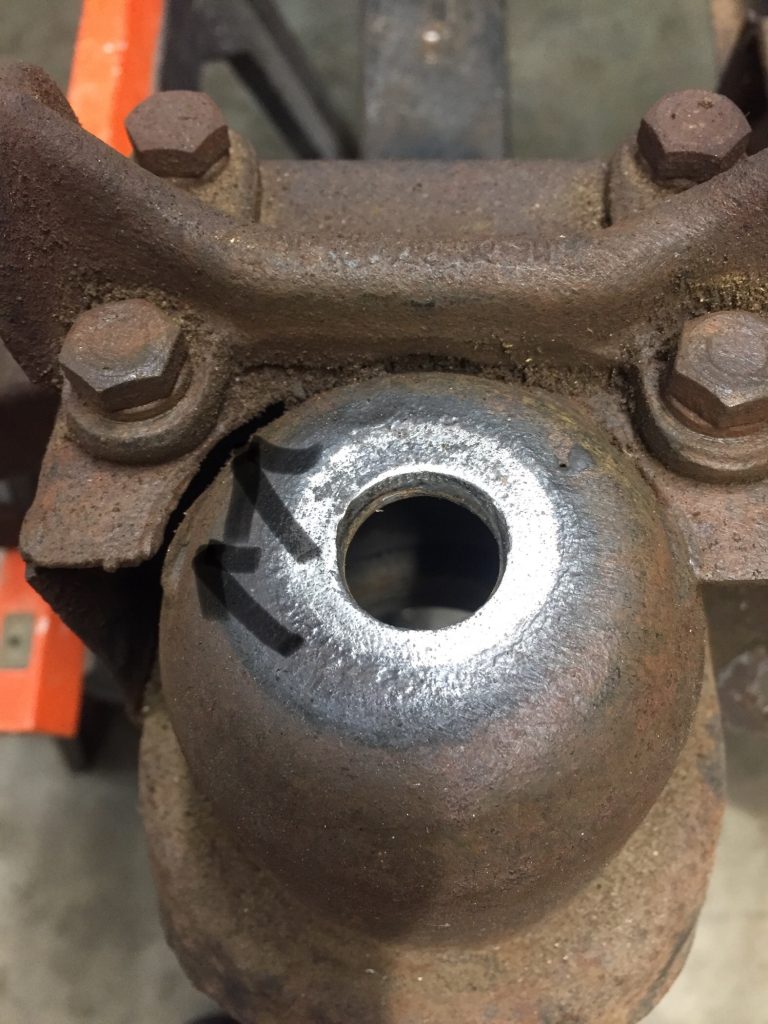
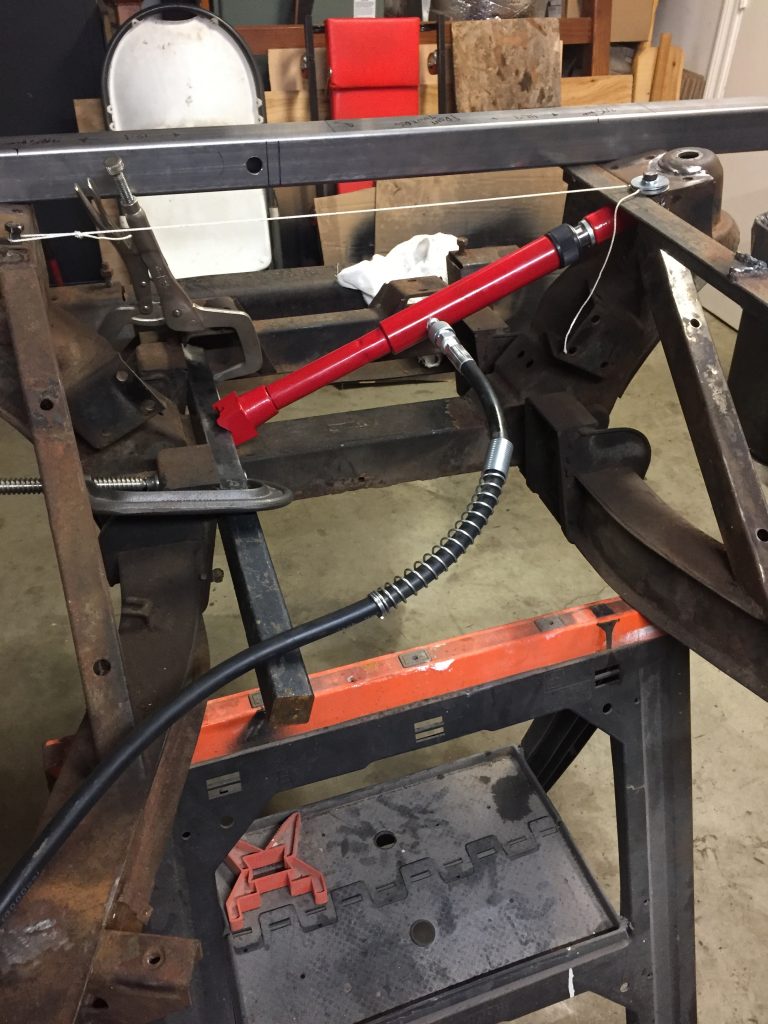
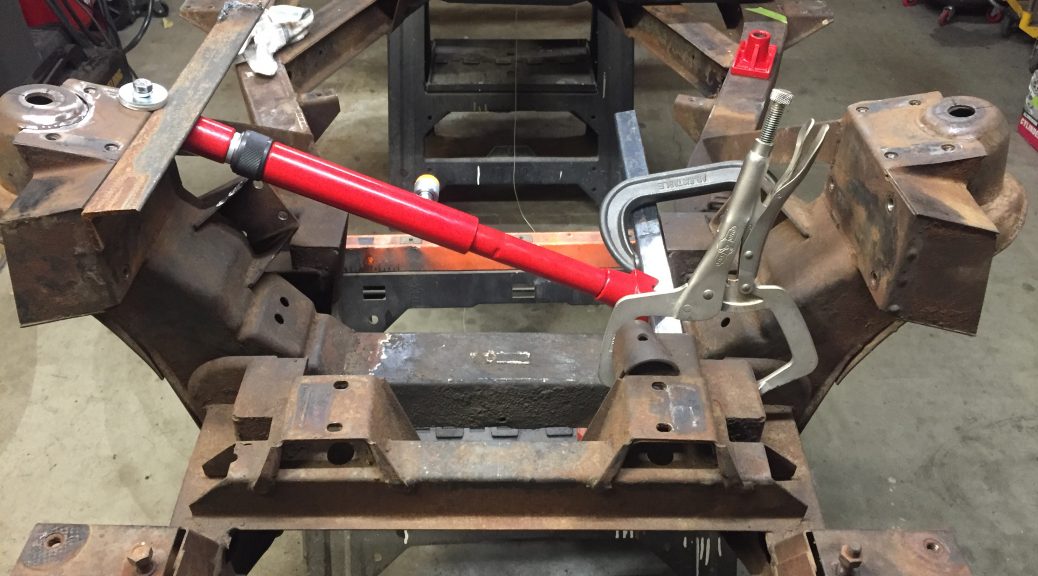
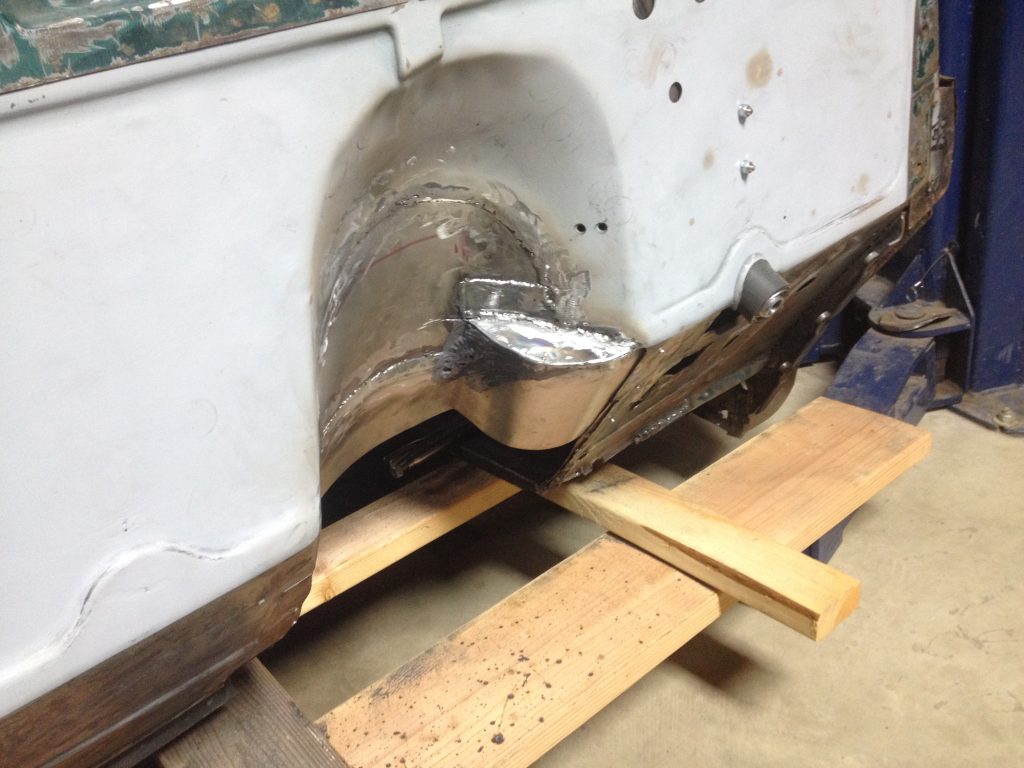
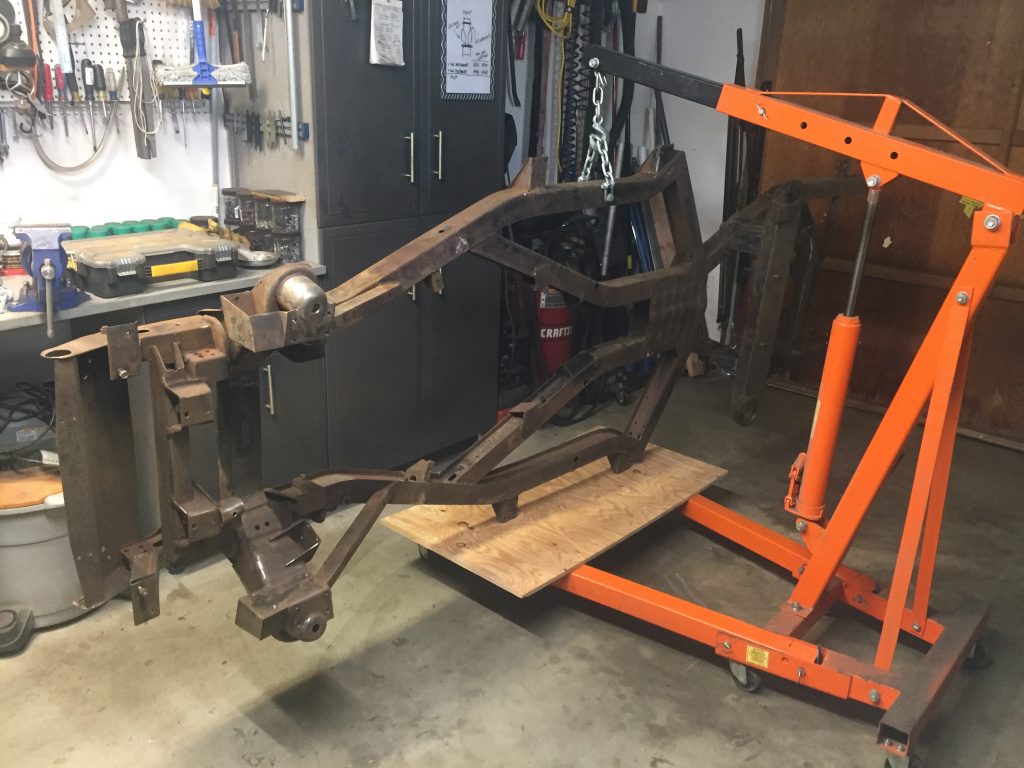
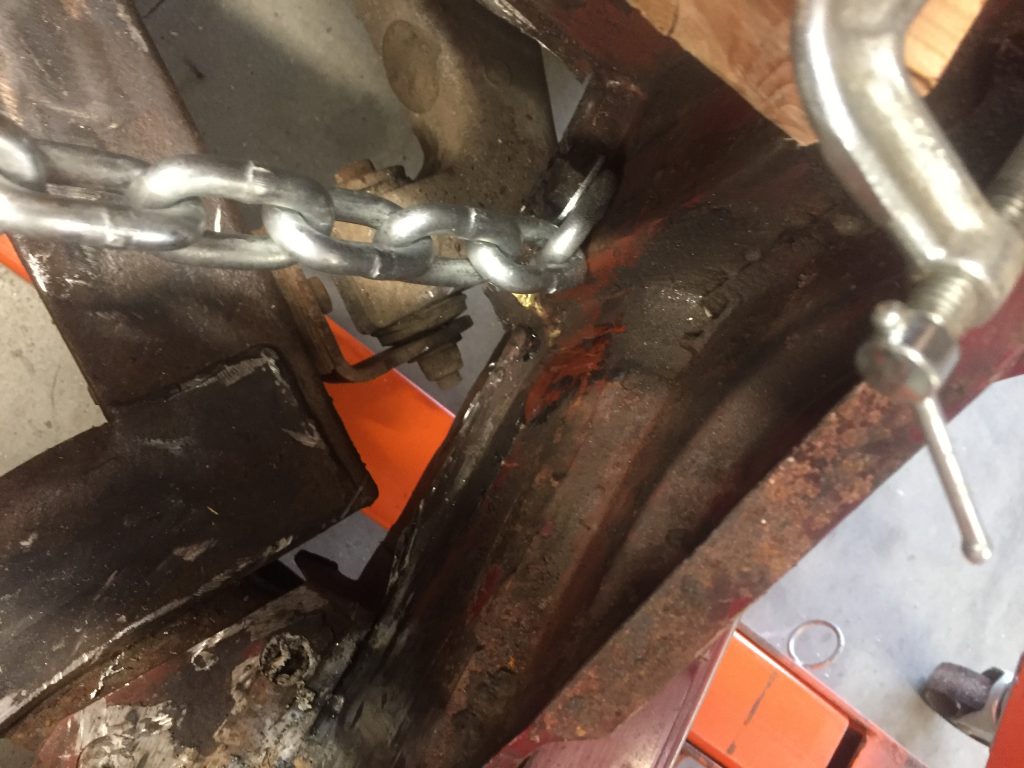
As I looked over the frame after removing the body, I was really pleased at the absence of rust and absence of cracks in the usually suspect areas. However, upon closer inspection it was obvious that the car had taken a hit in the right front corner. The direction of the hit seemed to be from the right front wheel on a vector through the driver’s head, as if it had been driven into a culvert and struck something immovable.
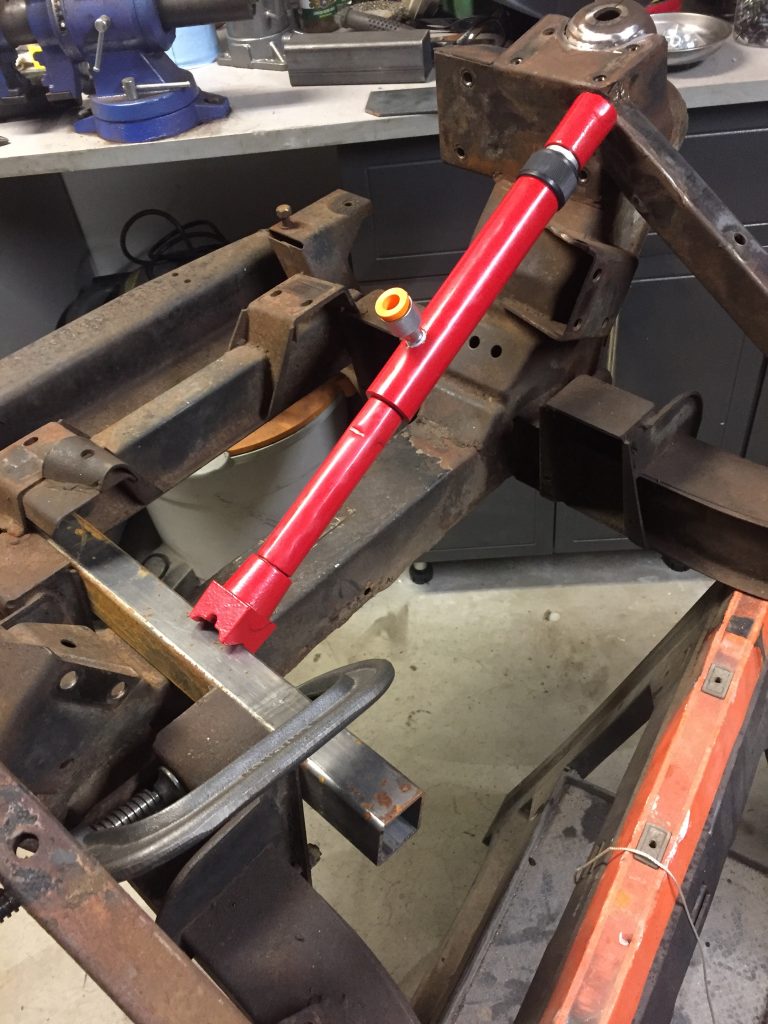
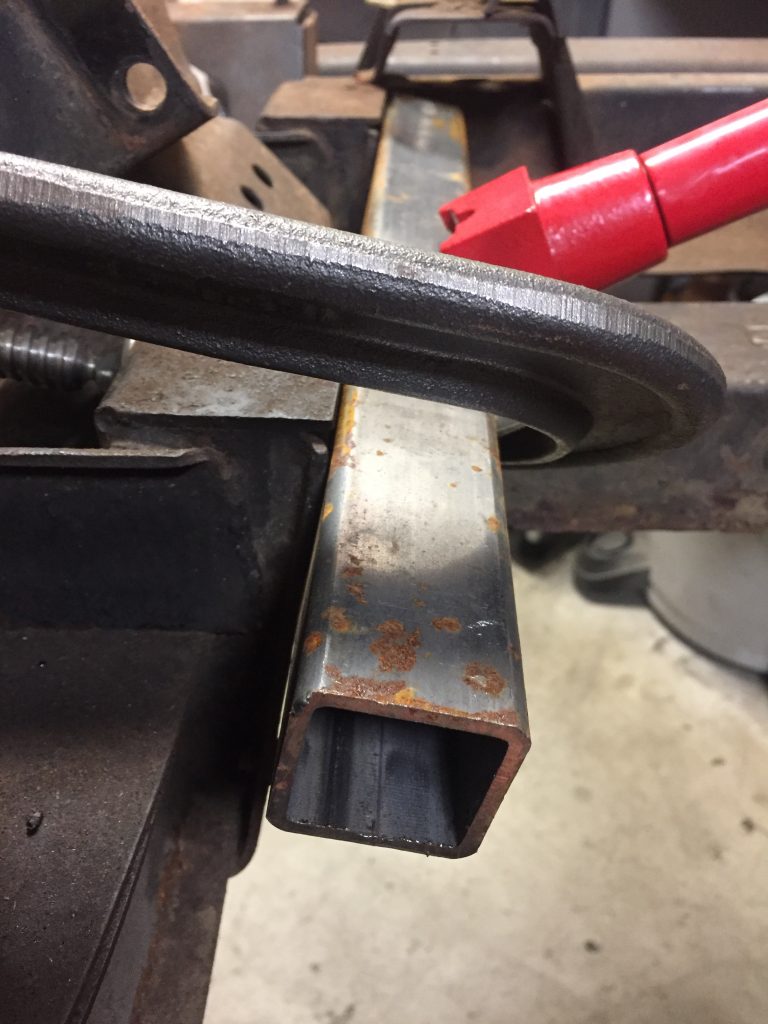
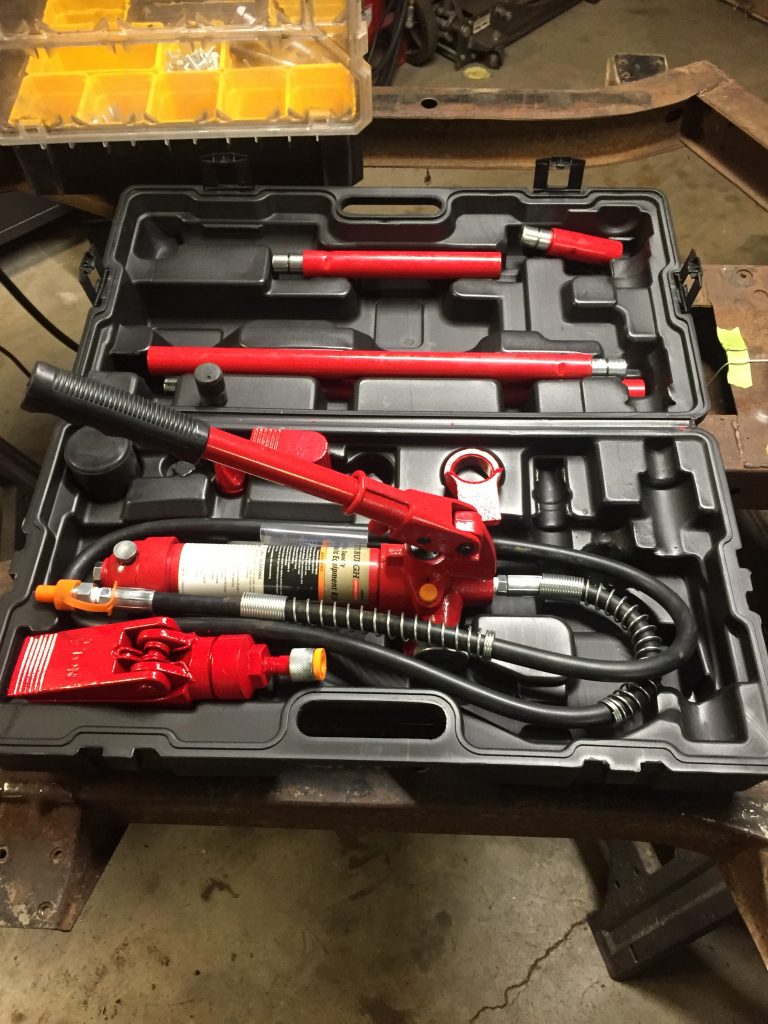
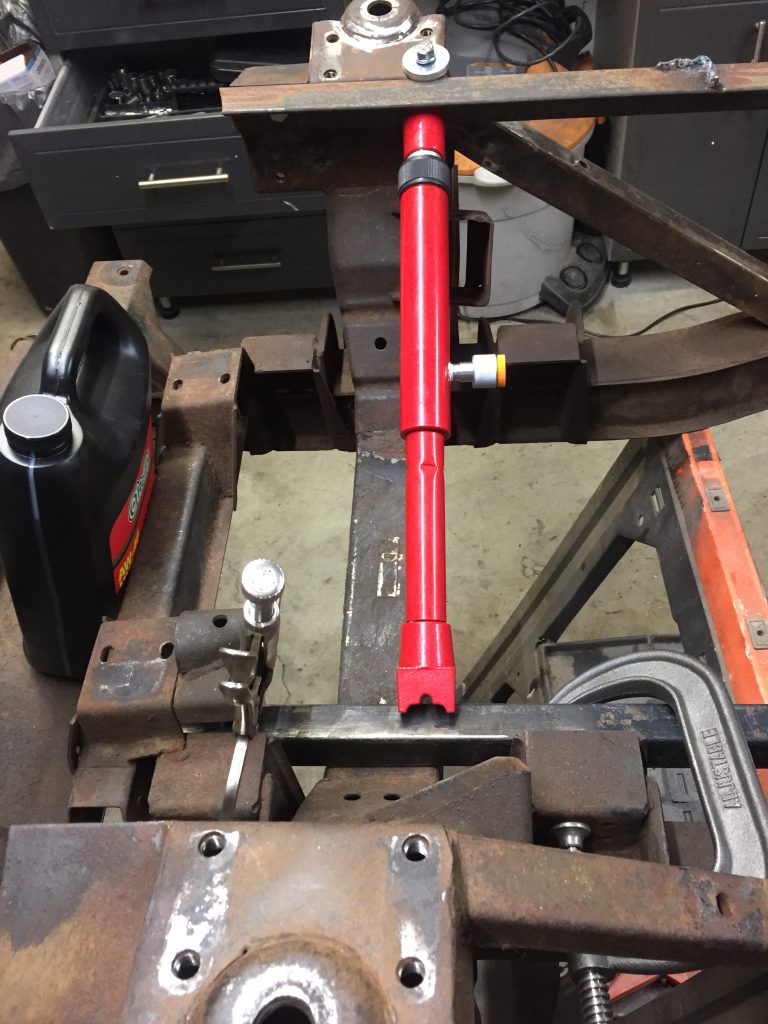
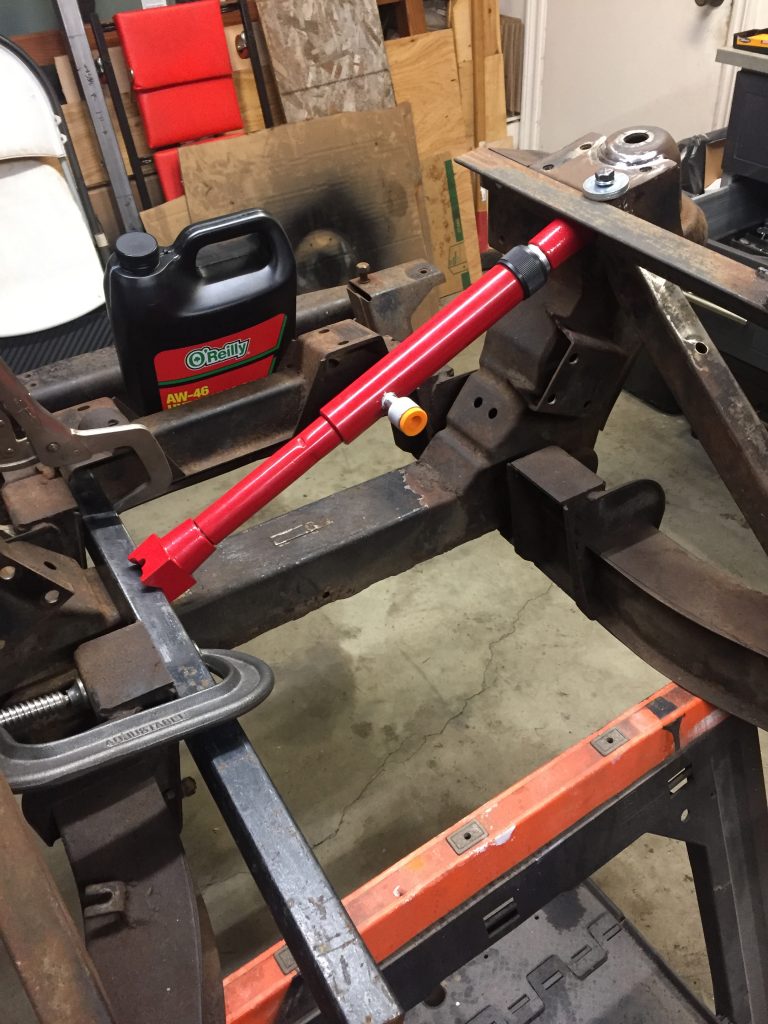
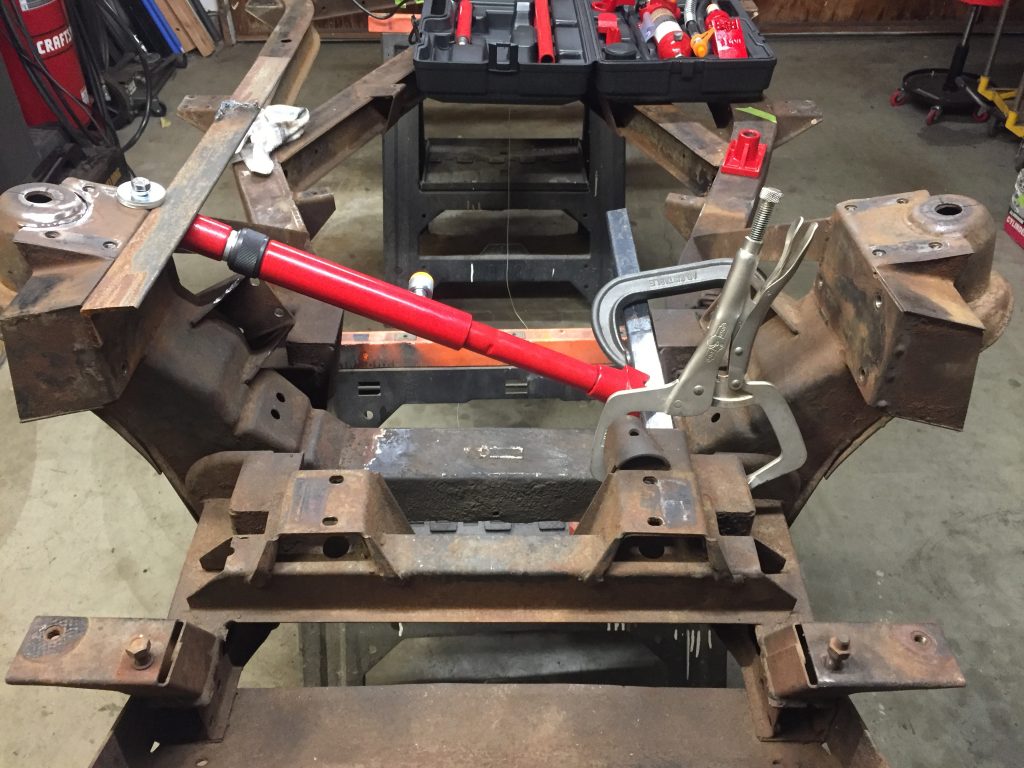
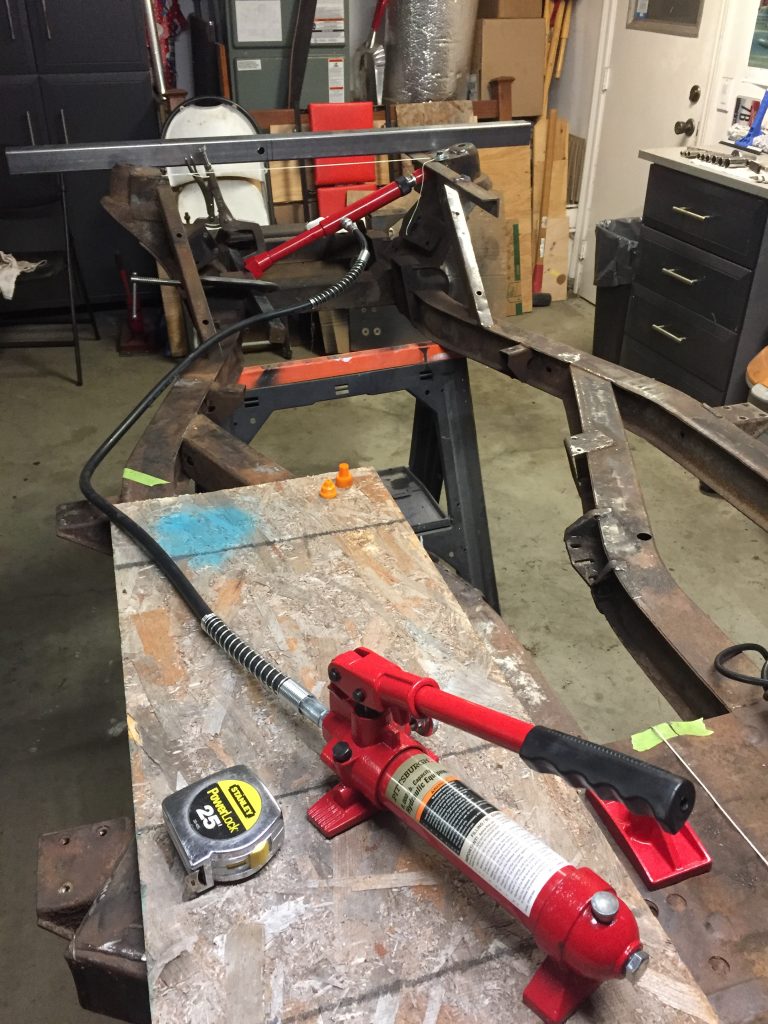
I thought about taking it into a body shop that had frame straightening equipment, but ultimately decided that a little work with a porta-power hydraulic ram would solve my problem. Well, that along with some new parts and a bit of welding. I was already planning on replacing every bit of the car that could possibly be worn, so adding few more pieces to replace bent parts was no big deal.
The porta-power worked great pushing the shock/spring tower back to where it belonged. We’re only talking about 7/16″ but the frame is a little springy so it had to be pushed a bit further than that to allow for spring back. I replaced both upper fulcrum pins (left and right side of the car), welded the shock tower where it had come apart, and then trusted that I could get the alignment right when it all got bolted back together. And it worked out perfectly.


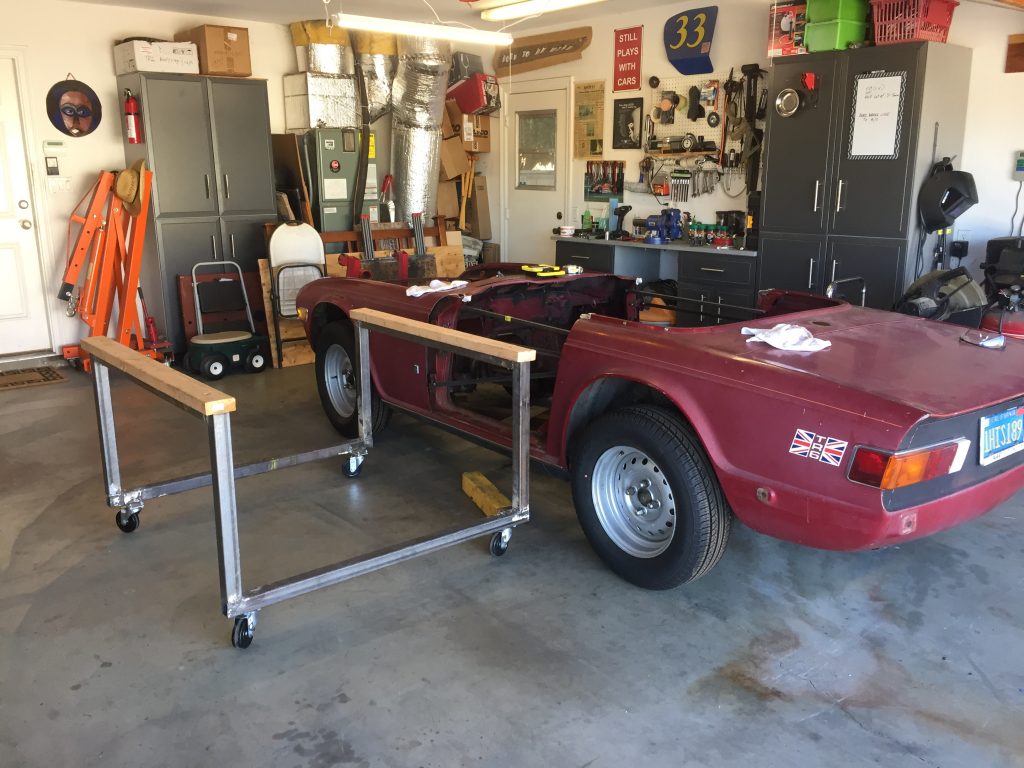
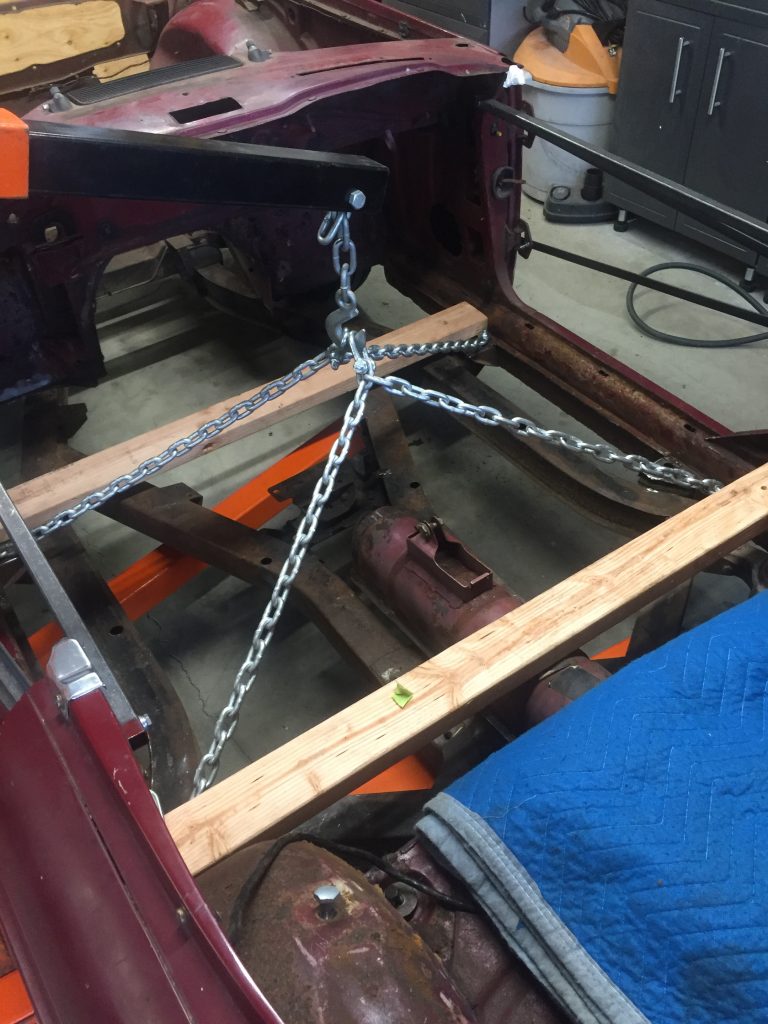

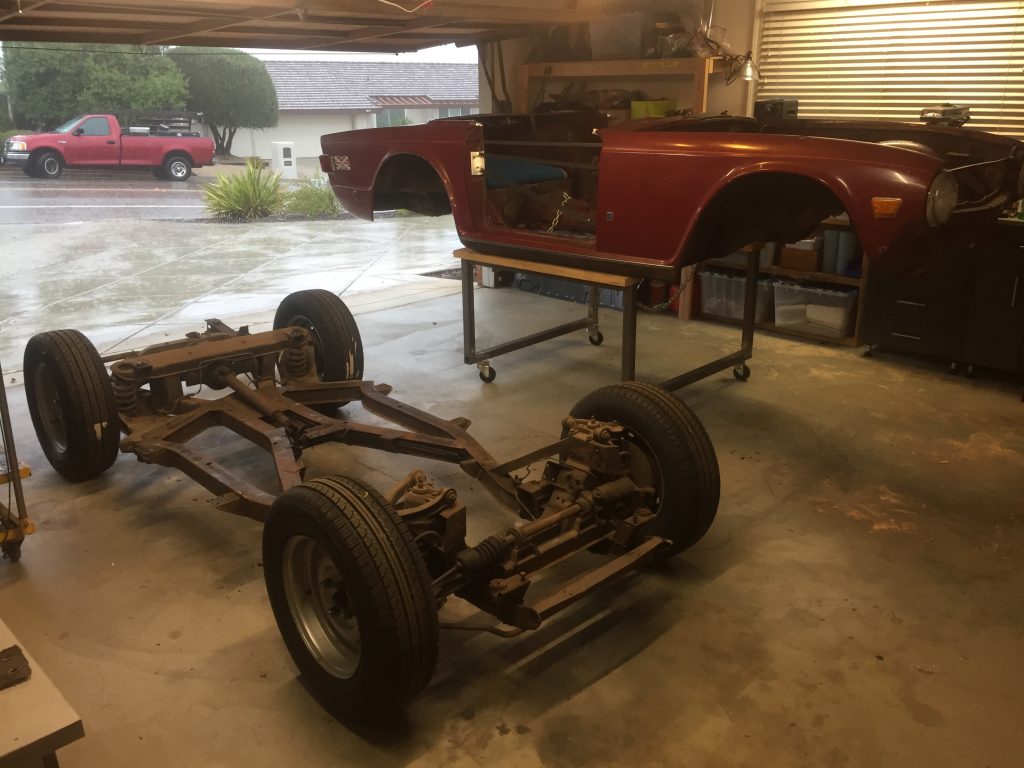
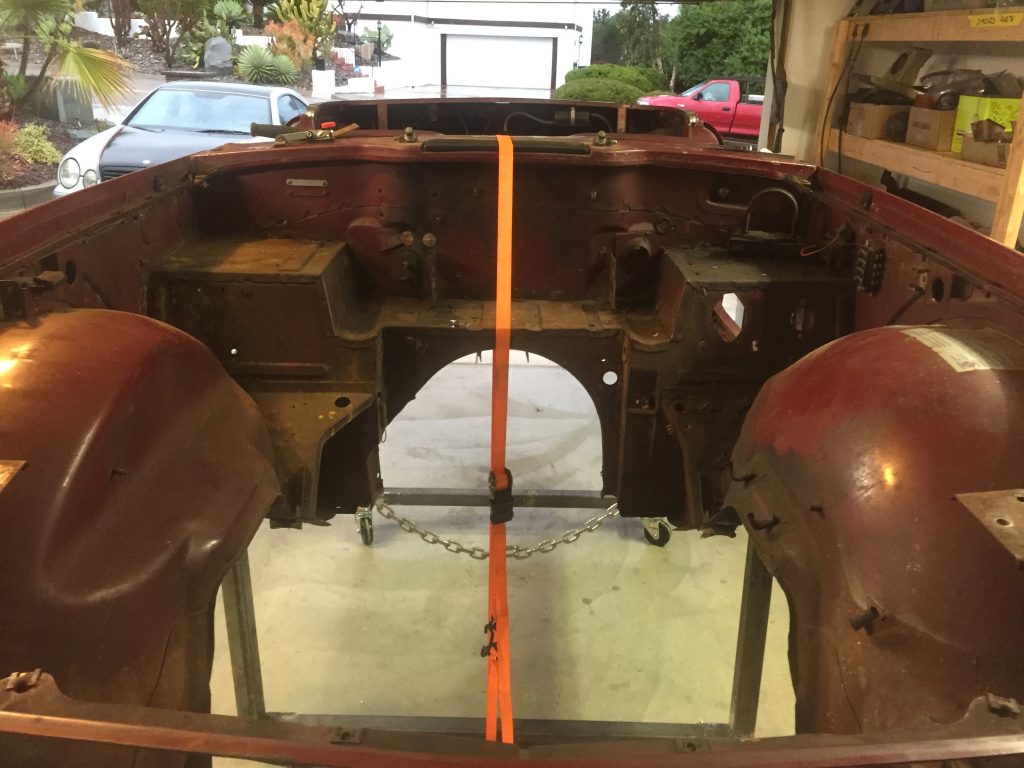
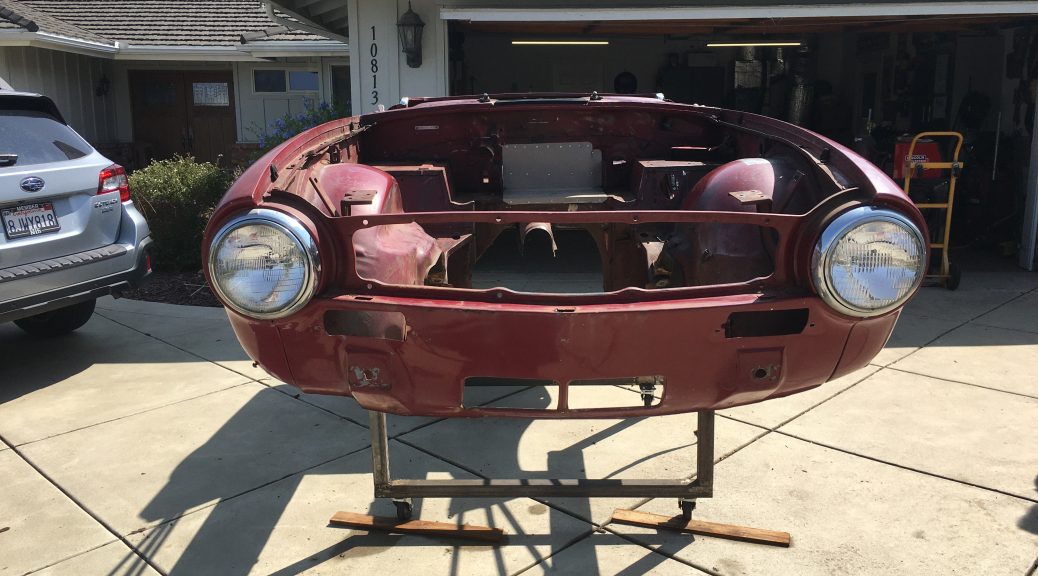
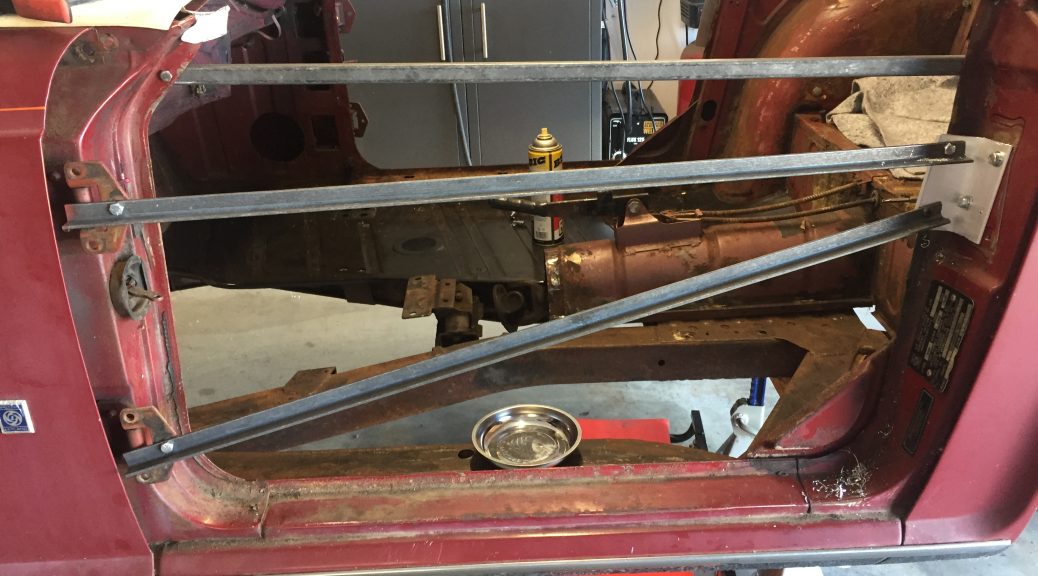
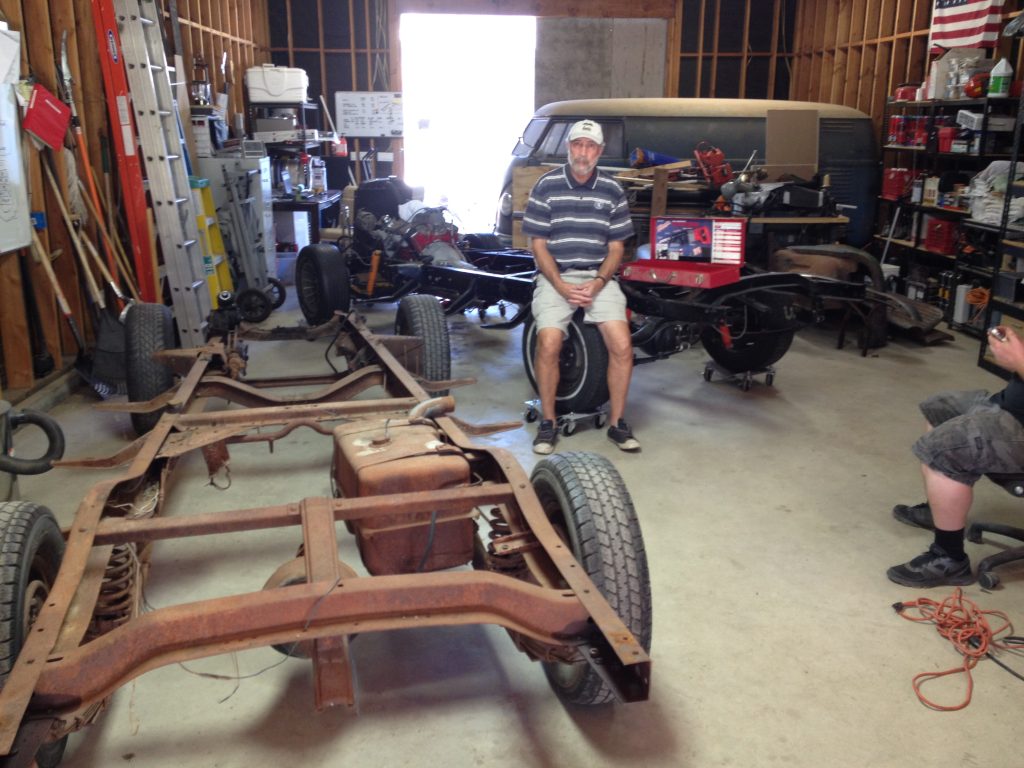
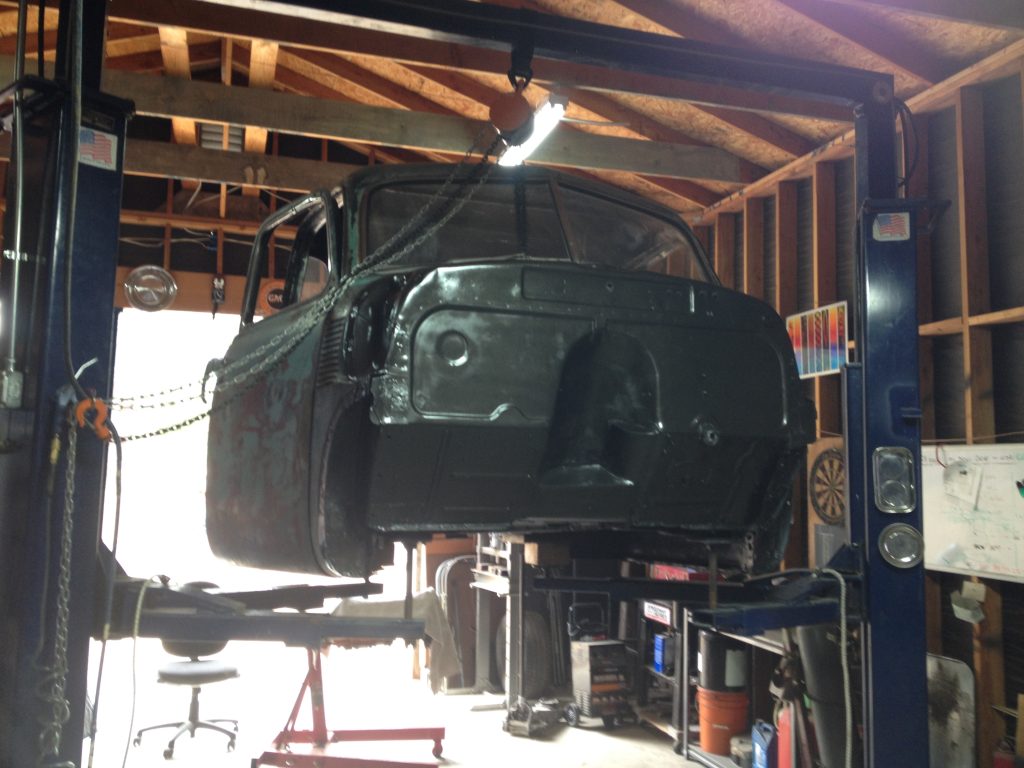
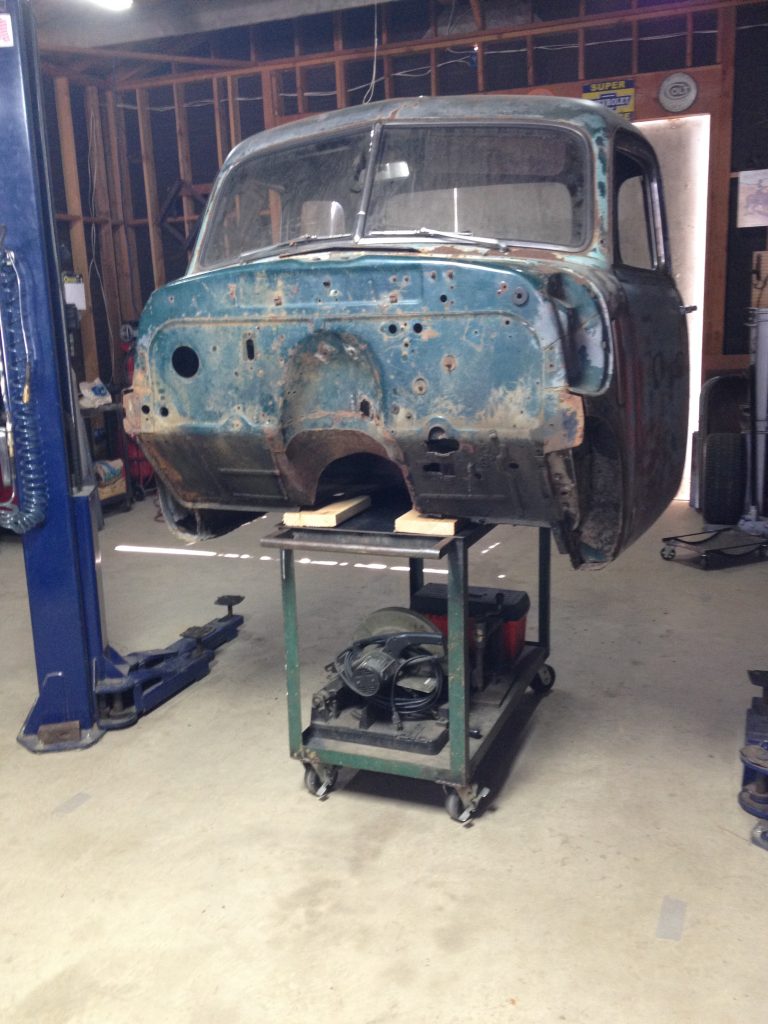
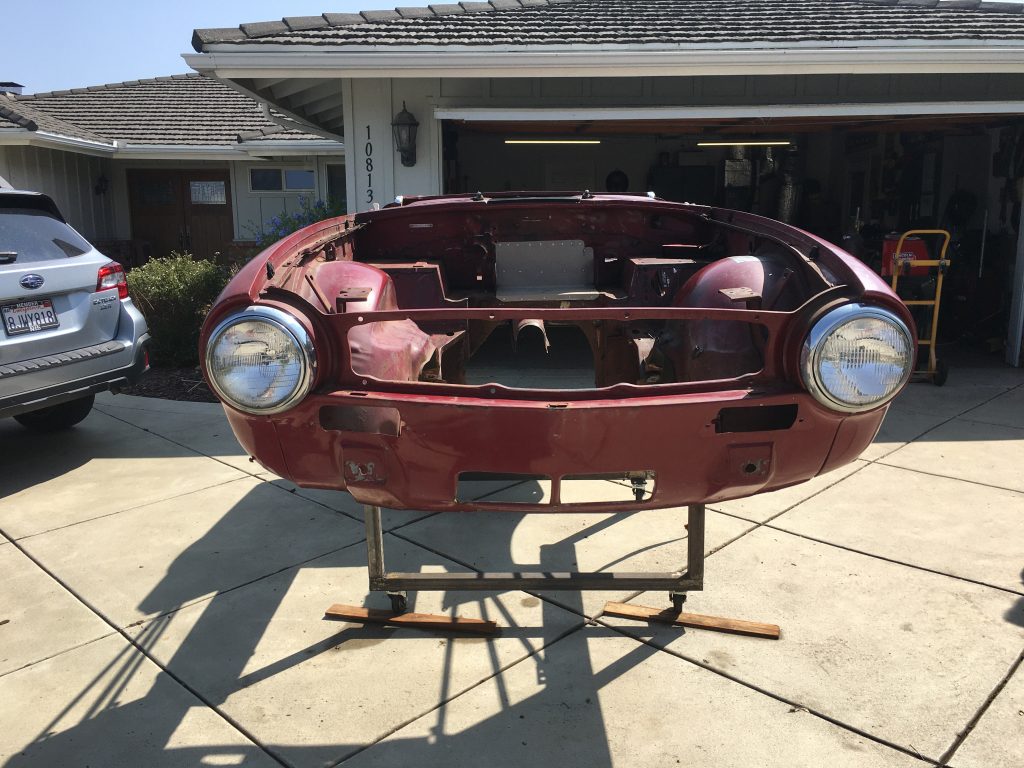
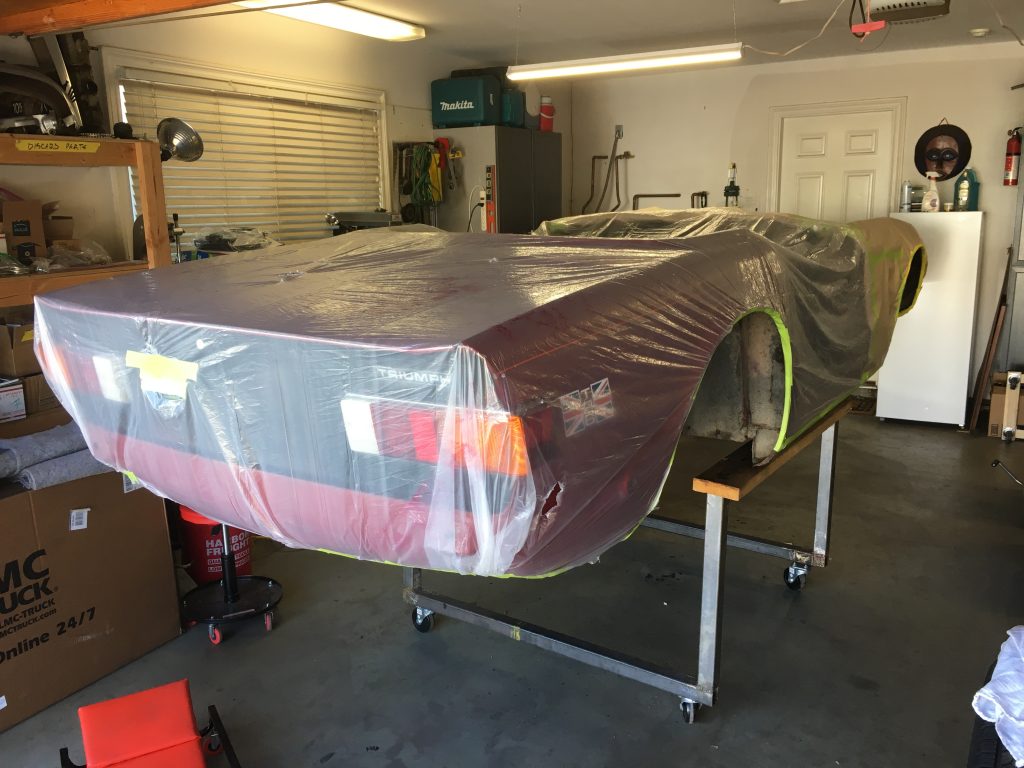
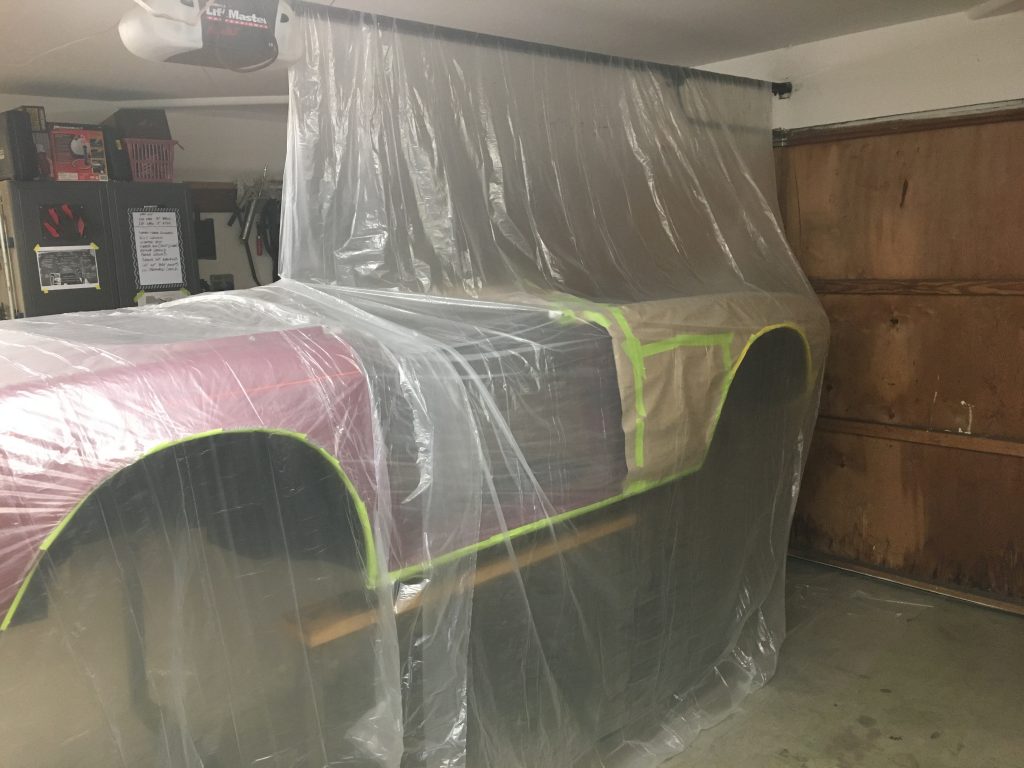
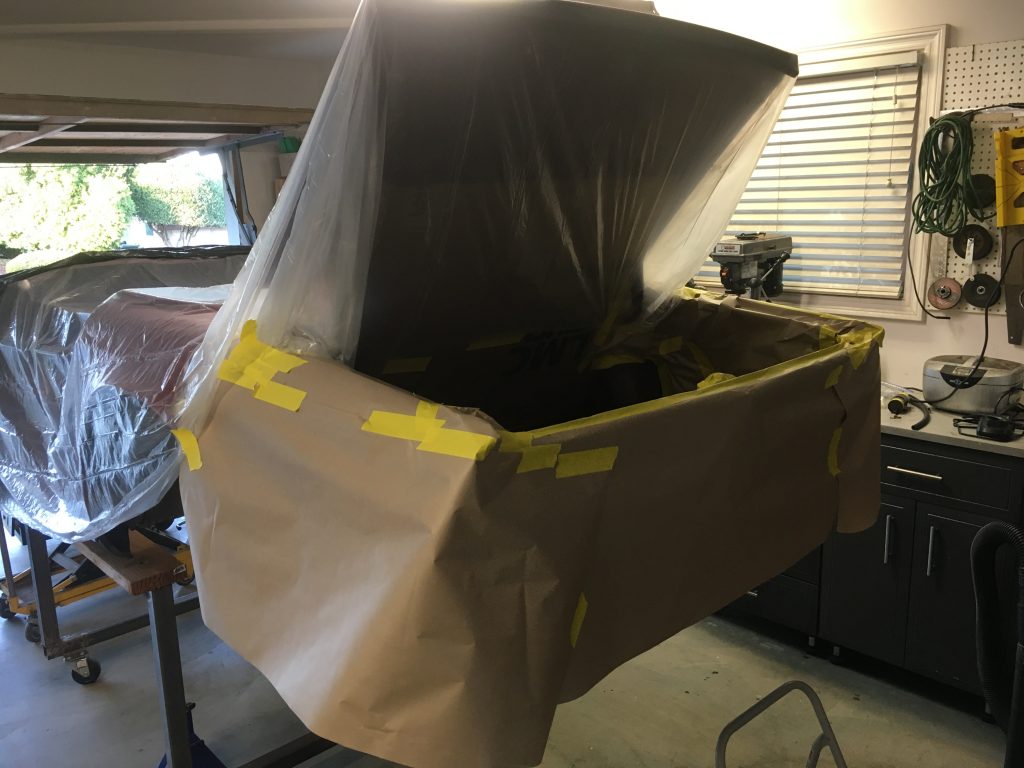
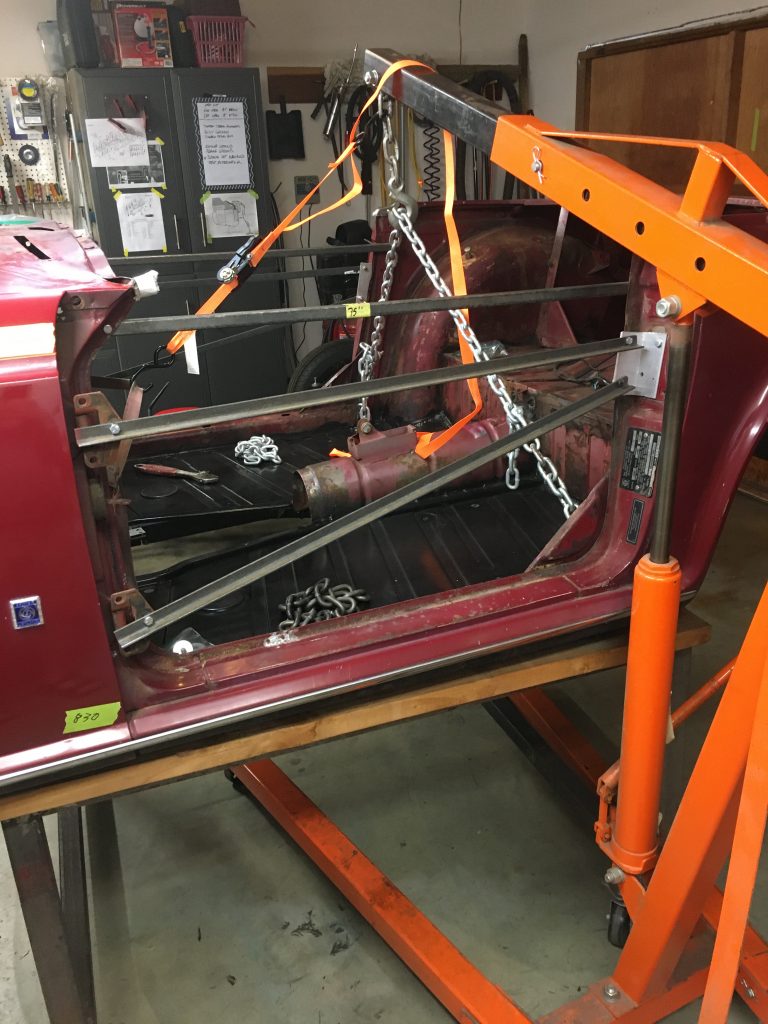
Separating the body from the chassis was a momentous occasion, and pretty straightforward, with the engine and transmission and the passenger floors and gas tank already removed. One of the online sites, can’t remember whether it is TRF or Moss, has a good illustration of all the bolts securing the body, and that was helpful for removal and re-assembly. Of course there are brake lines and fuel lines and other bits that need to be undone, as well.
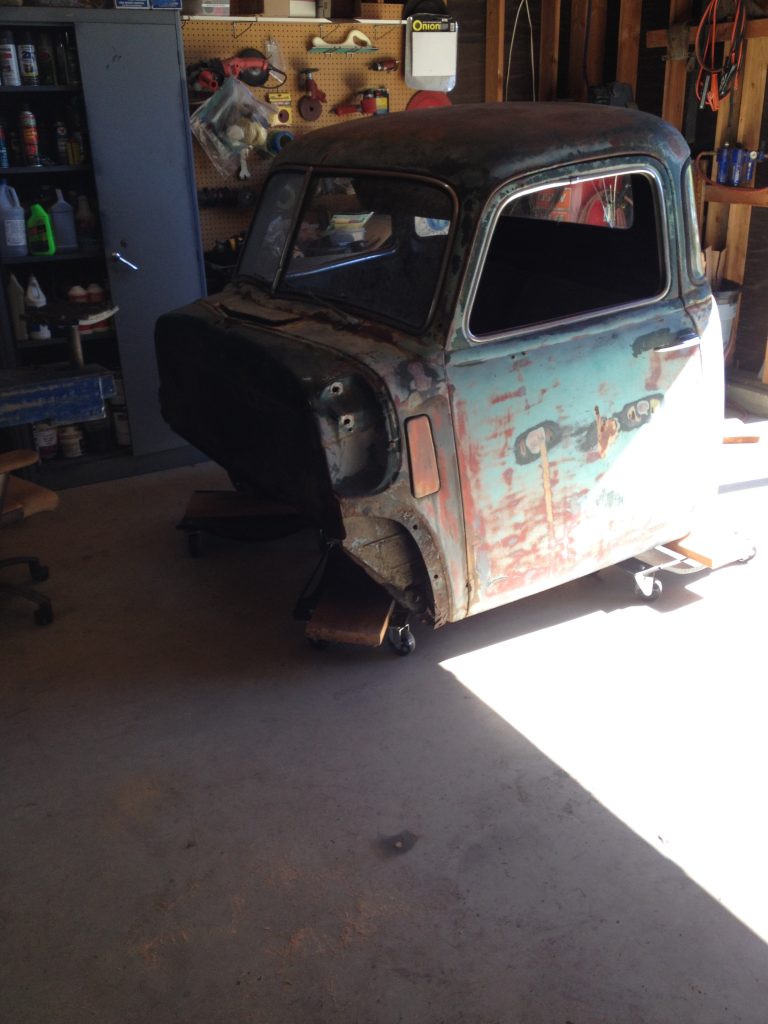
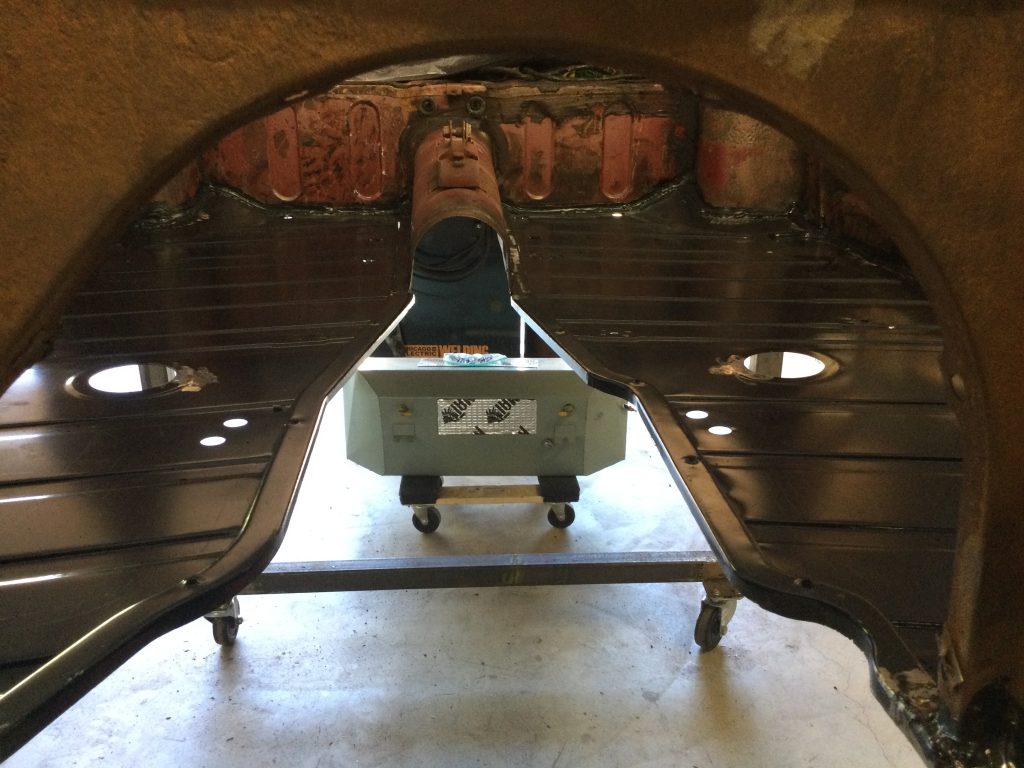
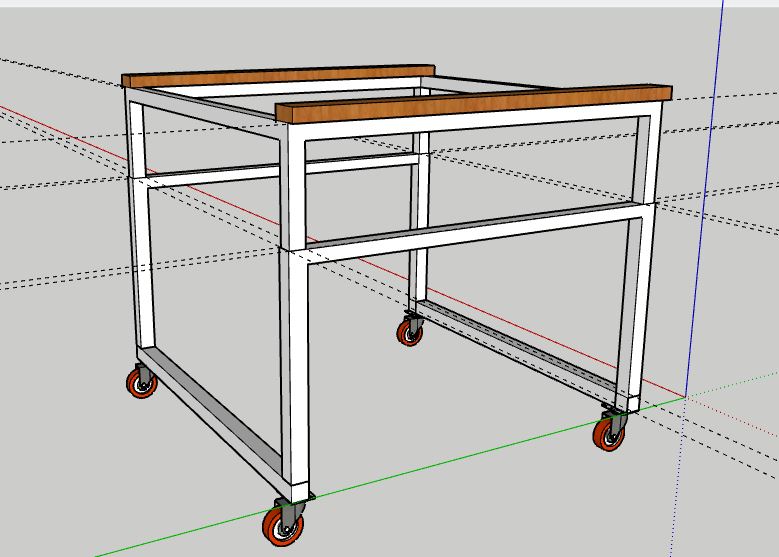
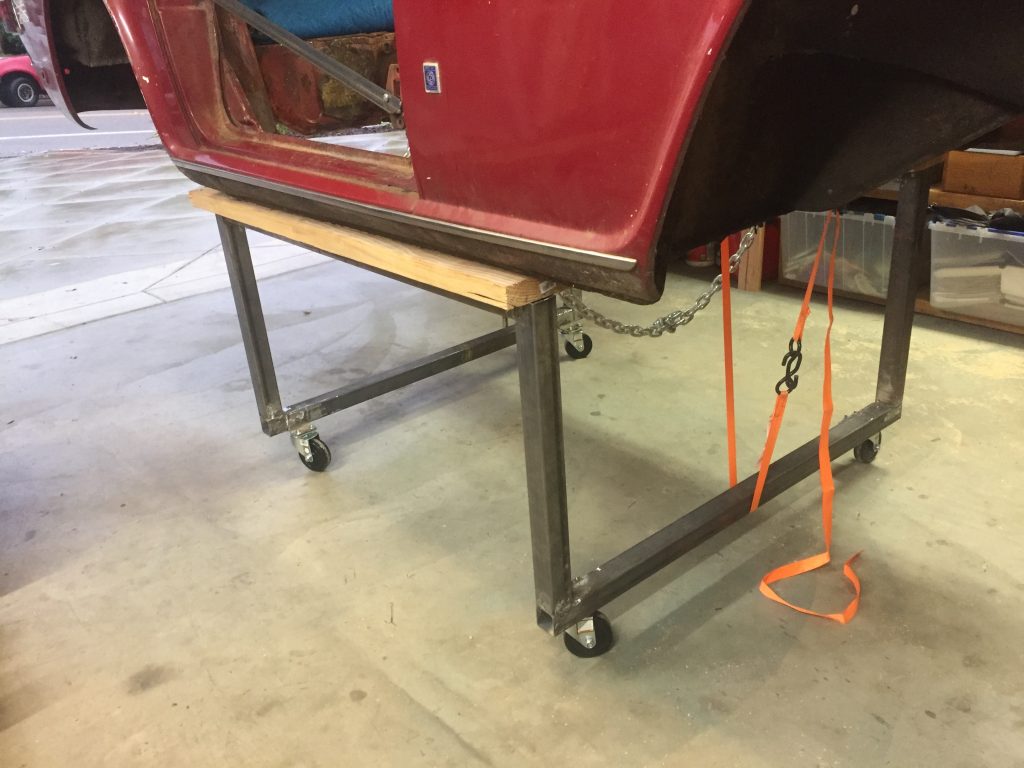
We used our engine hoist to do the lifting, anchoring the chains as shown in the photos. I built a stand with wheels so that the body could be moved around in the garage. The stand also allowed me to work while standing up inside the engine bay or passenger area when necessary. As you can see in the pictures, I utilized the door hinges and latch holes, along with a couple other existing holes, to brace the body so it would not fold and create problems later. I really didn’t want to go to the trouble of welding and and then grinding off the braces, nor did I want to drill any holes.

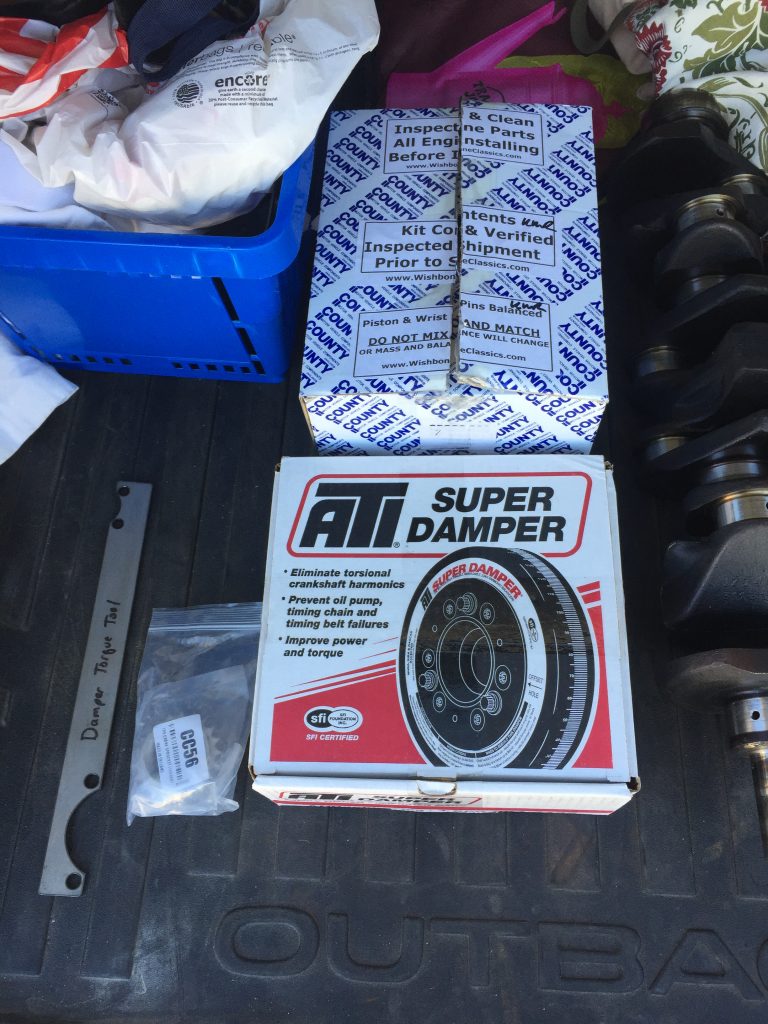

I brought the engine block and cylinder to head to Casey down at HDS Autoparts & Machine Shop in Escondido, California. Along with those heavy pieces I dropped off the following:
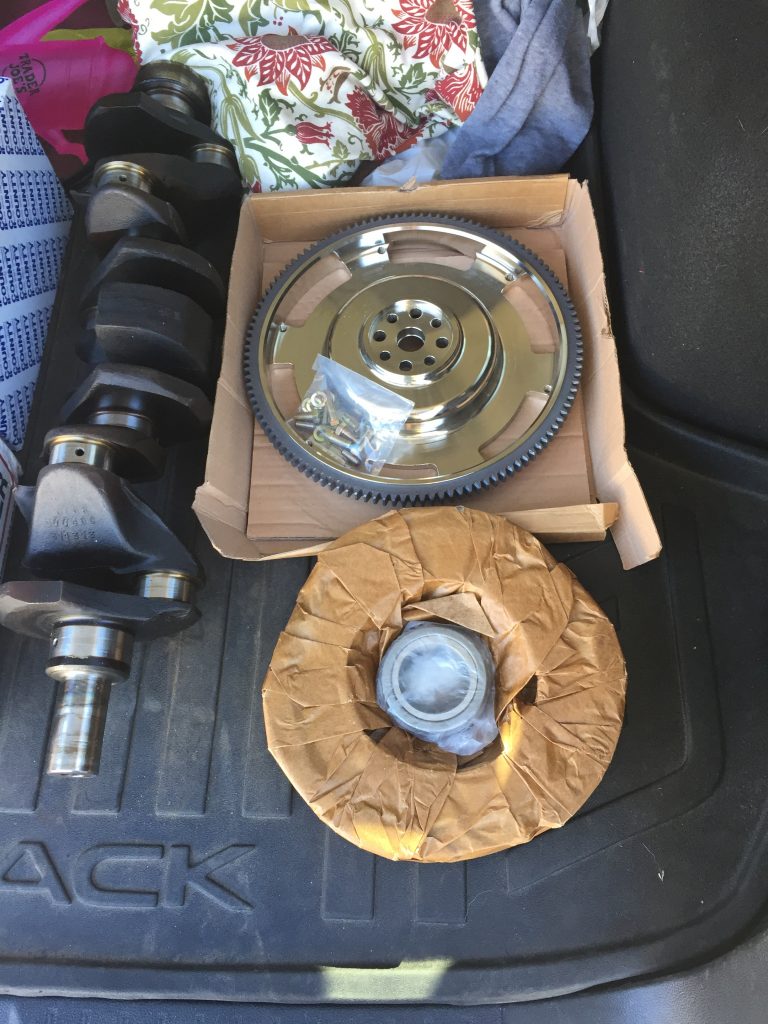
GP3-110 camshaft; ATI Super Damper; lightweight steel flywheel; new clutch and pressure plate; hardened valve seats; new valves; ARP head studs — all from Goodparts. I brought Casey my matched-weight set of County .020 pistons/rings/pins from Wishbone Classics. I also brought him my crankshaft; new timing gear; and my lightened 640 gram connecting rods. And probably other stuff I’m forgetting. Anyway he got the entire rotating assembly from damper to pressure plate.
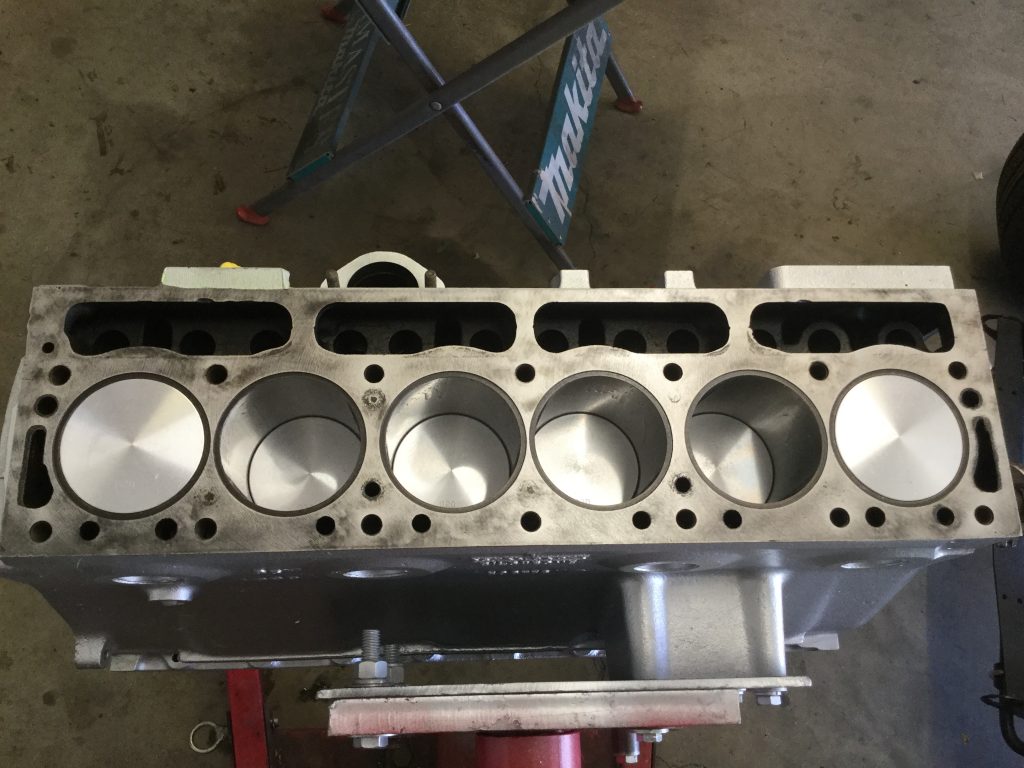
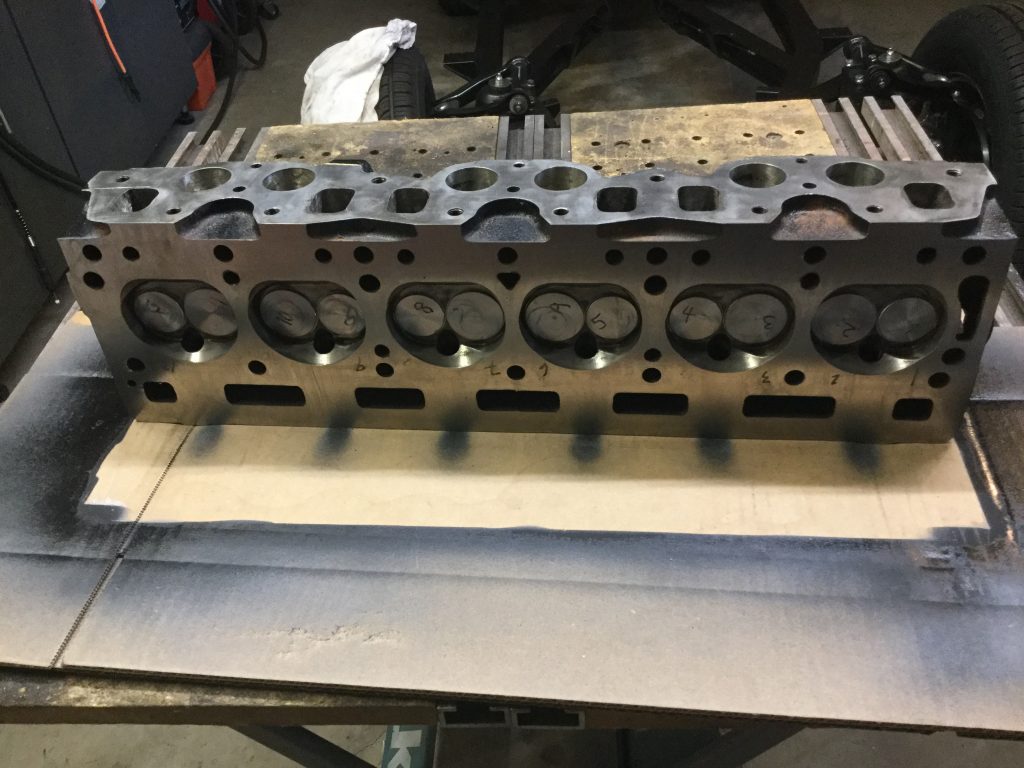
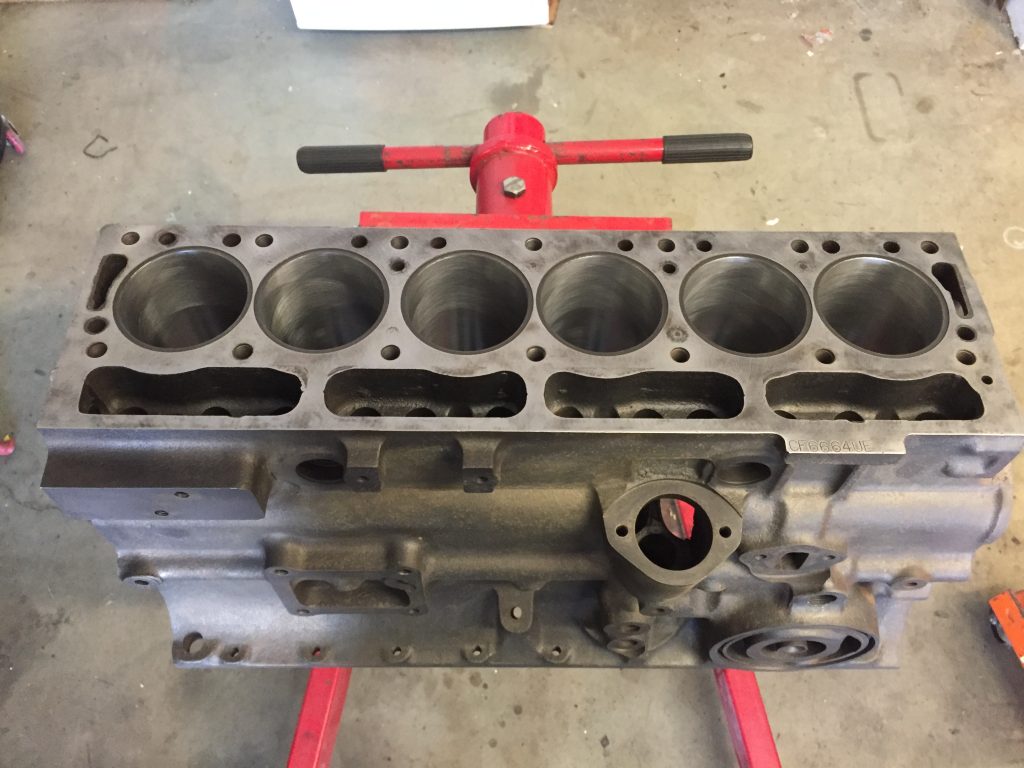
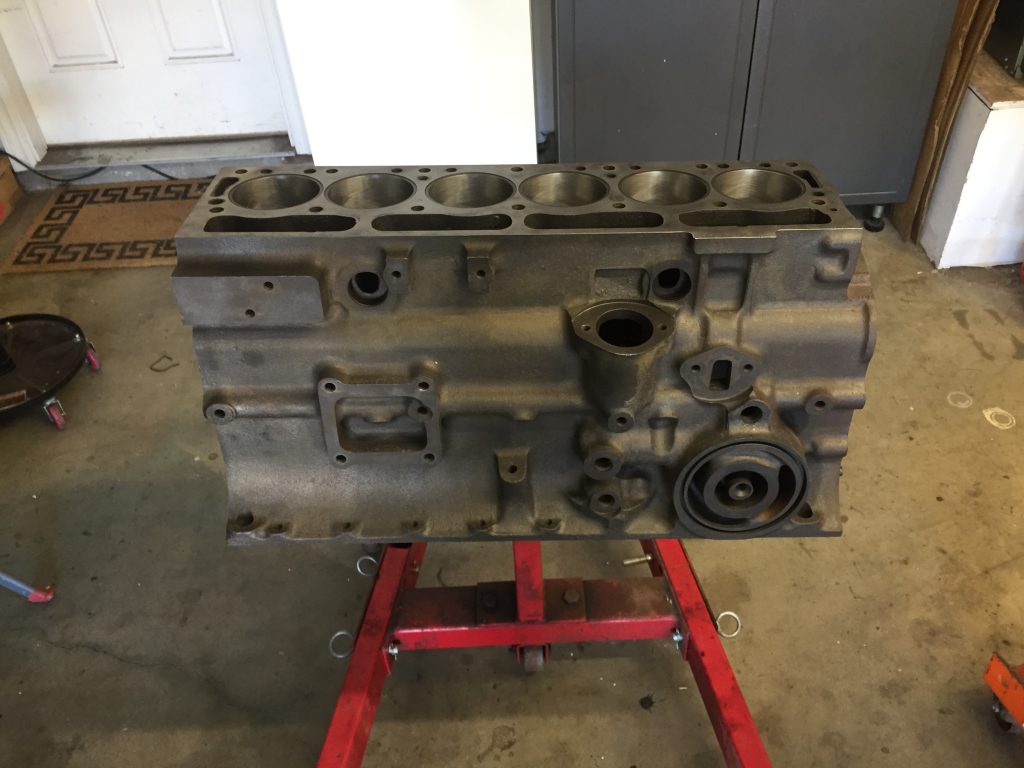
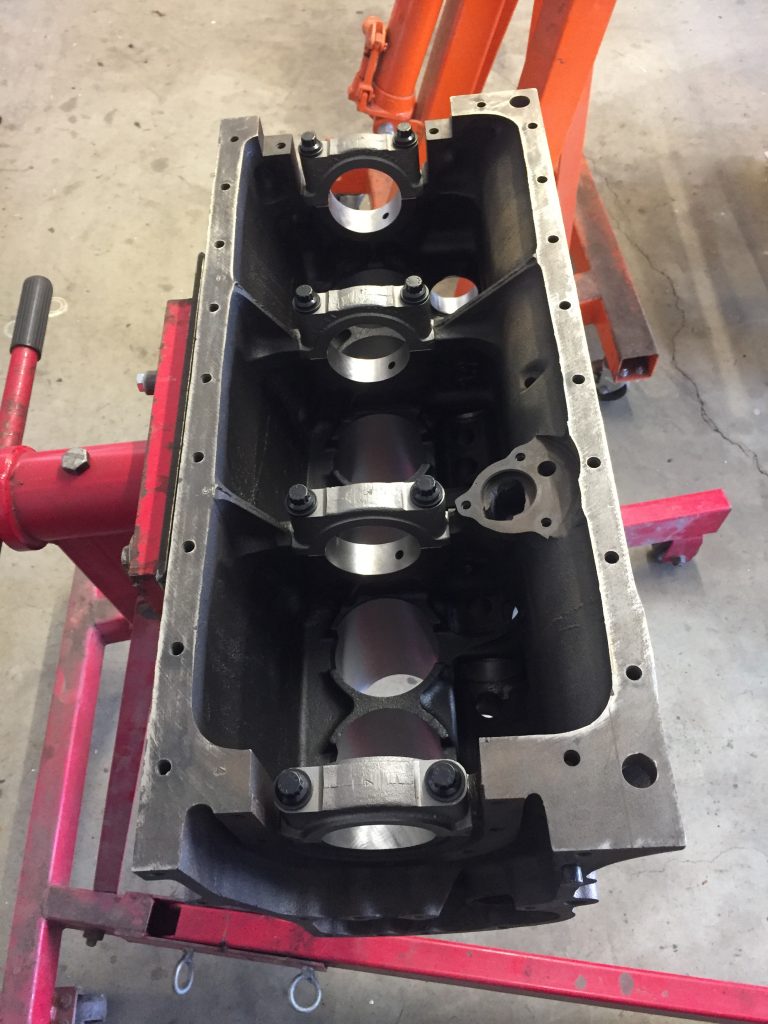
HDS cleaned and magnafluxed the engine; bored the block and installed cam bearings; bored the cylinders .020″ and surfaced the block; peened my modified connecting rods; kissed the small end of the rods; modified the rods for ARP rod bolts; installed cast iron valve guides and hardened valve seats; polished the crankshaft; machined .140″ from the cylinder head; and balanced the entire rotating assembly. The compression ratio should be in the area of 9.5:1 with the milled head.
With the matched piston and rod weights, there wasn’t much to do on the rotating assembly except for the pressure plate. As you can see from the photo above, quite a bit of drilling (metal removal) was needed to balance that puppy. Should be smooth sailing, especially with the inherent smoothness of the six.
Postscript: the spec I gave Casey for the valve guide height was from the factory manual. That was a big oops, explained in the engine assembly article later.