1956 Chevrolet 3600 Interior Restoration

After sandblasting the Farm Truck from “bumper to bumper,” including the interior, we got busy restoring the truck to its former glory. Owner Lewie wanted the two-tone dash as original, and we love the way it turned out. Click on the pictures to enlarge them.


interior of 1956 Chevrolet truck freshly painted.
Fresh paint. Now is the time for…

At this stage, spend some time laying on the cab floor deciding what to do next, such as installing defrost vents and the wiper system.

electric wiper motor installed in our old Chevy truck
New electric wiper motor; our manifold vacuum will be reserved for brakes. Slots for defrost vents visible in this photo

Since we have added vacuum assist for the brakes, we opted to install an electric wiper motor in lieu of the original vacuum unit. We decided to purchase defrost vents late in the restoration and had to become contortionists to install them. Doable, but not the fifteen minute job it could have been.

defrost vents for Chevy truck
Take it from me… add your defrost vents before doing anything else.

The defrost vents, along with many of the parts for the Farm Truck were purchased from Classic Parts of America through their website:  classicparts.com. With the appropriate, e.g. 1955-59, magazine-sized catalog in hand, parts were routinely found and ordered in minutes. So, if your thing is exclusively Chevrolet trucks, they are a good resource. Customer service gets a passing grade, too.

sound deadener installed in cab
Making it quiet.

Google found this 236 mil Sound Deadener Heat Insulation on the Walmart website:  $24 for a 60″ by 40″ sheet. Two sheets got the job done.

speaker installed in corner of 1956 Chevy truck cab
Convenient place for speakers, even with in-cab fuel tank.

The speakers were bought locally at Fry’s, and they just happened to fit like they were made for the Farm Truck’s cab corners

wiring the dashboard on our old Chevy truck
Getting dash wired… note jagged cutout for radio.

Someone got a little carried away with the radio cutout. Since Lewie wanted the oval face “vintage look”radio, we made a face plate ourselves.

irregular shaped opening for radio
What radio fit this opening????
vintage looking radio installed in hand made plate
Plate for “vintage look” radio.

The headliner looks great, but the rubber gasket was a pain to install. We created a little more room under the lip with wood shims and used plenty of lubricant – along with a hammer and block of wood – to urge the rubber onto the lip. For the corners we shaped a piece of wood with a large radius. It was a two-person job.

headliner, dome light, and gun rack installed
Headliner, dome light, gun rack… check!
seat belts, fuel tank, carpet, and mats installed
seat belts, fuel tank, carpet, and mats… done!

Other than the sound of gas sloshing around in the tank, this cab should be quiet! Actually, our ’59 Apache is the same setup, and the fact the fuel tank is in the cab hasn’t been noticeable at all.

dashboard completed on our 1956 Chevy truck
Dashboard nearly complete.

We ditched the original ammeter and the mechanical oil gauge, opting for a couple after-market gauges from JEGS. More about that in the Rebel Wire post, coming shortly. The radio plate got a paint job to match the dark gray on top of the dash.

All in all, we’re pretty pleased with the interior restoration. It looks clean and tidy, and should be quiet, as well.

1956 Chevrolet 3600: Installation of the 235 six and the Muncie 319 transmission

We installed the 235 six without the transmission attached. Even so, we removed all the support structure between the fenders rather than trying to shoe horn it in and bang it against the firewall. Besides, this is a tall truck, and being able to reach in from the front made plumbing and wiring tasks much easier.

235 six engine installed in the Farm Truck
Stovebolt six back in the Farm Truck

We exchanged the original 318 Muncie three-speed  for a rebuilt 319 with the Borg Warner electric overdrive. The transmissions were the same length so we were able to use the original driveshaft. Installations (with the clutch alignment tool) was a snap.

Muncie 3 speed overdrive transmission on the bench
Our fresh Muncie 319 3-speed overdrive transmission

However, after filling it with GL-1 gear oil, which lubricates both the trans and the overdrive, we were surprised to find a leak on the passenger side of the transmission. I sent a couple photos to the rebuilder – All Trans in Greenville, SC – and they identified the culprit as a pressed-in tapered pin that holds the reverse idler shaft in place.

pointing out the leak in our Muncie 319 transmission
Hotrodder’s nightmare, a leak!

Bruce at All-Trans said tap a center punch with a hammer in the middle of the pin two or three times. We went further and lightly ground the pin and surrounding area so it was flat, center-punched the middle of the pin, and then randomly punched about a dozen dimples around the around the pin. This stopped the leak, but we decided to spread a layer of JB Weld over it, too, just to be safe.

cutaway of transmission showing pin that was causing the leak
number nine, number nine, number nine — the reverse idler shaft pin

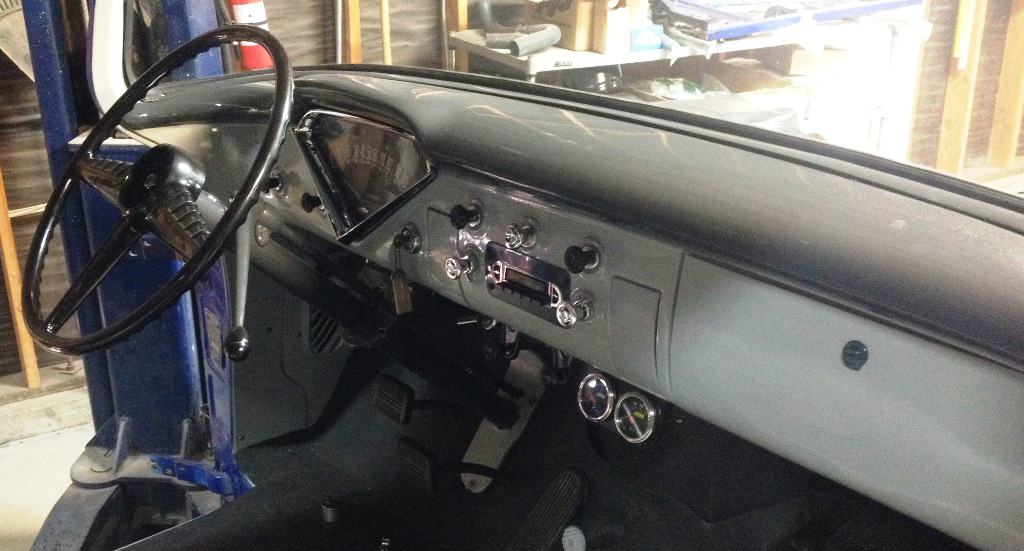
The next step was hooking up all the overdrive relay and kickdown switch wiring, and the lockout cable. It was pretty straightforward, but our kickdown switch location under the gas pedal (on the engine side of the firewall) was a tight squeeze. We hooked up about four feet of wire to each of the four terminals before mounting it.

Bracket for overdrive lockout cable

The terminals on the relay that came with the transmission were labelled different than the original item, so that caused a little head scratching. In order to sort it out and to decide where to locate the relay, we used Google’s Sketchup to create a component diagram.

Relay for the Borg Warner overdrive system

As you can see, with the 235 six, we decided to mount the relay on the firewall near the battery, coil, and resistor. Of course, at this point we haven’t tested the overdrive. In fact, that’s on the schedule for tomorrow.

diagram showing location of overdrive components in our Muncie 319 trans.
Component/wiring diagram for overdrive system

But we did fire up the engine after hooking up our new wiring harness and all the other controls and plumbing. We knew the engine ran fine from the test stand, but it’s still a milestone to fire it up in the truck.