Farm Truck Update

The restoration of Lewie’s 1956 Chevy 3600 has been progressing steadily since our last post. The cab is finally painted inside and out. We chose single stage paints purchased at Meza Automotive Paint in Escondido for exterior and interior. We used our old DeVilbiss gun for the most part, and an inexpensive (but awesome) Harbor Freight detail gun – part of a two gun kit – for the tight spots and for touch-up. The blue exterior is surprisingly bright and we’re all anxious to see it on the road with the white bits installed (bumper, grill, hubcaps, mirrors, etc).

Truck cab exterior painted a brilliant shade of blue.
Truck cab painted brilliant blue. It pops!
Interior of 1956 Chevy truck painted in shades of gray.
Interior a little more tame in shades of gray, as it was originally.

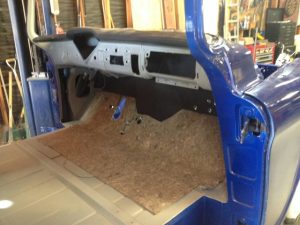
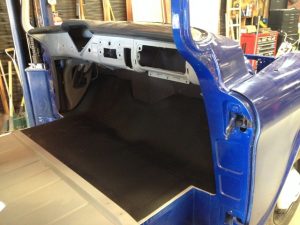
For the front part of the cab floor we bought the original style jute and cardboard inner firewall cover, and the precut jute pad and rubber floormat. All these were purchased from Classic Parts of America.

Inner firewall cover and precut jute pad.
Precut and punched rubber floormat.
Precut and punched rubber floormat. I wish I had done this in the Apache.

We will use heat shield insulation on the rest of the cab floor, and under the headliner.

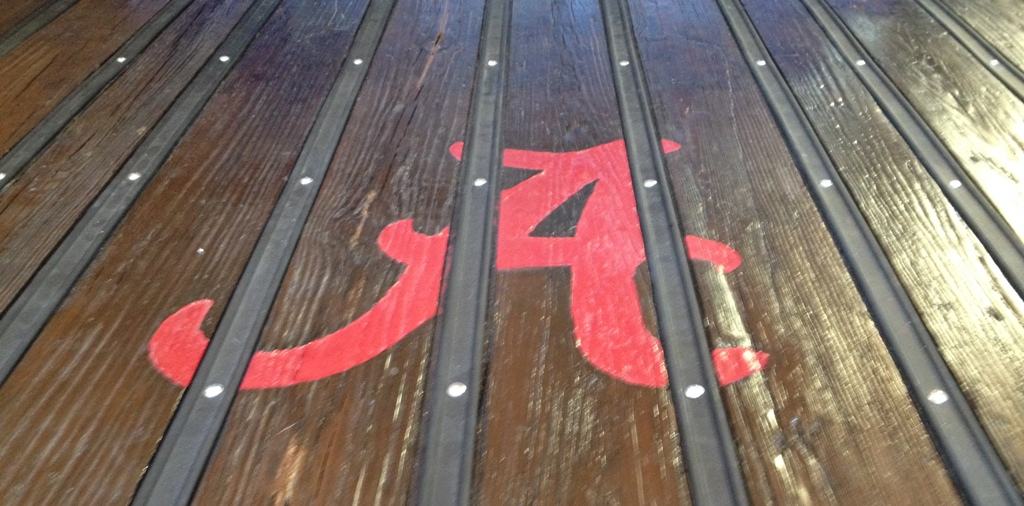
Lewie took on the project of refinishing his original wood bed, and from the crimson red “A” it should be apparent where he – and the truck – lived when the it was purchased a few decades ago.

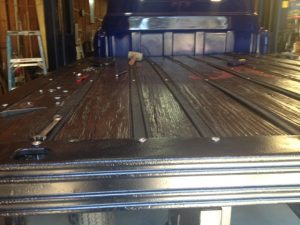
Installation of frame, bed wood, and strips.

The original metal strips were rusted, and junked. We bought these replacements from Mar-K Manufacturing in Oklahoma City… simply filled in the convenient form describing the strips for our bed (length, hole sizes, hole locations) and everything fit perfectly. Turn around time was about one week!

Mechanical tasks were also getting finished. The CPP power steering kit required cutting the shaft and column, and we elected to chop off even more to move the steering wheel away from the driver – Lewie is not petite.

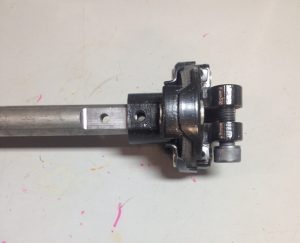
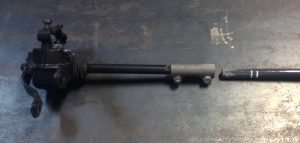
Steering shaft shortened, double D cut, and drilled for a pin or bolt.

We used Josh Sadler’s Yoshifab, right here in Fallbrook, to cut the double D into the shaft and drill a 1/4 hole for a bolt or roll-pin. We nearly lopped too much off the shaft – the column shifter has to clear the dash!

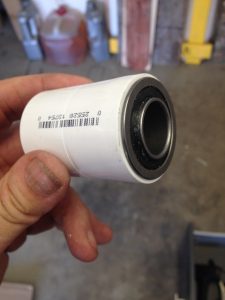
Flanged bearing inserted into PVC coupler
Flanged bearing inserted into PVC coupler. We cut the coupler just past the end of the bearing.

To keep the outer column from flopping around, we utilized a flanged bearing inserted into a piece of PVC pipe and pressed into the bottom end of the column.

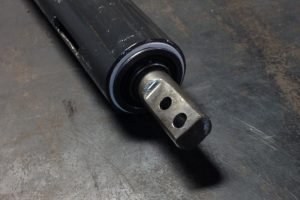
Bearing installed into bottom end of steering column.

Once the engine and transmission are in place, we will install the shifter mechanism onto the steering column. The slotted hole visible in the above photo allows positional adjustment so that the shift rods operate on the trans levers correctly. We will then need to chop a couple inches off of the upper shift shaft (under the dash) since we shortened the steering column.

Shifter shaft needs to be shortened a couple inches, exact amount to be determined later.
Shifter shaft needs to be shortened a couple inches, exact amount tbd later.

In the next post, we chase down a vacuum leak in the 235 six.

Stop the Vacuum Leak (we see the light)

When the 1956 Chevy farm truck entered the barn in January, it was running pretty well. Vacuum at the intake manifold was at 20 inches and a compression check – wet and dry – showed even numbers across the cylinders. After pulling the engine we did a leak down check and again the numbers were similar for all the cylinders, even if percentages were a bit high. We could hear air escaping through the crankcase breather pipe, indicating the rings weren’t sealing as well as they might. But that check was with a cold engine, so we decided against a rebuild at this time.

We cleaned and painted the engine, rebuilt the carburetor, installed new spark plugs, set the valve lash and static ignition timing, and then added a power steering pump and alternator.
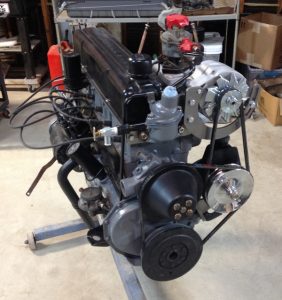
The 235 six, with fresh paint and added power steering pump and alternator.

We went full quick and easy mode to fire up the engine and check for leaks, using the engine stand as our test bed.
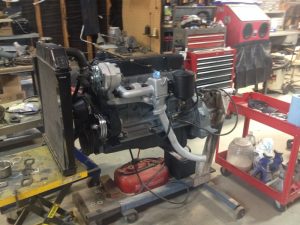
1956 Chevy 235 six in our engine test stand.
Our engine test bed worked like a charm, simple and easy.

We hooked up our two essential gauges – oil pressure and vacuum – and fired up the stovebolt six. And it ran like crap. Would not idle, vacuum below ten inches, ignition timing out in left field just to get it to run. We grabbed the aerosol can of carburetor cleaner for a squirt around the base of the Rochester and immediately the RPM increased. Bingo:  a vacuum leak. No problem, easy fix, right?

We tried every combination of gasket, no gasket, Loctite 518 with gaskets, 518 without gaskets, thick gaskets, thin gaskets… no improvement. We used our flat metal welding table and 600 grit wet/dry paper on both sides of the insulator, and on the carburetor base until we were sure they were flat. Still no improvement.

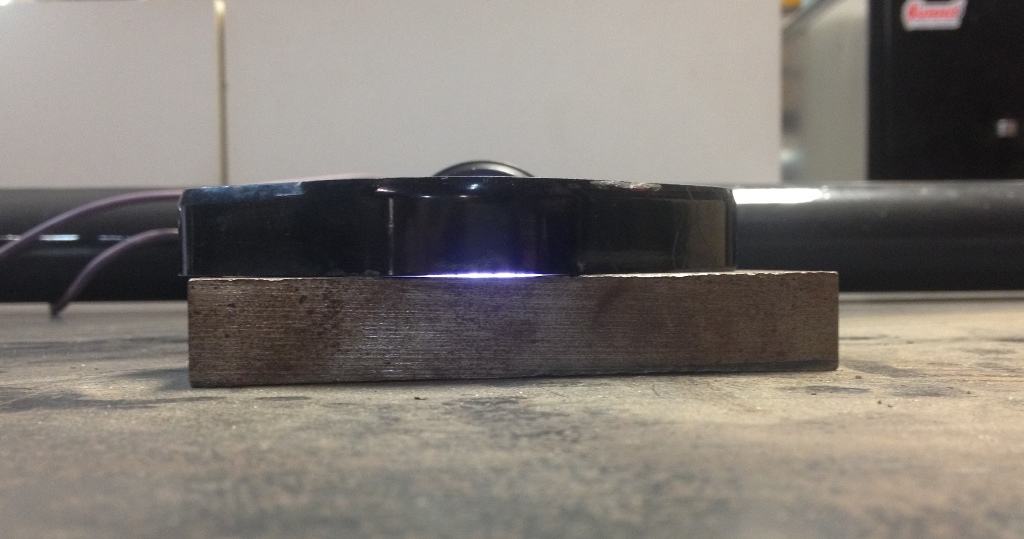
Finally getting smart, we brought out a flat chunk of metal that we keep in the toolbox and laid the insulator on it with a flashlight behind.
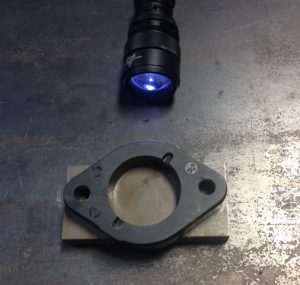
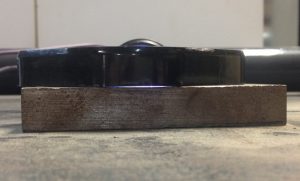
Diagnostic tools: a flashlight and a flat piece of metal.
Valuable diagnostic tools: a flashlight and a flat piece of metal.
Light seen shining under carb insulator, showing warpage.

The insulator was clearly warped. We installed a new (nine dollar) insulator from Classic Parts of America, and, after doing a static ignition timing reset, put it all back together for the umpteenth time, and… eureka! The old six purred like a kitten and once again showed an excellent vacuum reading.

As you can see, Lance is excited… the engine is purring and he’s holding a Corona. We used a thick gasket between the insulator and manifold, but applied minimal torque on the bolts attaching the carburetor to the manifold. I may disassemble one more time and pitch the bottom gasket as I suspect it was a contributing factor with just two bolts holding down the Rochester 1 barrel.