When the 1956 Chevy farm truck entered the barn in January, it was running pretty well. Vacuum at the intake manifold was at 20 inches and a compression check – wet and dry – showed even numbers across the cylinders. After pulling the engine we did a leak down check and again the numbers were similar for all the cylinders, even if percentages were a bit high. We could hear air escaping through the crankcase breather pipe, indicating the rings weren’t sealing as well as they might. But that check was with a cold engine, so we decided against a rebuild at this time.
We cleaned and painted the engine, rebuilt the carburetor, installed new spark plugs, set the valve lash and static ignition timing, and then added a power steering pump and alternator.

We went full quick and easy mode to fire up the engine and check for leaks, using the engine stand as our test bed.

We hooked up our two essential gauges – oil pressure and vacuum – and fired up the stovebolt six. And it ran like crap. Would not idle, vacuum below ten inches, ignition timing out in left field just to get it to run. We grabbed the aerosol can of carburetor cleaner for a squirt around the base of the Rochester and immediately the RPM increased. Bingo: a vacuum leak. No problem, easy fix, right?
We tried every combination of gasket, no gasket, Loctite 518 with gaskets, 518 without gaskets, thick gaskets, thin gaskets… no improvement. We used our flat metal welding table and 600 grit wet/dry paper on both sides of the insulator, and on the carburetor base until we were sure they were flat. Still no improvement.
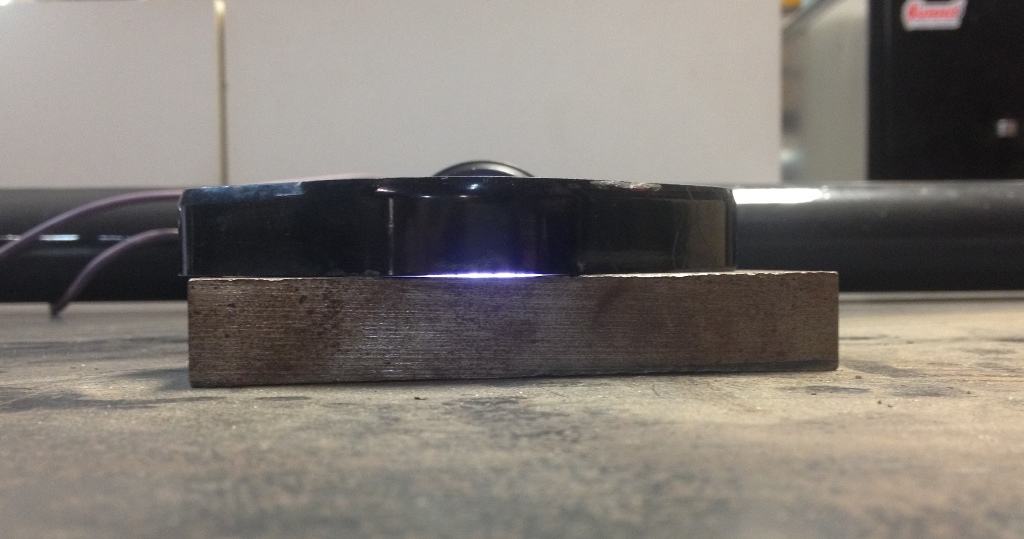
Finally getting smart, we brought out a flat chunk of metal that we keep in the toolbox and laid the insulator on it with a flashlight behind.


The insulator was clearly warped. We installed a new (nine dollar) insulator from Classic Parts of America, and, after doing a static ignition timing reset, put it all back together for the umpteenth time, and… eureka! The old six purred like a kitten and once again showed an excellent vacuum reading.
As you can see, Lance is excited… the engine is purring and he’s holding a Corona. We used a thick gasket between the insulator and manifold, but applied minimal torque on the bolts attaching the carburetor to the manifold. I may disassemble one more time and pitch the bottom gasket as I suspect it was a contributing factor with just two bolts holding down the Rochester 1 barrel.