The 1956 Chevrolet 3600 “Farm Truck” is the third truck we have built at the barn, and in all three we have used the Rebel Wire 9+3 kit. The first to get the Rebel Wire treatment was Lance’s 1948 3100. We approached that initial job with a little trepidation, but Jeremy White at Rebel Wire held our hands the whole way and answered all of our questions. Having worked with many vendors in our builds, I can testify that customer service just doesn’t get any better than what Jeremy delivers.

At $204.95, the 9+3 kit is a good bargain. In the Farm Truck, we have a full complement of electrical equipment, including the radio, electric wipers, heater, cigarette lighter, a couple after-market gauges, turn signals (an option in 1956) and emergency flashers, single wire alternator, and the electric overdrive unit. We’ve still never used the 3 extra circuits.

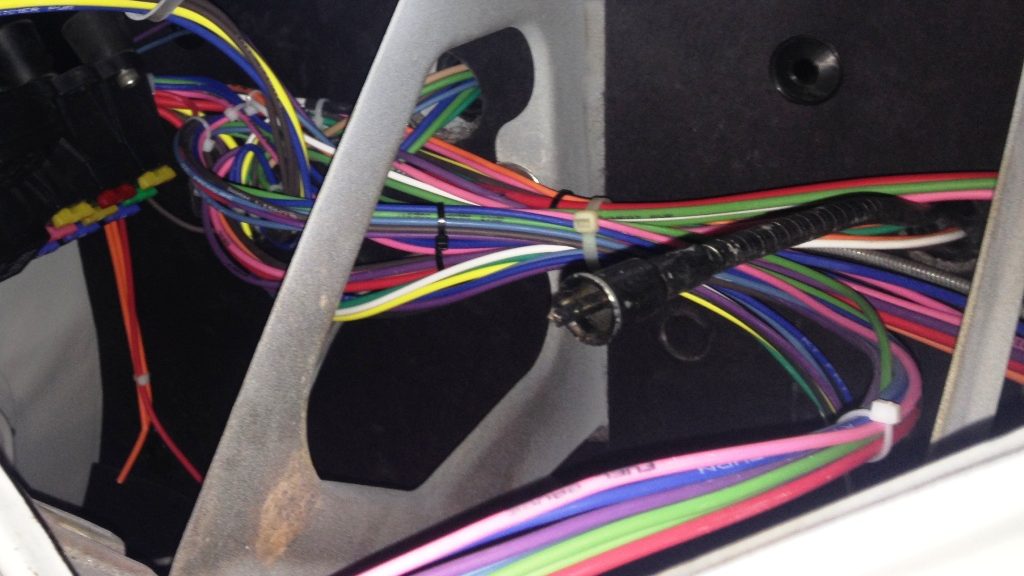
The wires are grouped for front, rear, dash, etc., and each individual wire is labeled every six inches or so along its entire length. The instructions are thorough and straightforward. This is about as foolproof as it gets.


We salvaged the original dash lights and a few inches of the old wires, then spliced them into blade connectors to hook up with the new wiring harness. Later, we added lights for the turn signal indicators.
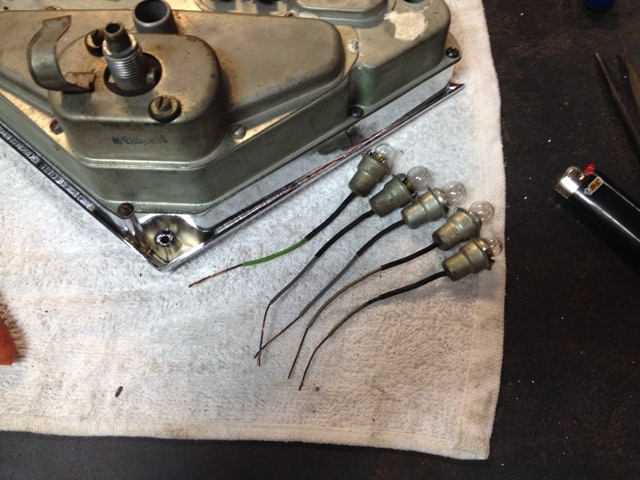
We used the Lineman’s Splice to connect old to new. Here’s a link to a YouTube video showing how to do it: NASA approved Linesman Splice

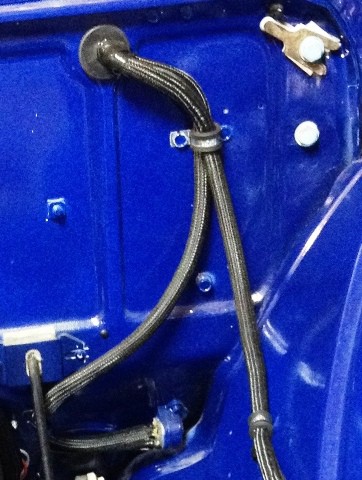
We didn’t go crazy trying to hide wires, just picked the appropriate holes in the firewall and then used split “braided” wire insulation. In the San Diego area, we found it in bulk at Marshall’s Hardware off of Miramar Road, and packaged (i.e., pricier) at the Off Road Warehouse in Escondido.
Since the mandate from Lewie was to make this truck just like he remembered it back in the 60’s when his dad bought it, we wanted to utilize the original gauges. It would have been easy, and tidy under the dash.
But I could imagine a cold, foggy night in San Diego after Lewie has been partying, external speakers blaring his tunes. Time to go home: get in truck, 300 watt radio playing, headlights on, heater on, wipers on, alternator trying to charge the battery, and then pushing in the lighter to smoke his fifth cigar of the evening. Poof.

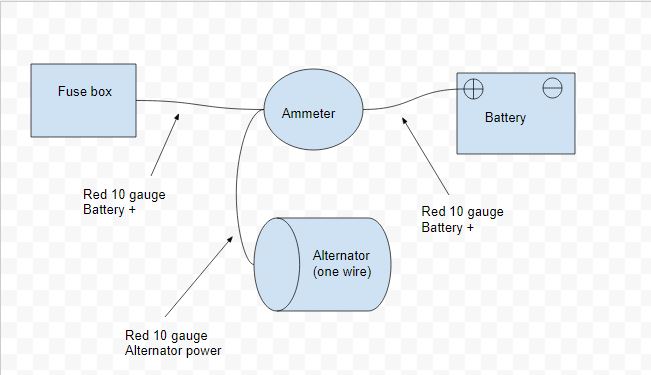
After discussing all this with Jeremy at Rebel Wire (and Lewie), we opted for an after market voltmeter, and an electric oil pressure gauge. It looks fine, but does add 7 or 8 wires under the dash, which isn’t quite as tidy. The oil line to the original gauge certainly wouldn’t have been ideal, either. So, a bit of a trade-off, but safety was foremost in our minds.
There’s nothing better in a restoration project than ripping out the nasty old, frayed wiring and replacing it with a new harness. Rebel Wire has really taken the difficulty out of the equation, with great pricing and invaluable customer service… big thanks to Jeremy and Rebel Wire from the crew in the Barn.
The Rebel 9+3 harness does not even have a DIAGRAM OF THEIR FUSE PANEL TO KNOW WHICH FUSE IS FOR WHICH CIRCUIT.
And I cannot email them to ask them because their captcha thing does not work.
Does anyone have any help on the fuse panel ?
Thank you,, I am frustrated with REBEL harness and lack of directions or diagram of fuse panel .
Kenny, i believe my kit came with a small sheet of stick on labels showing each fuse purpose. I will head to the shop today and retrieve it. Also, you can email Jeremy White directly (I will email his address to you), although he likely won’t respond until he sees it Monday morning. He is outstanding when it comes to helping out customers, in my experience. Re lack of directions, my kit came with complete instructions and Jeremy helped out whenever anything was unclear or not working as I expected.
p.s.: as I installed the kit on three different old Chevy trucks, 99 percent of the problems were resolved by fixing ground connections.
Good luck with your project.